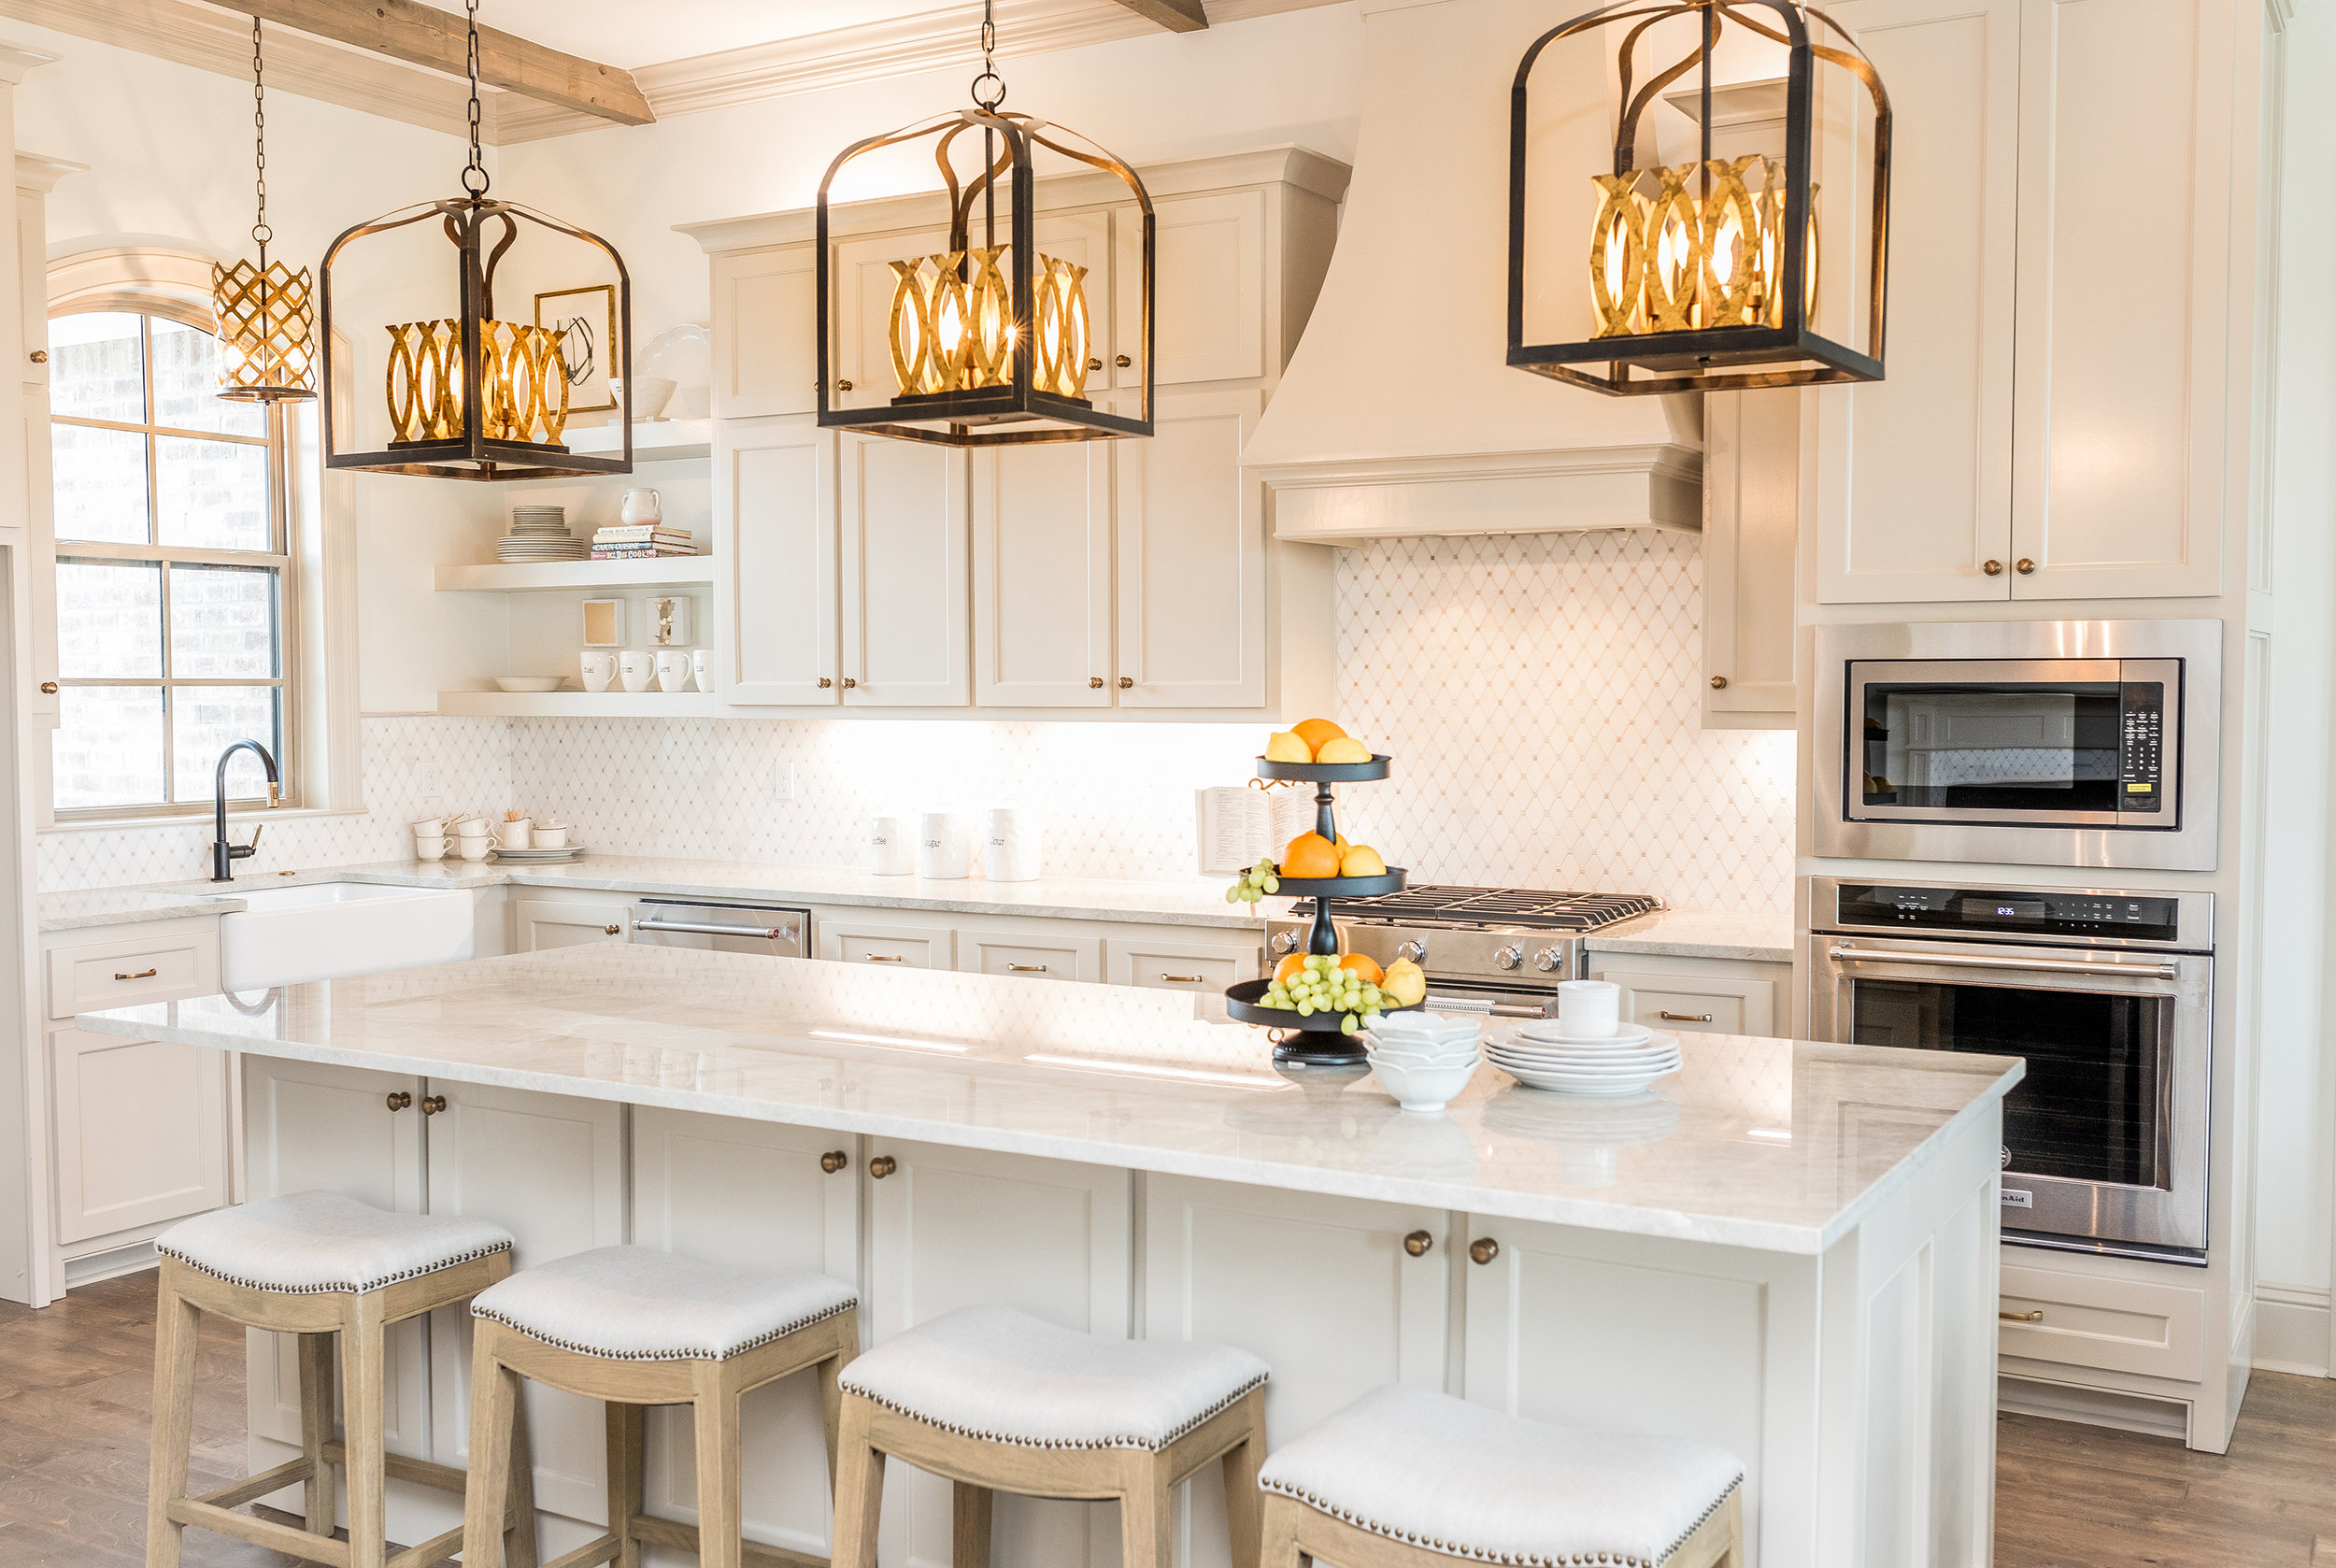
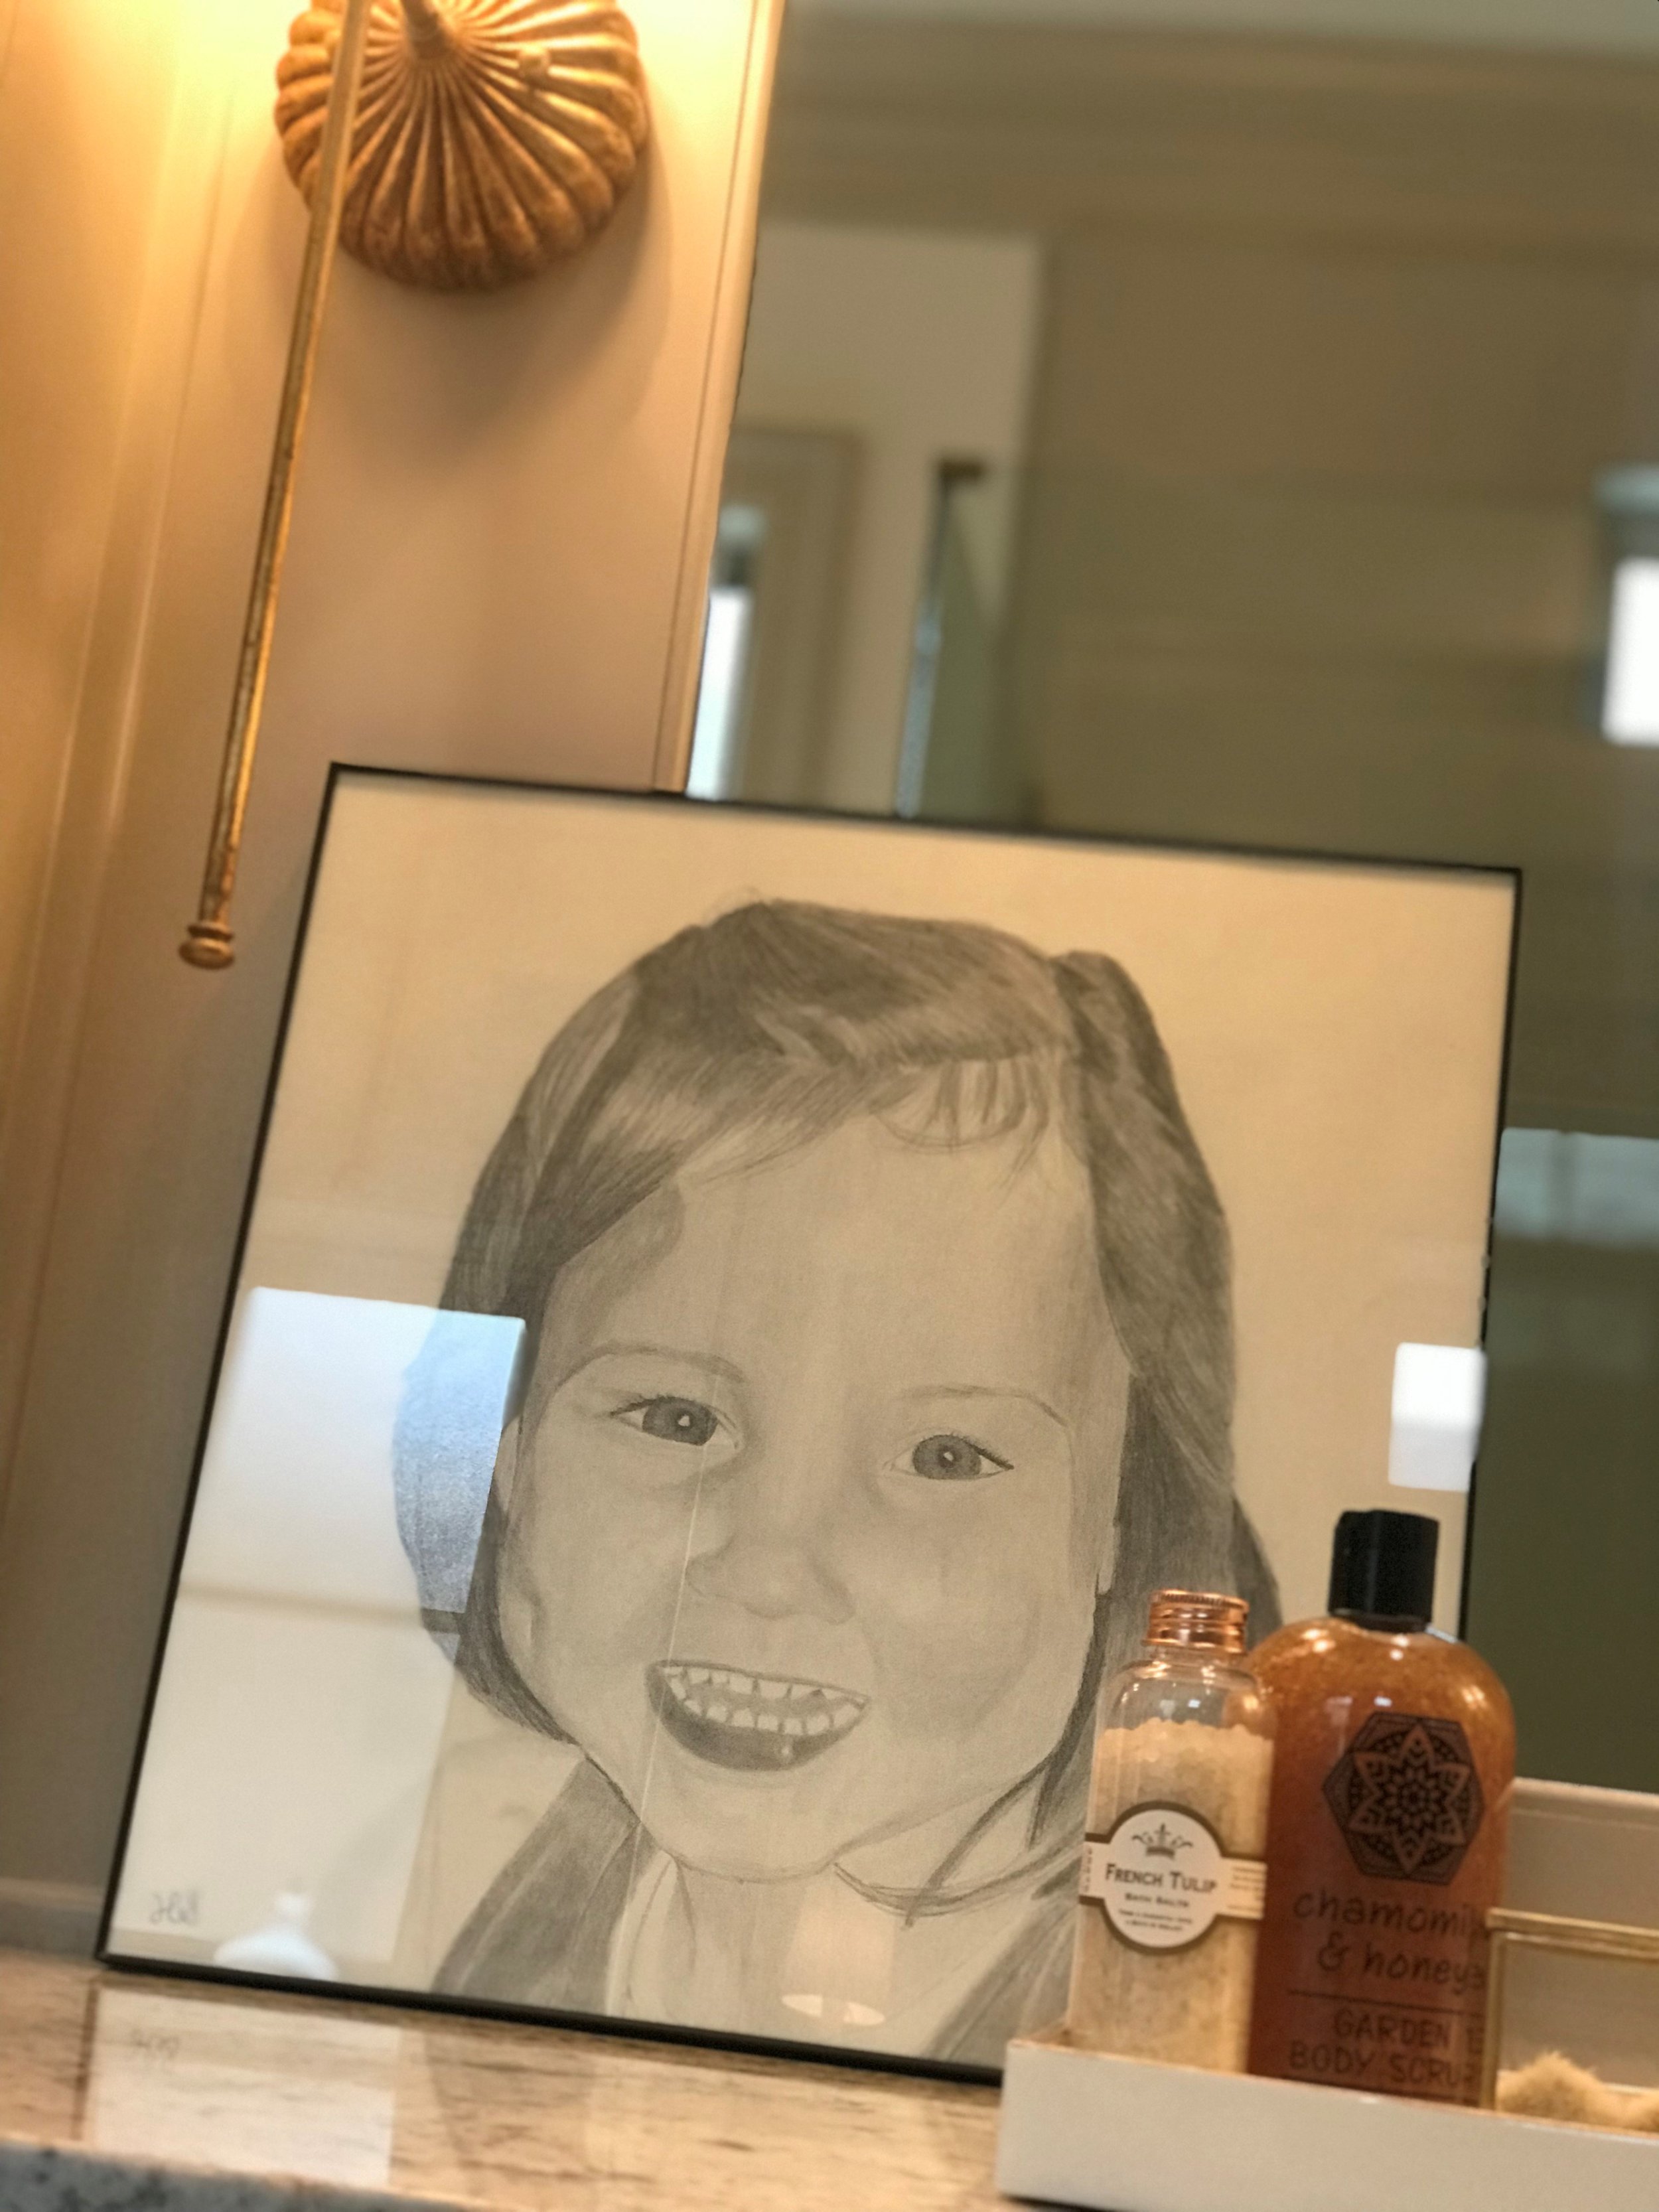
Best Bathrooms EVER!

I thought it would be interesting and useful to write a post on the bathrooms of Moondance… especially since they’re pretty BA! Being that 100 Moondance is a luxury spec home, a lot of detail was paid to each of the three bathrooms. Jamie (Eagle Nest Custom Homes) and I paid lots of attention to the design in an attempt to make each of these bathrooms special and unique.

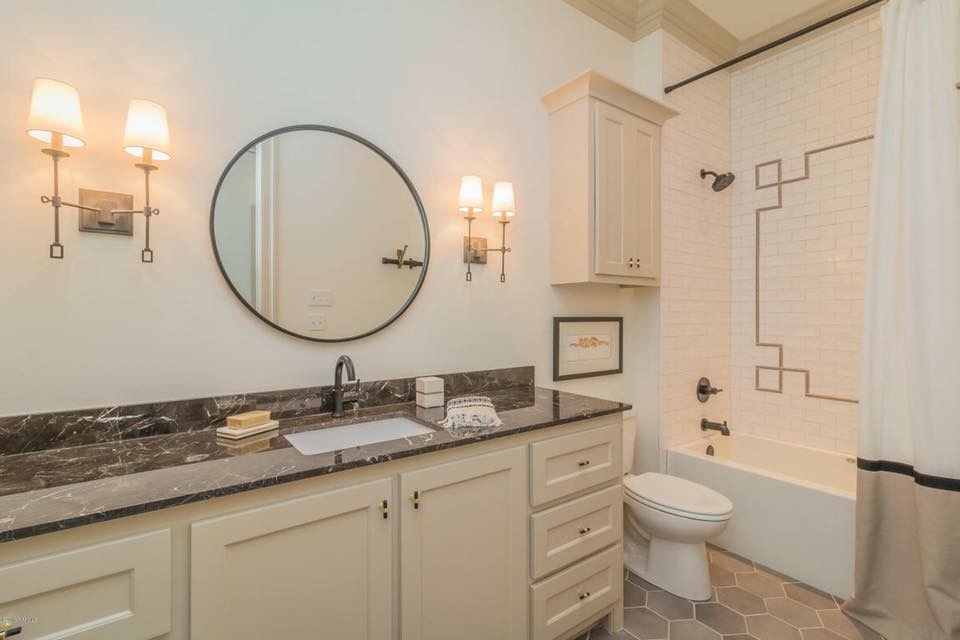
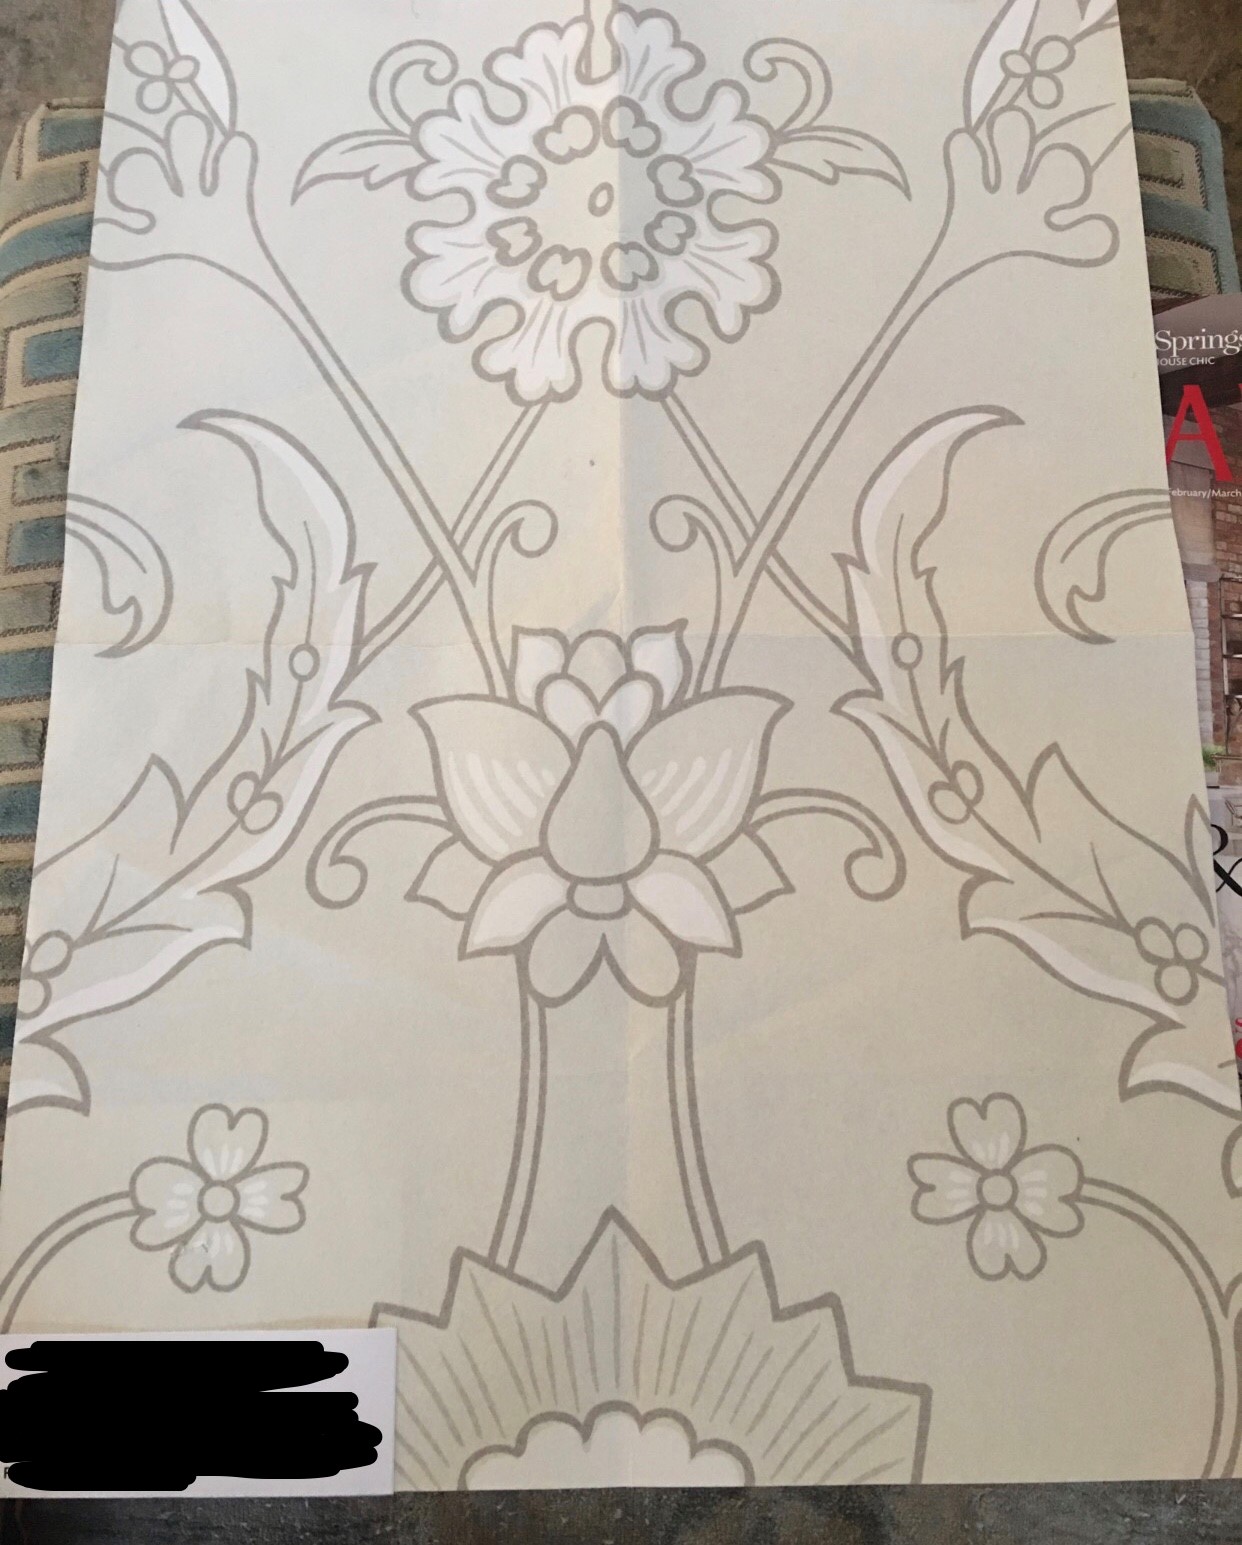
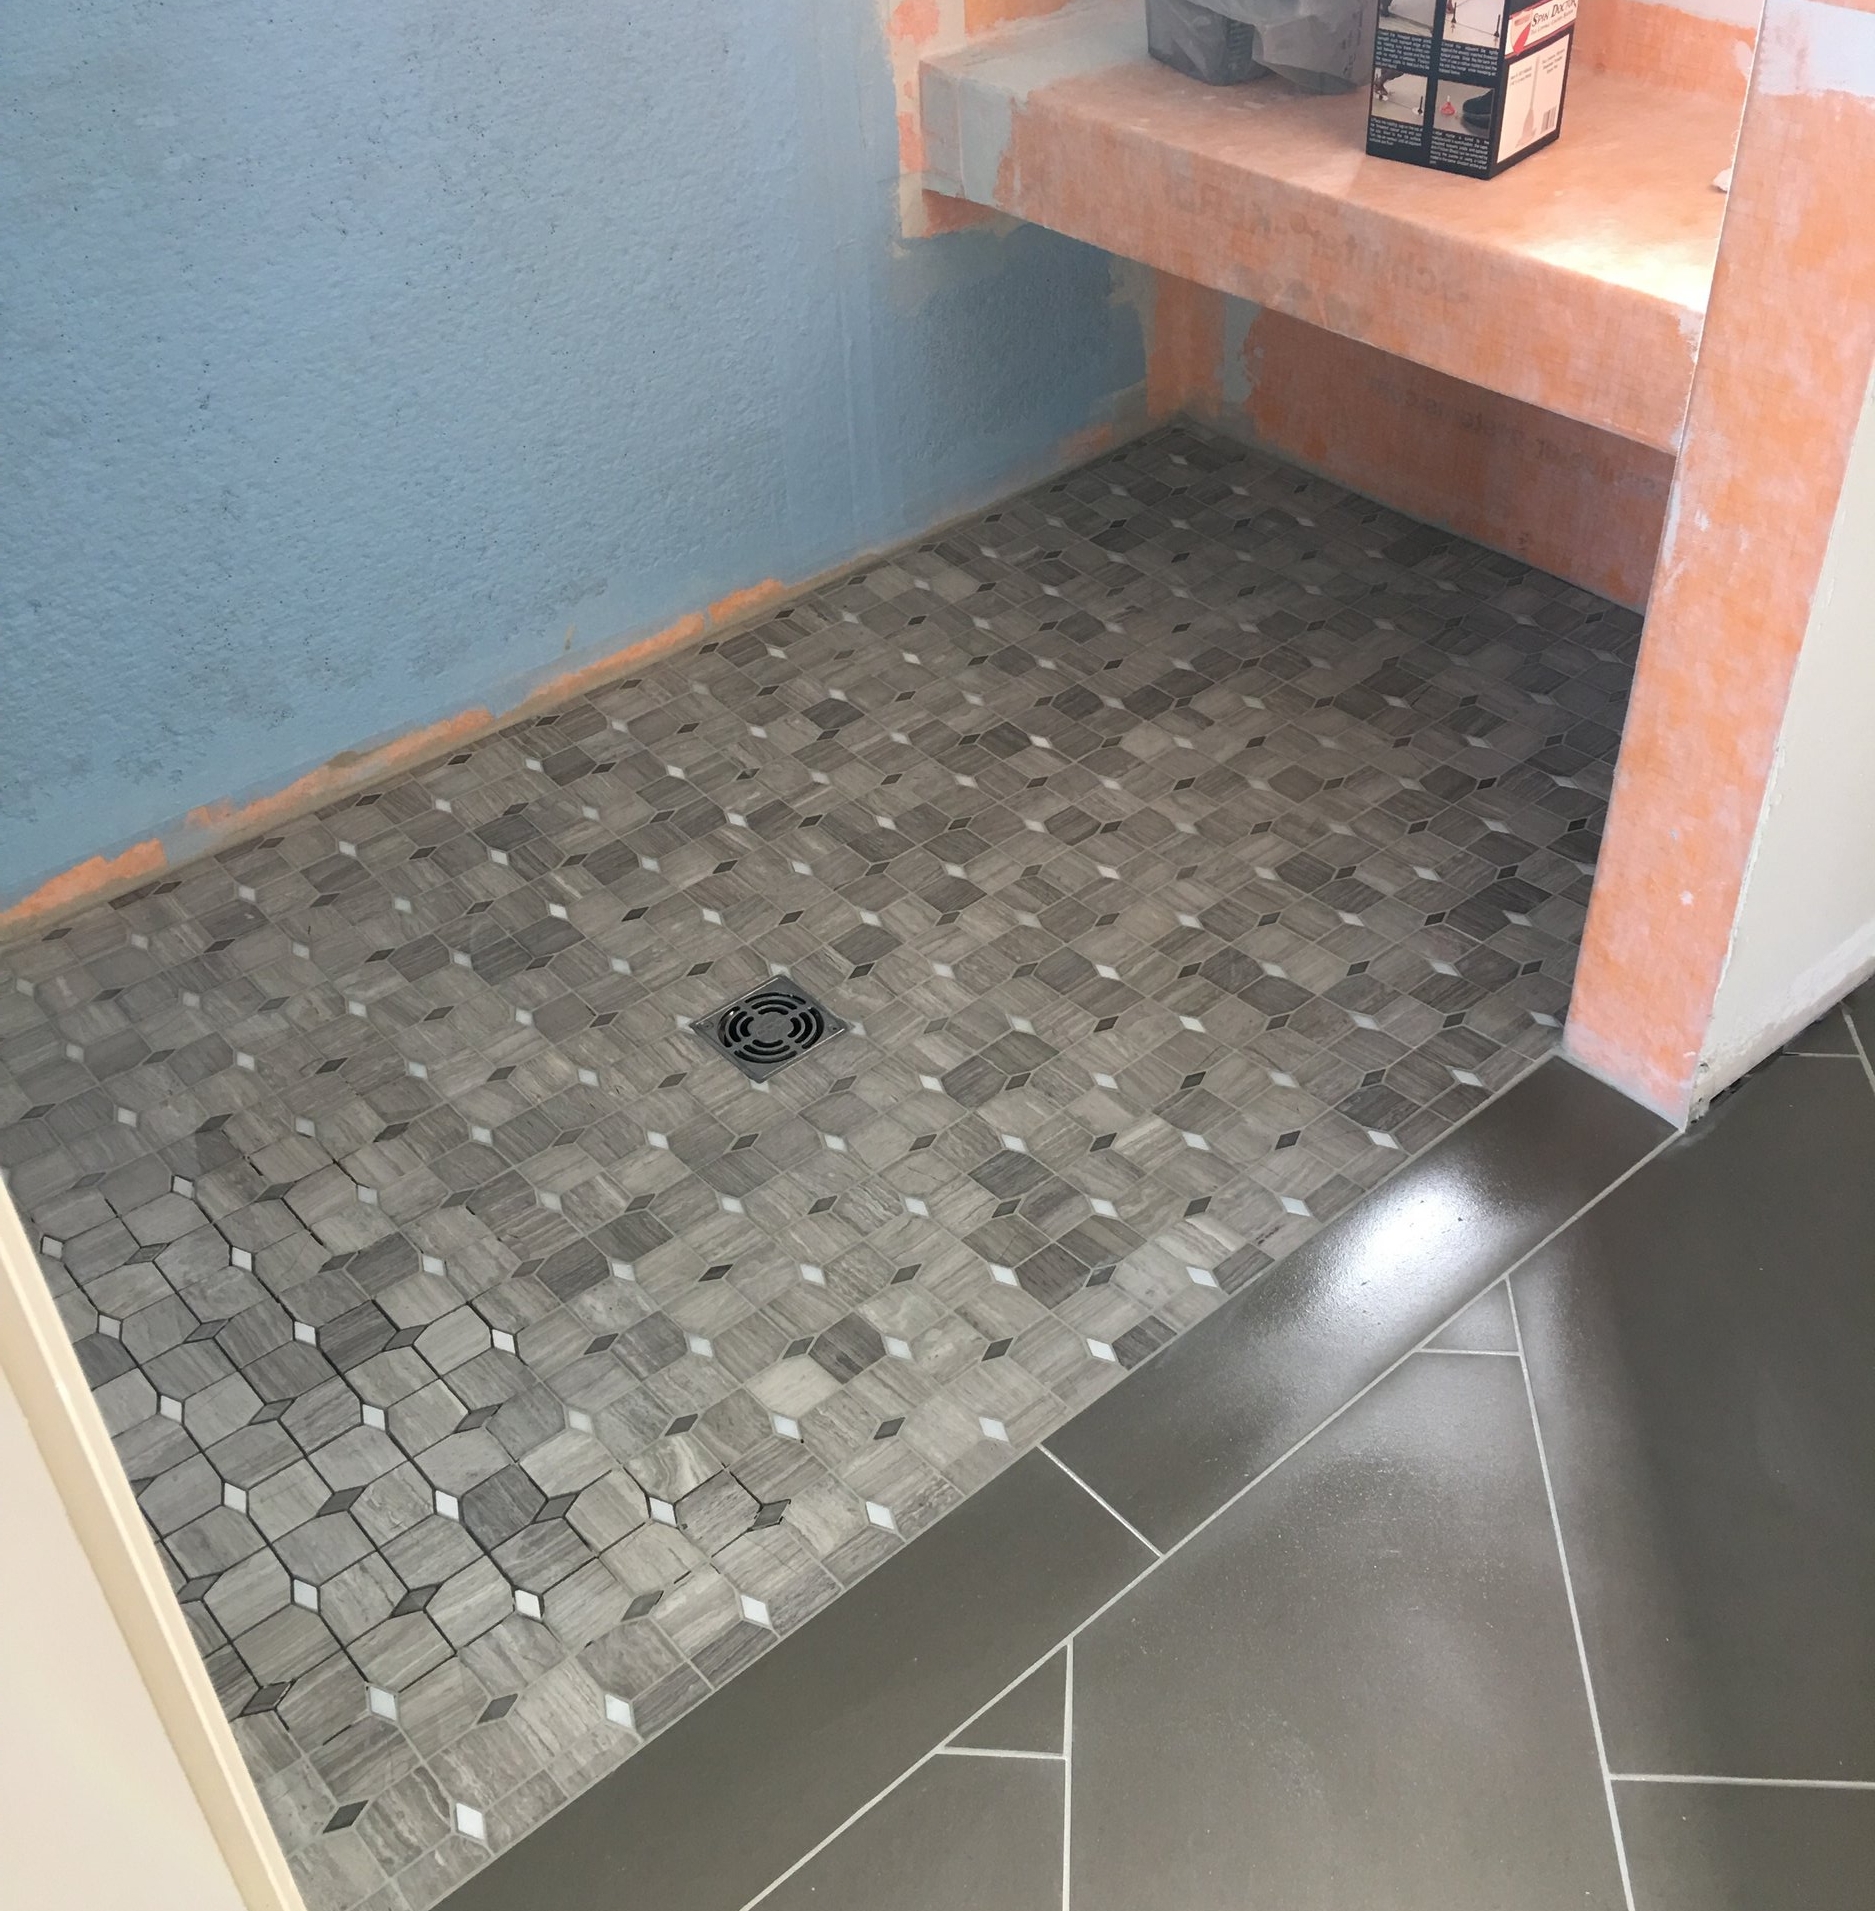
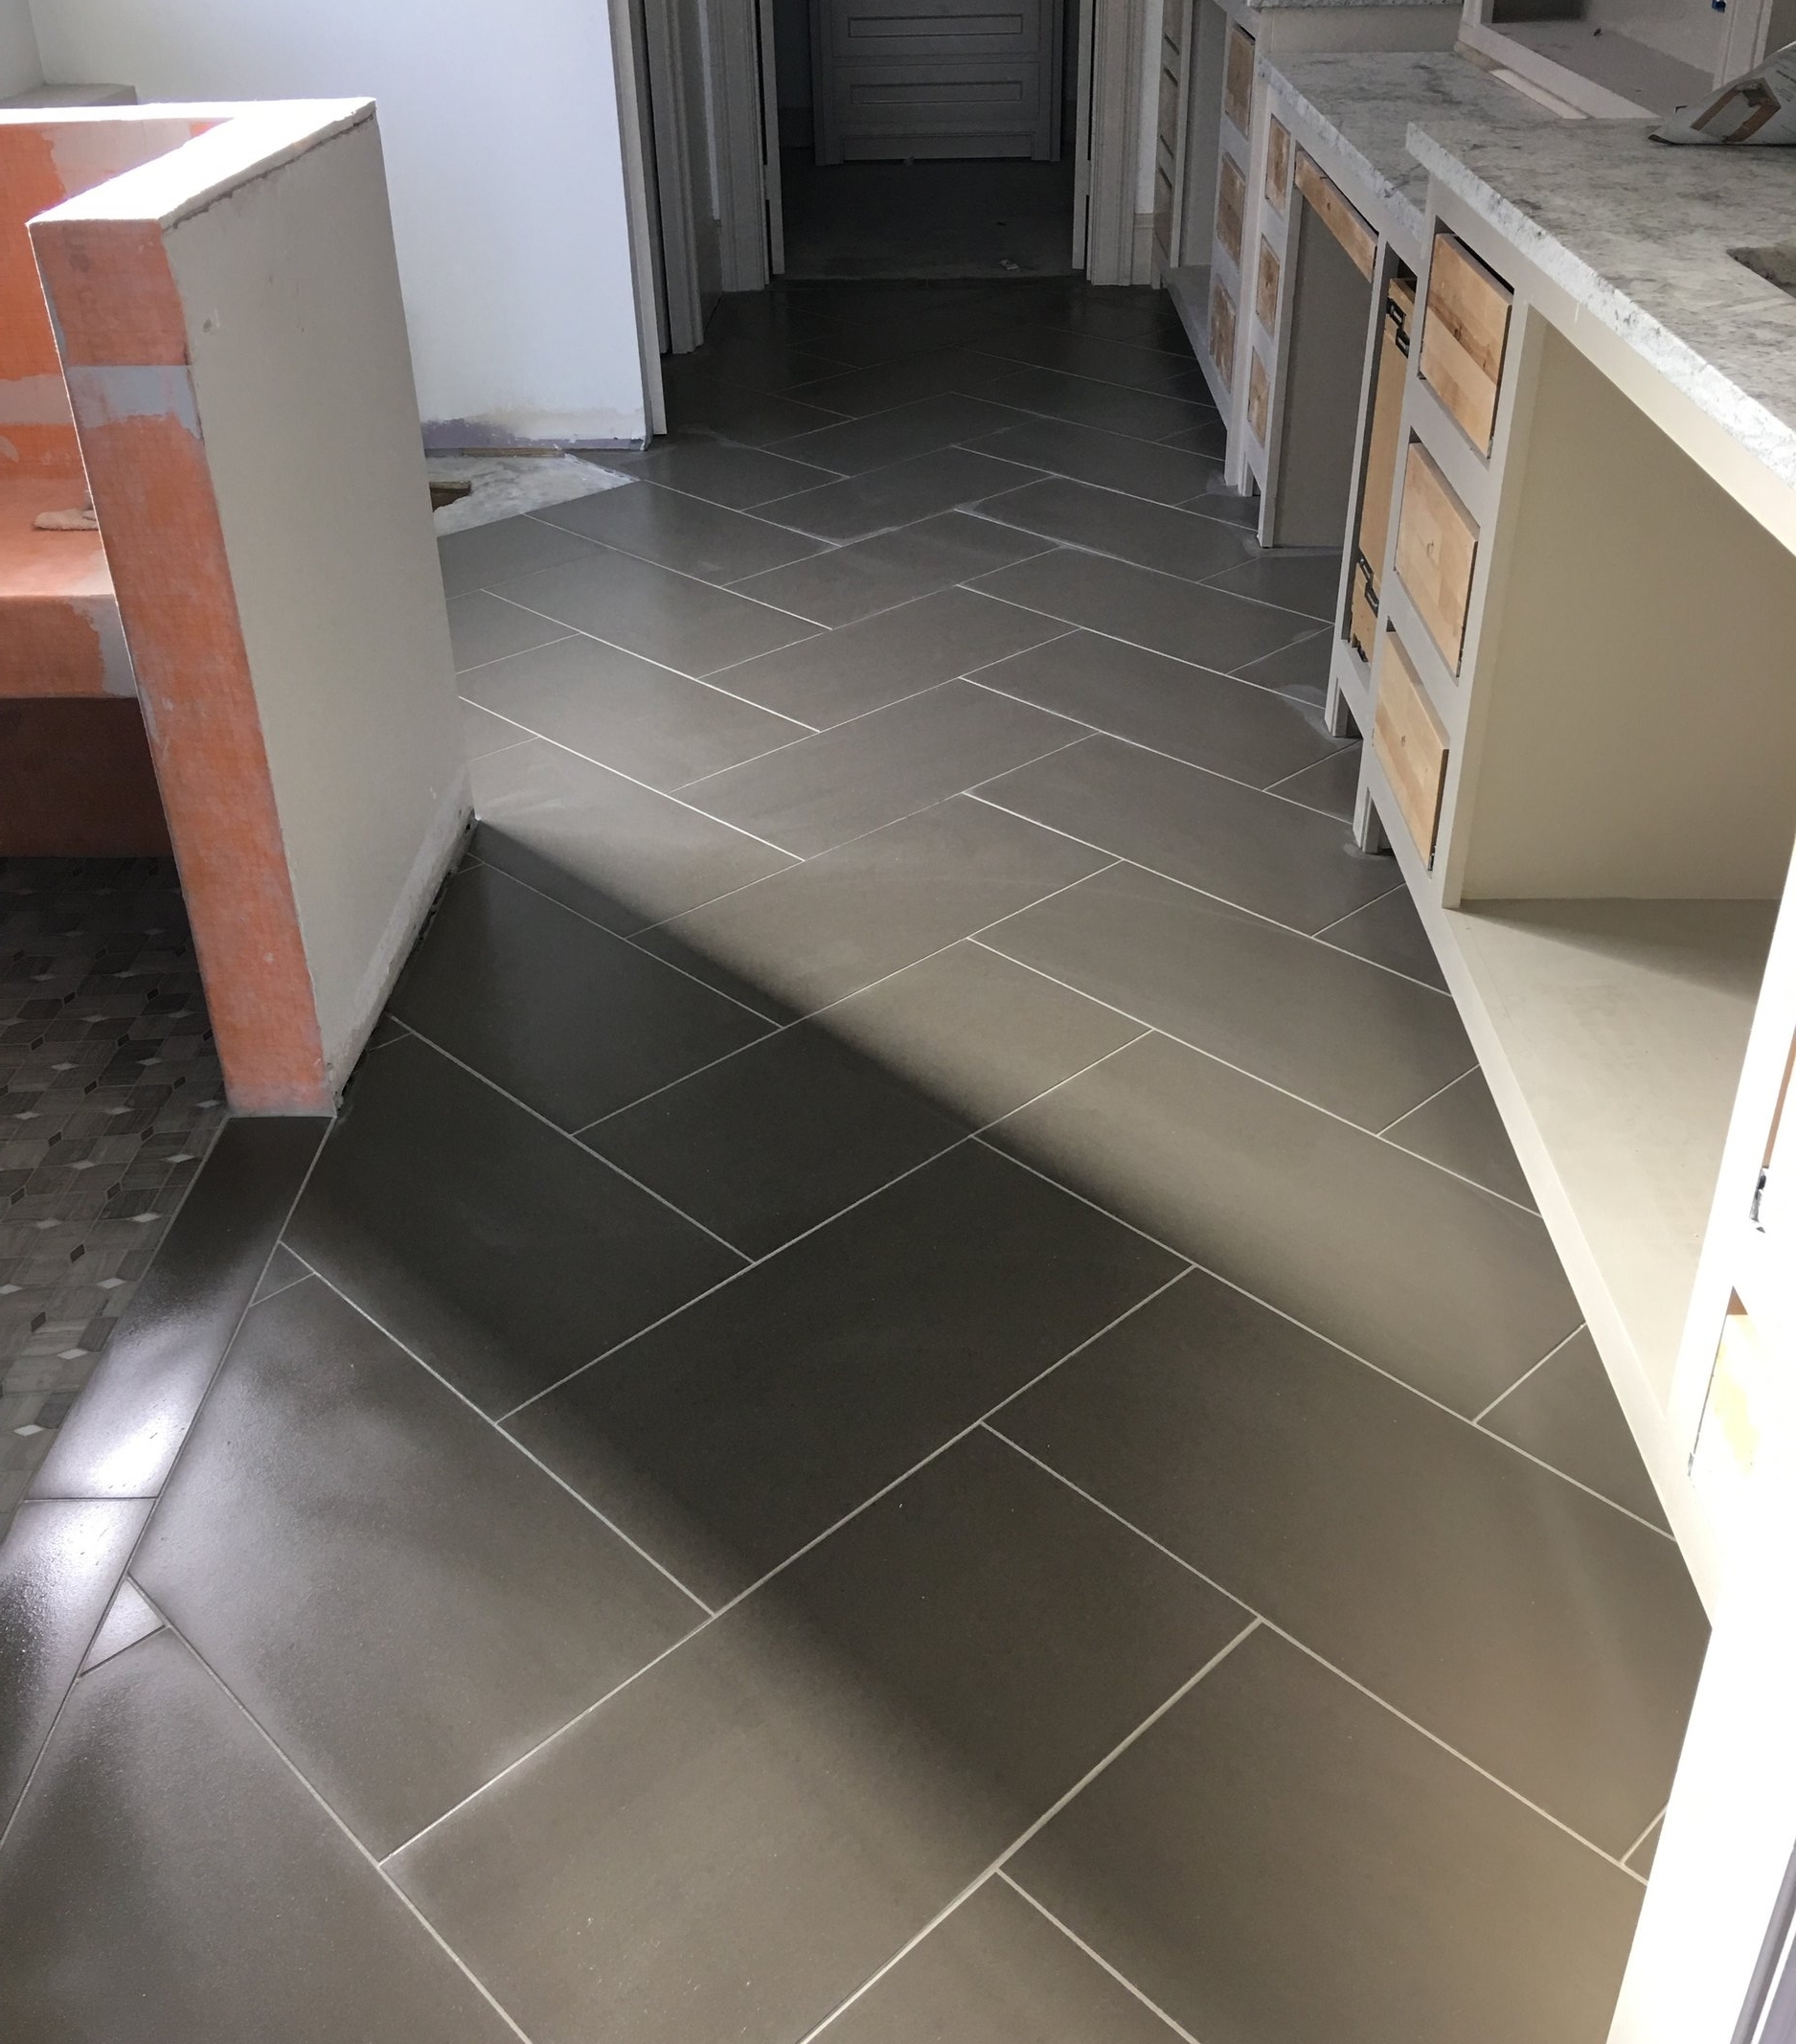
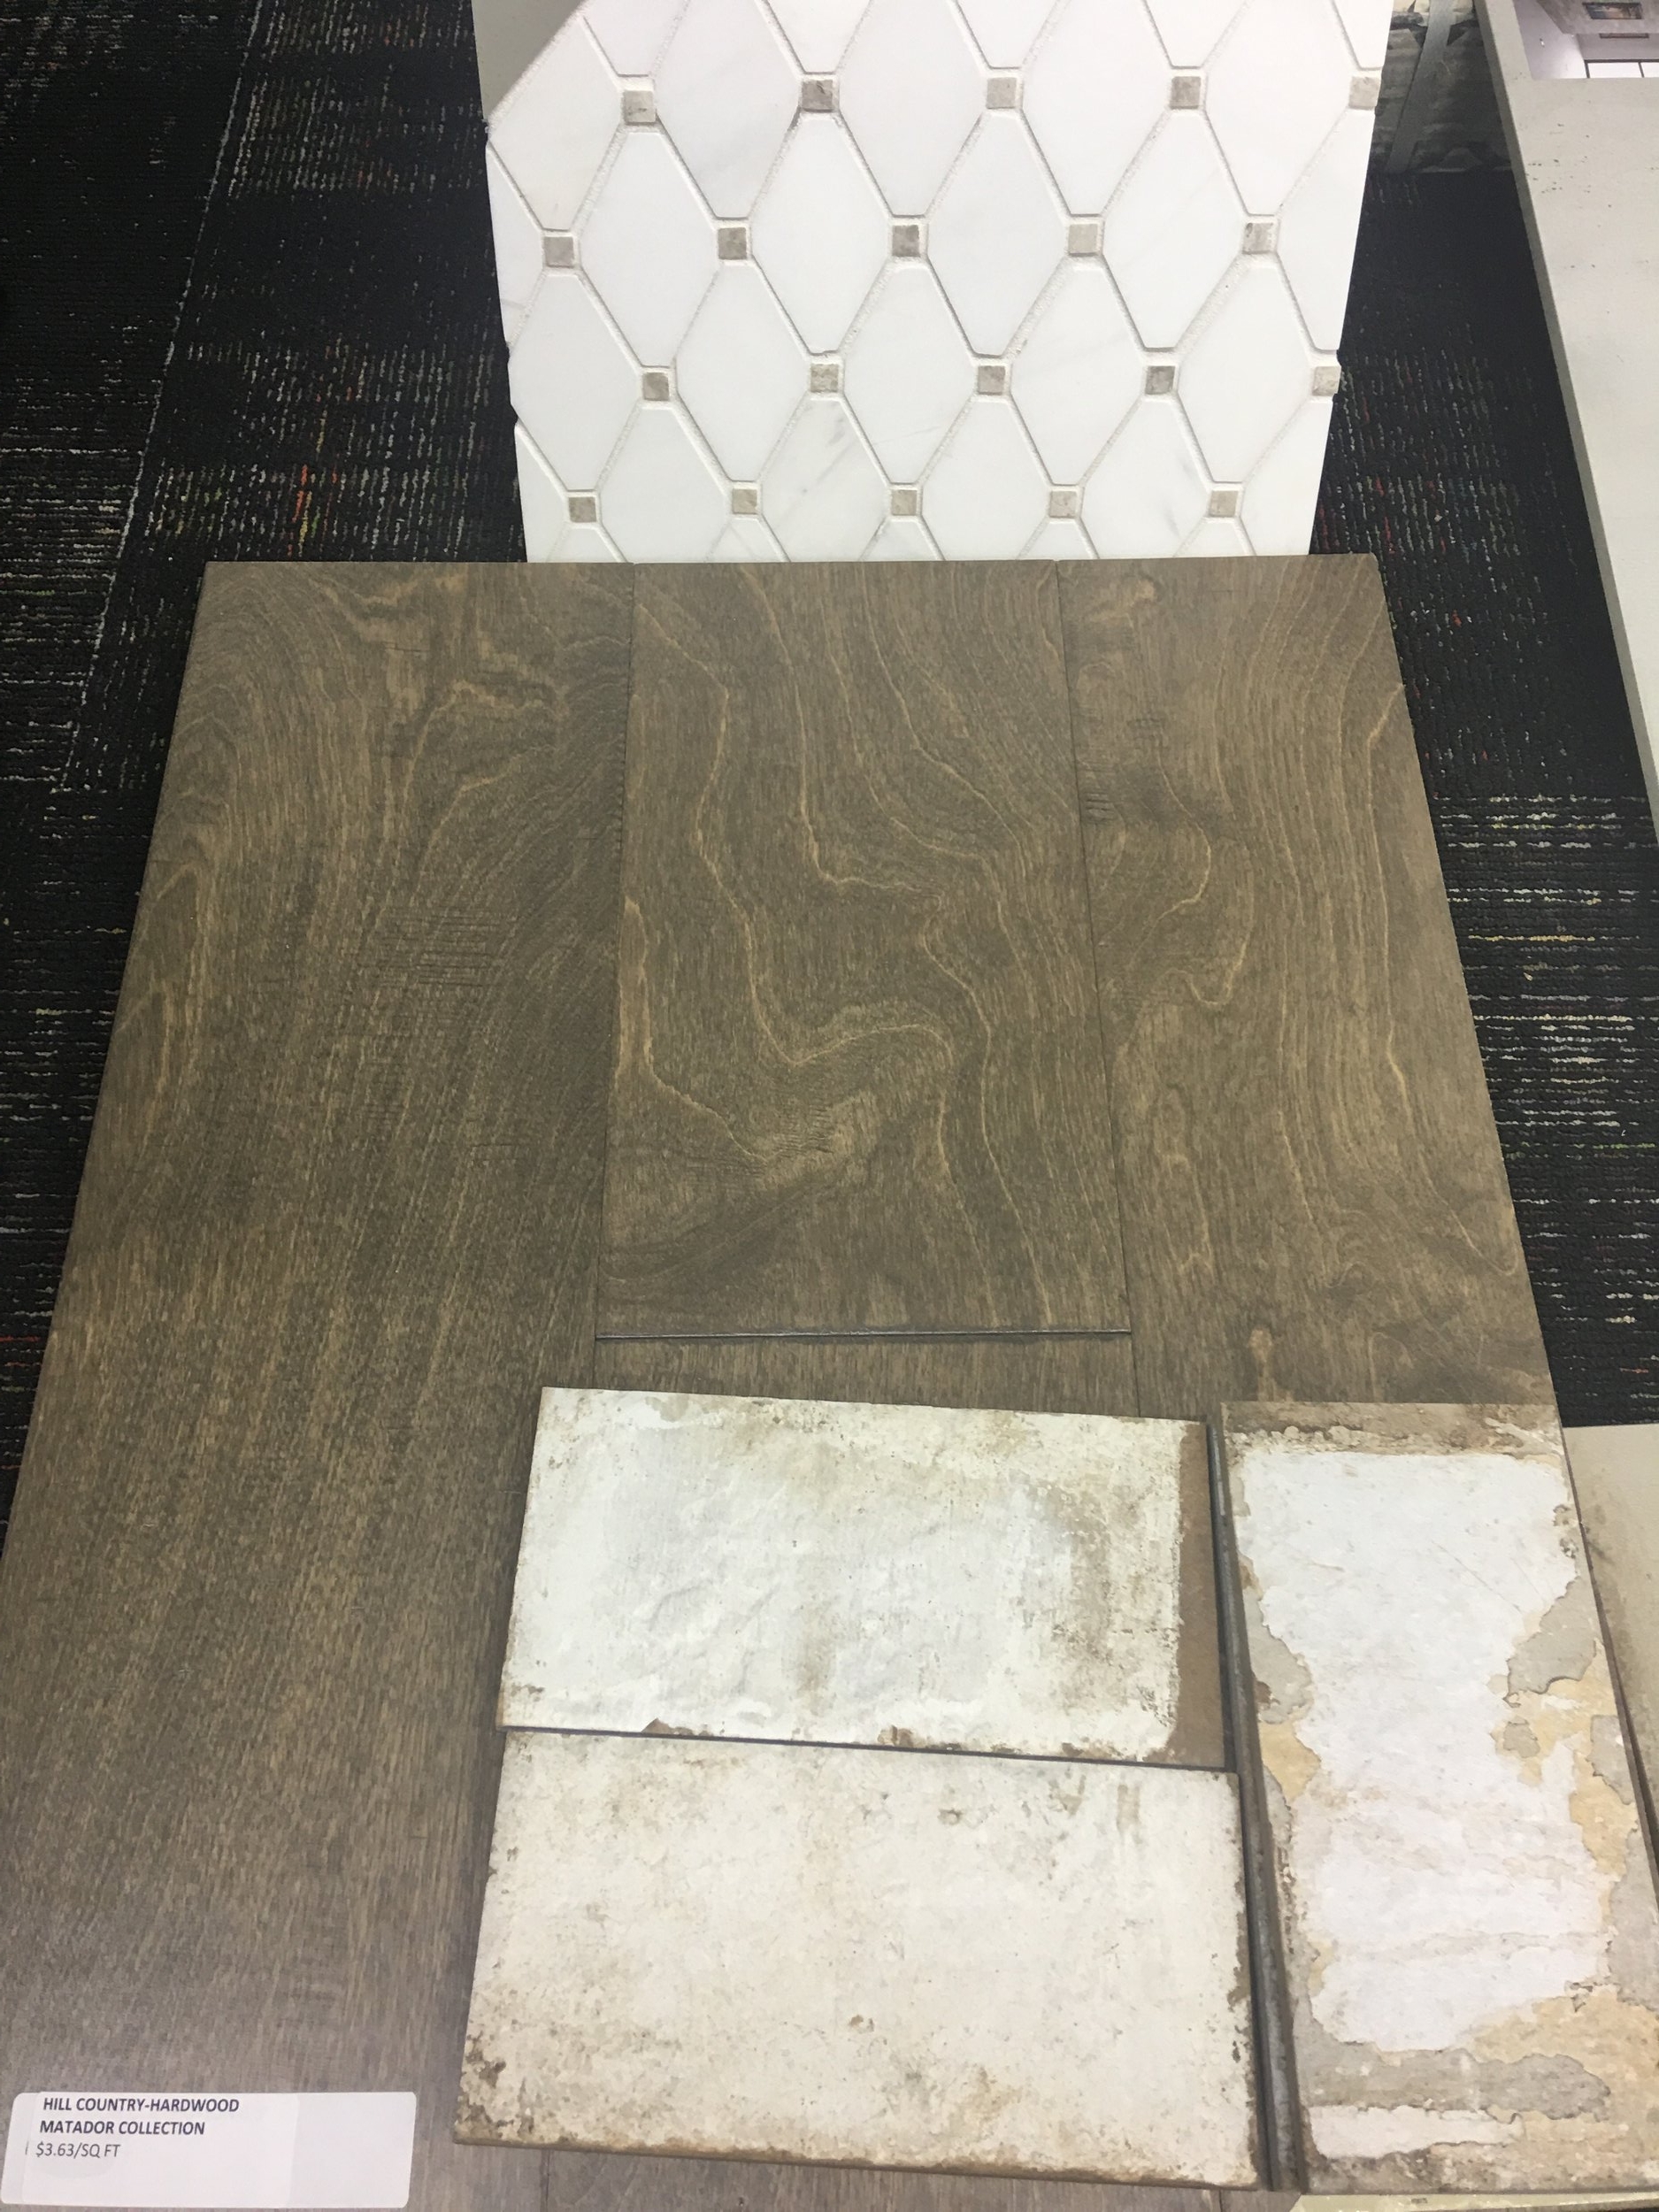
Let’s start with the front bathroom… Patterned tiles continue to be popular in 2019. We selected a soft, subtle tile for the floor. The cream, gray, and taupe colors add interest while still allowing the room to feel light and clean. In designing the cabinet, we constructed a floating vanity for two reasons 1) it allows more of the beautiful tile floor to be visible and 2) it allows for easier floor cleaning!

1.jpg

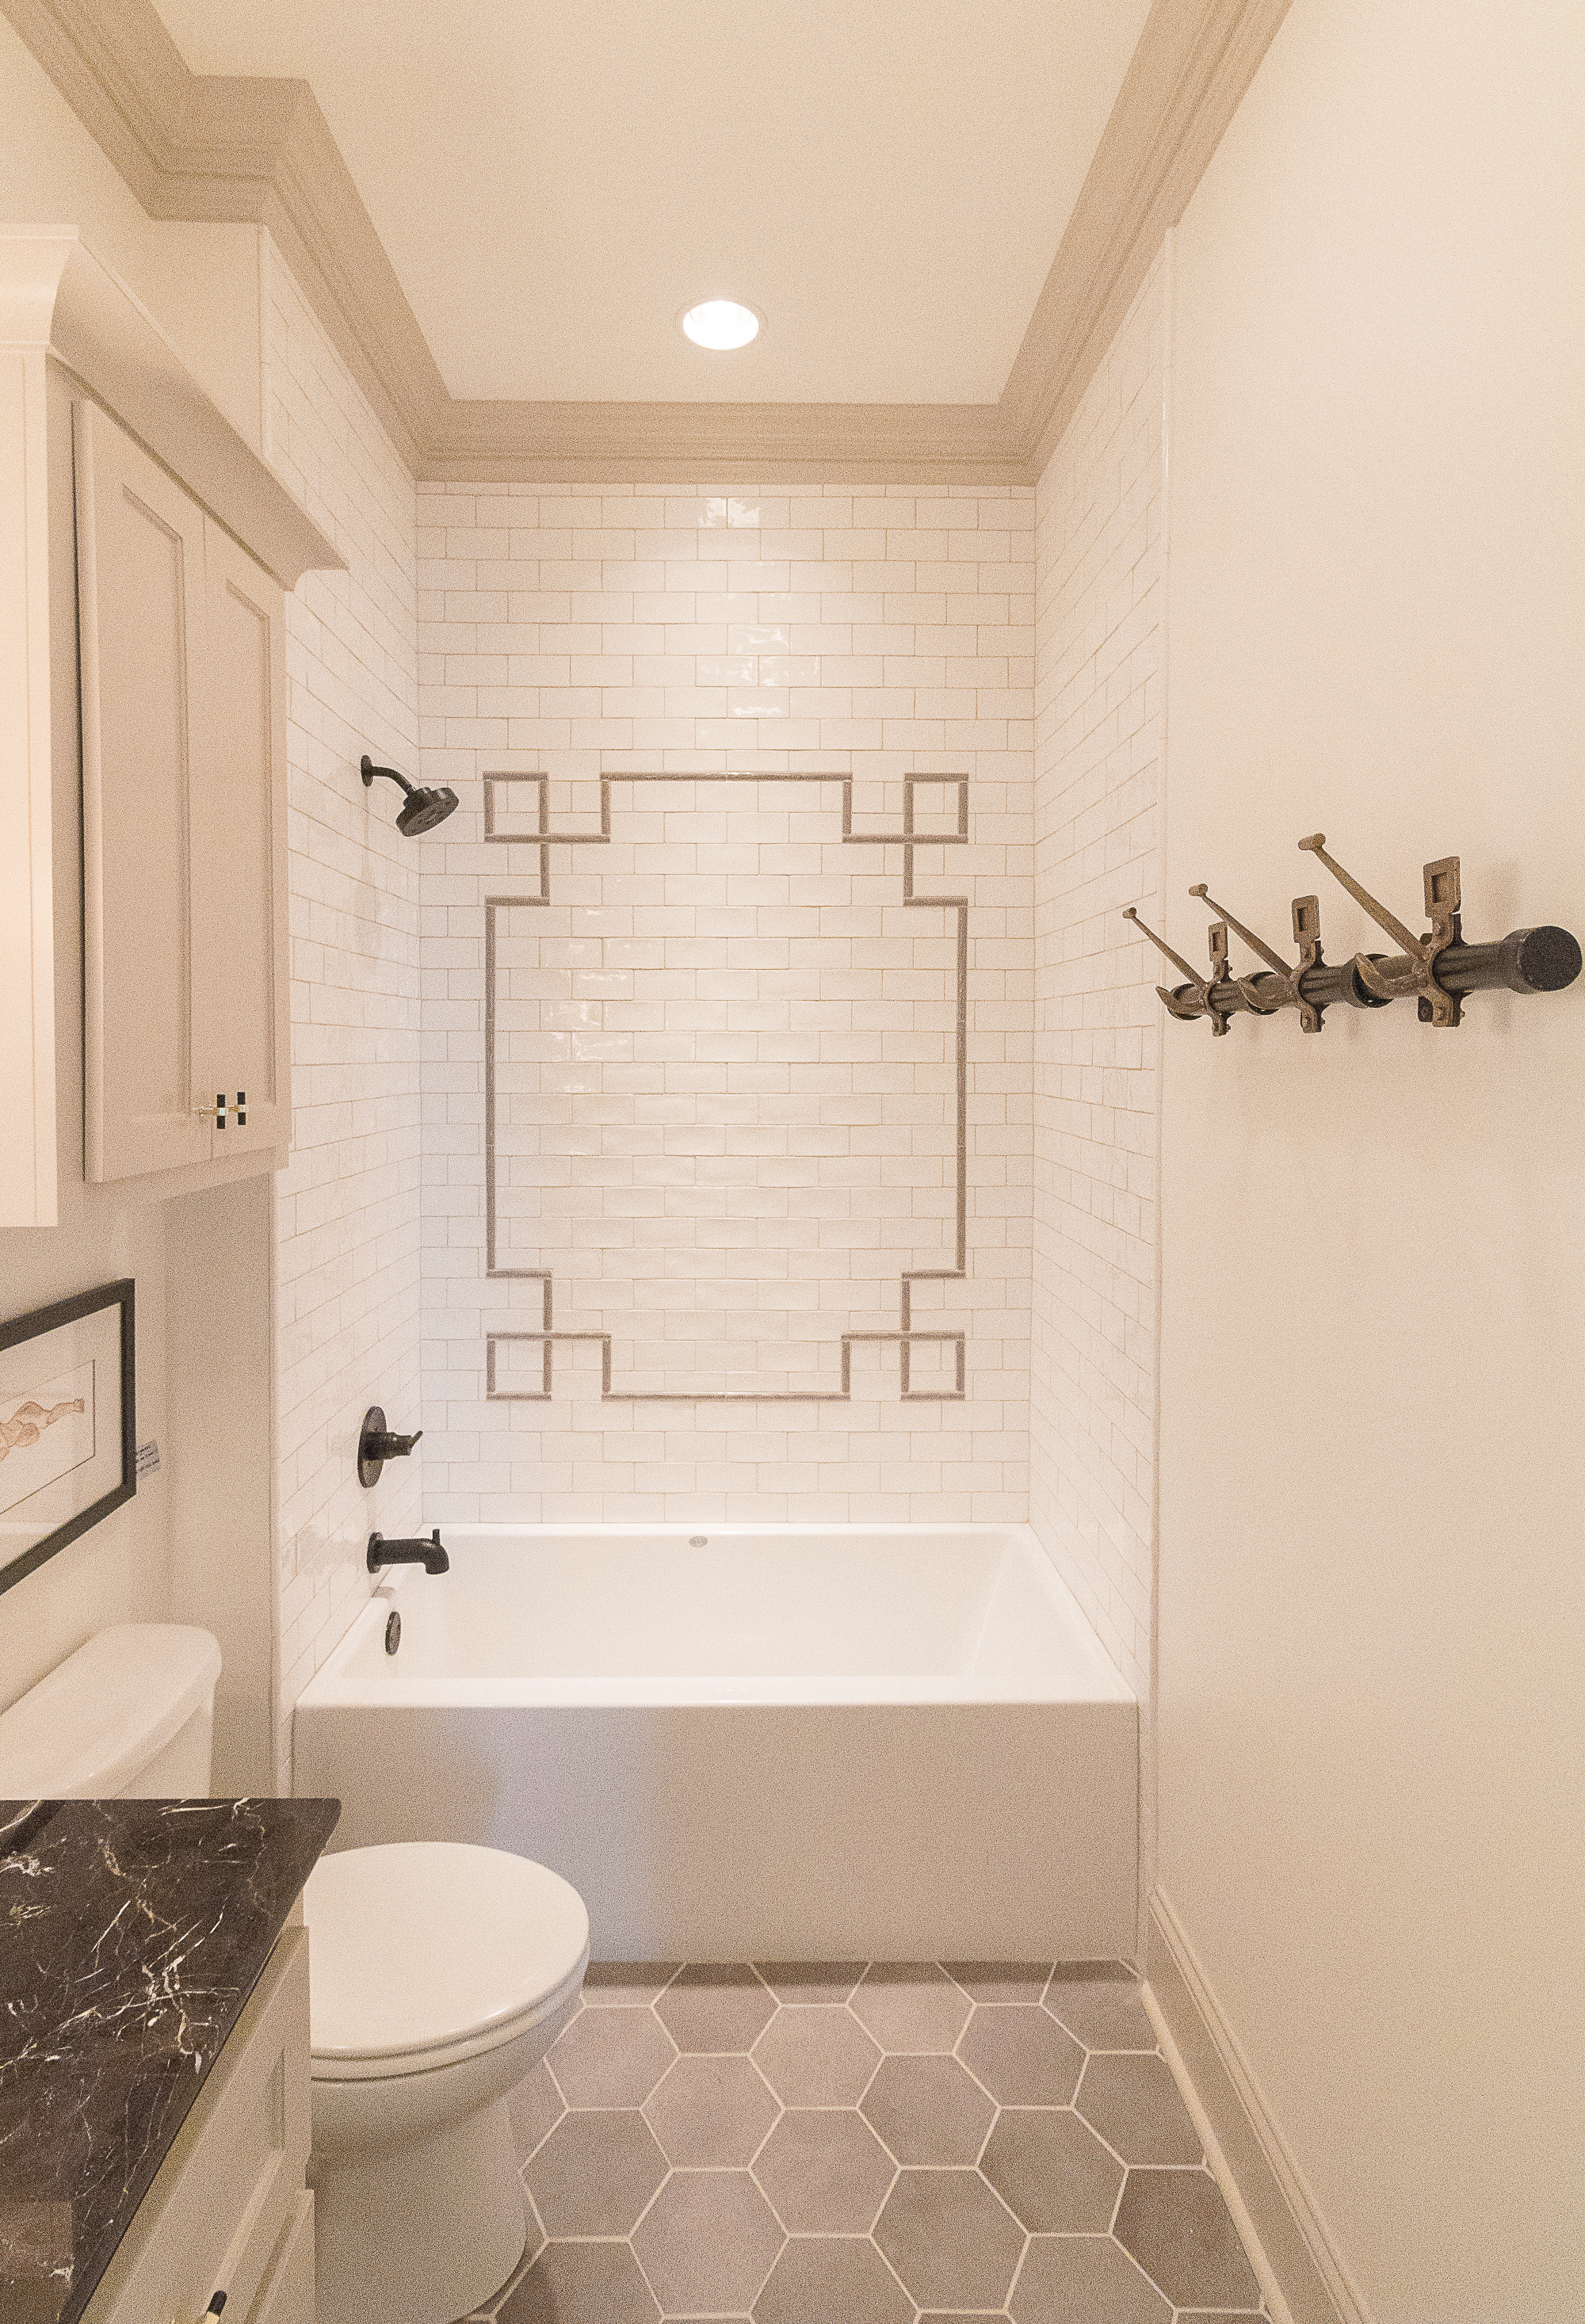
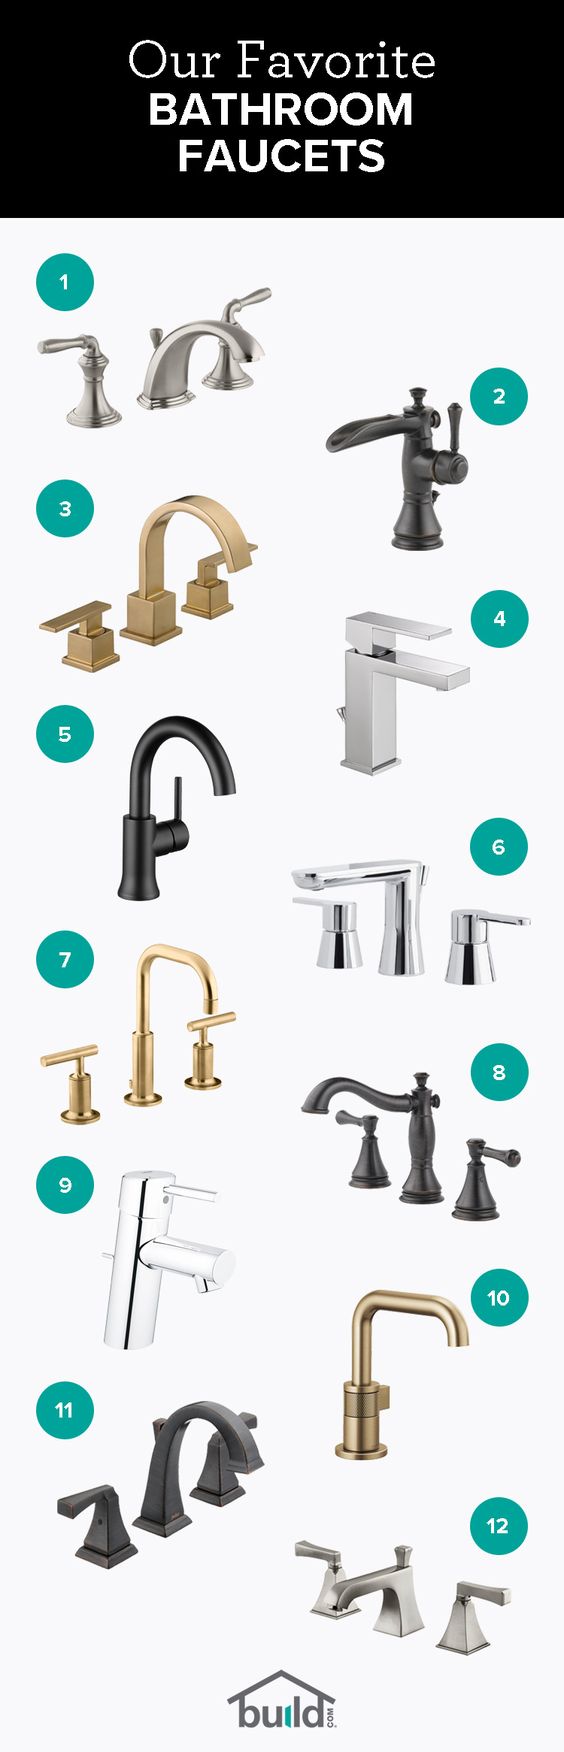
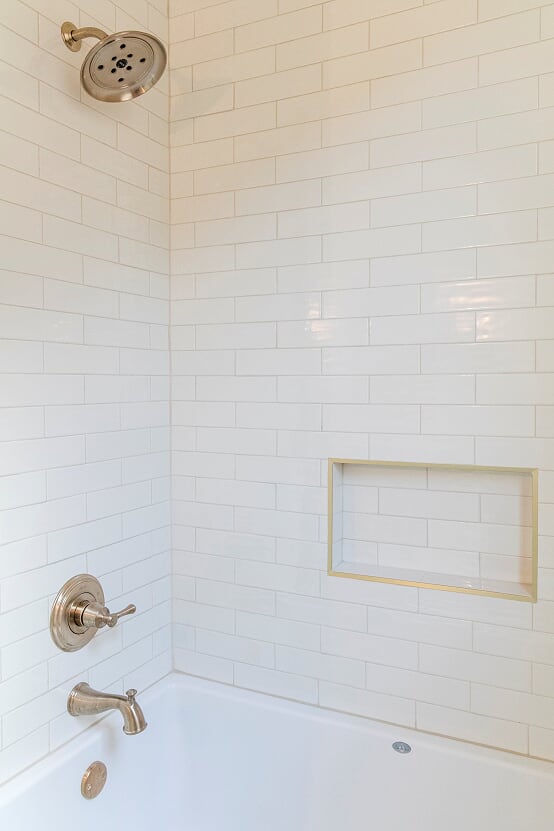
A simple, white subway tile was used for the tub/shower surround. We made this decision so it doesn’t detract from the stylish floor. You will notice that brushed gold faucets and schluter metal capping were used to compliment the finishes!

2.jpg

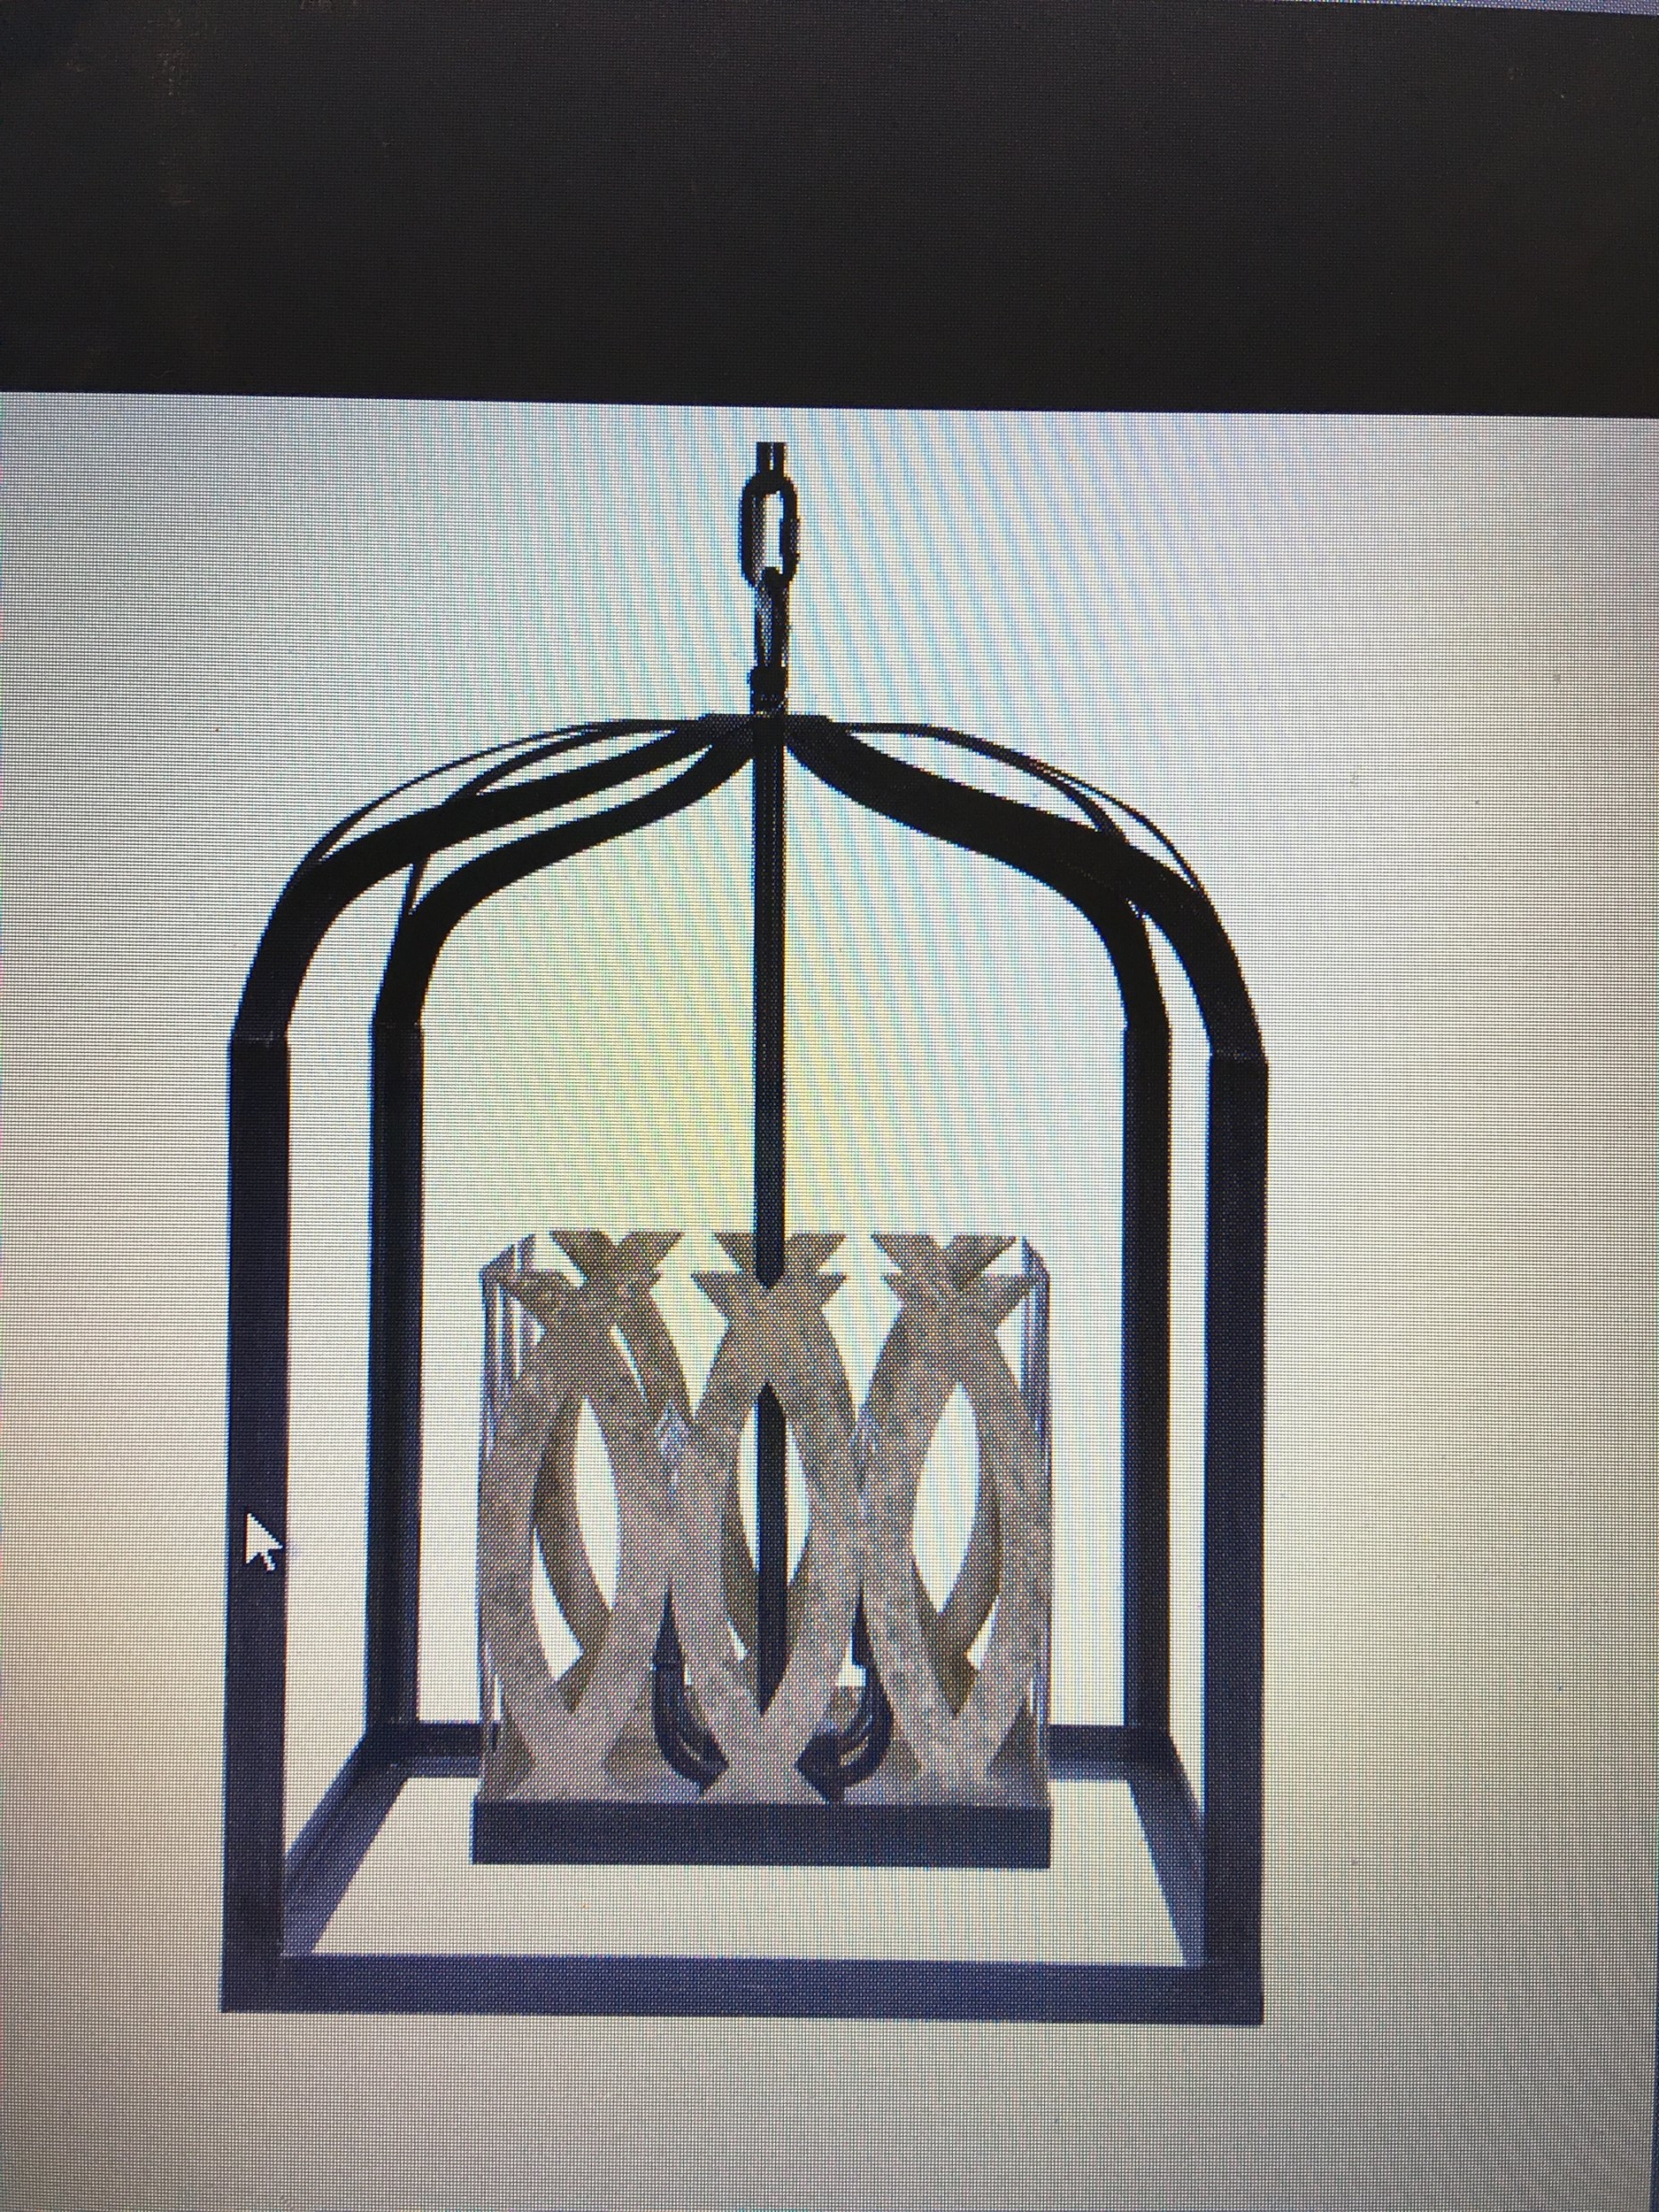
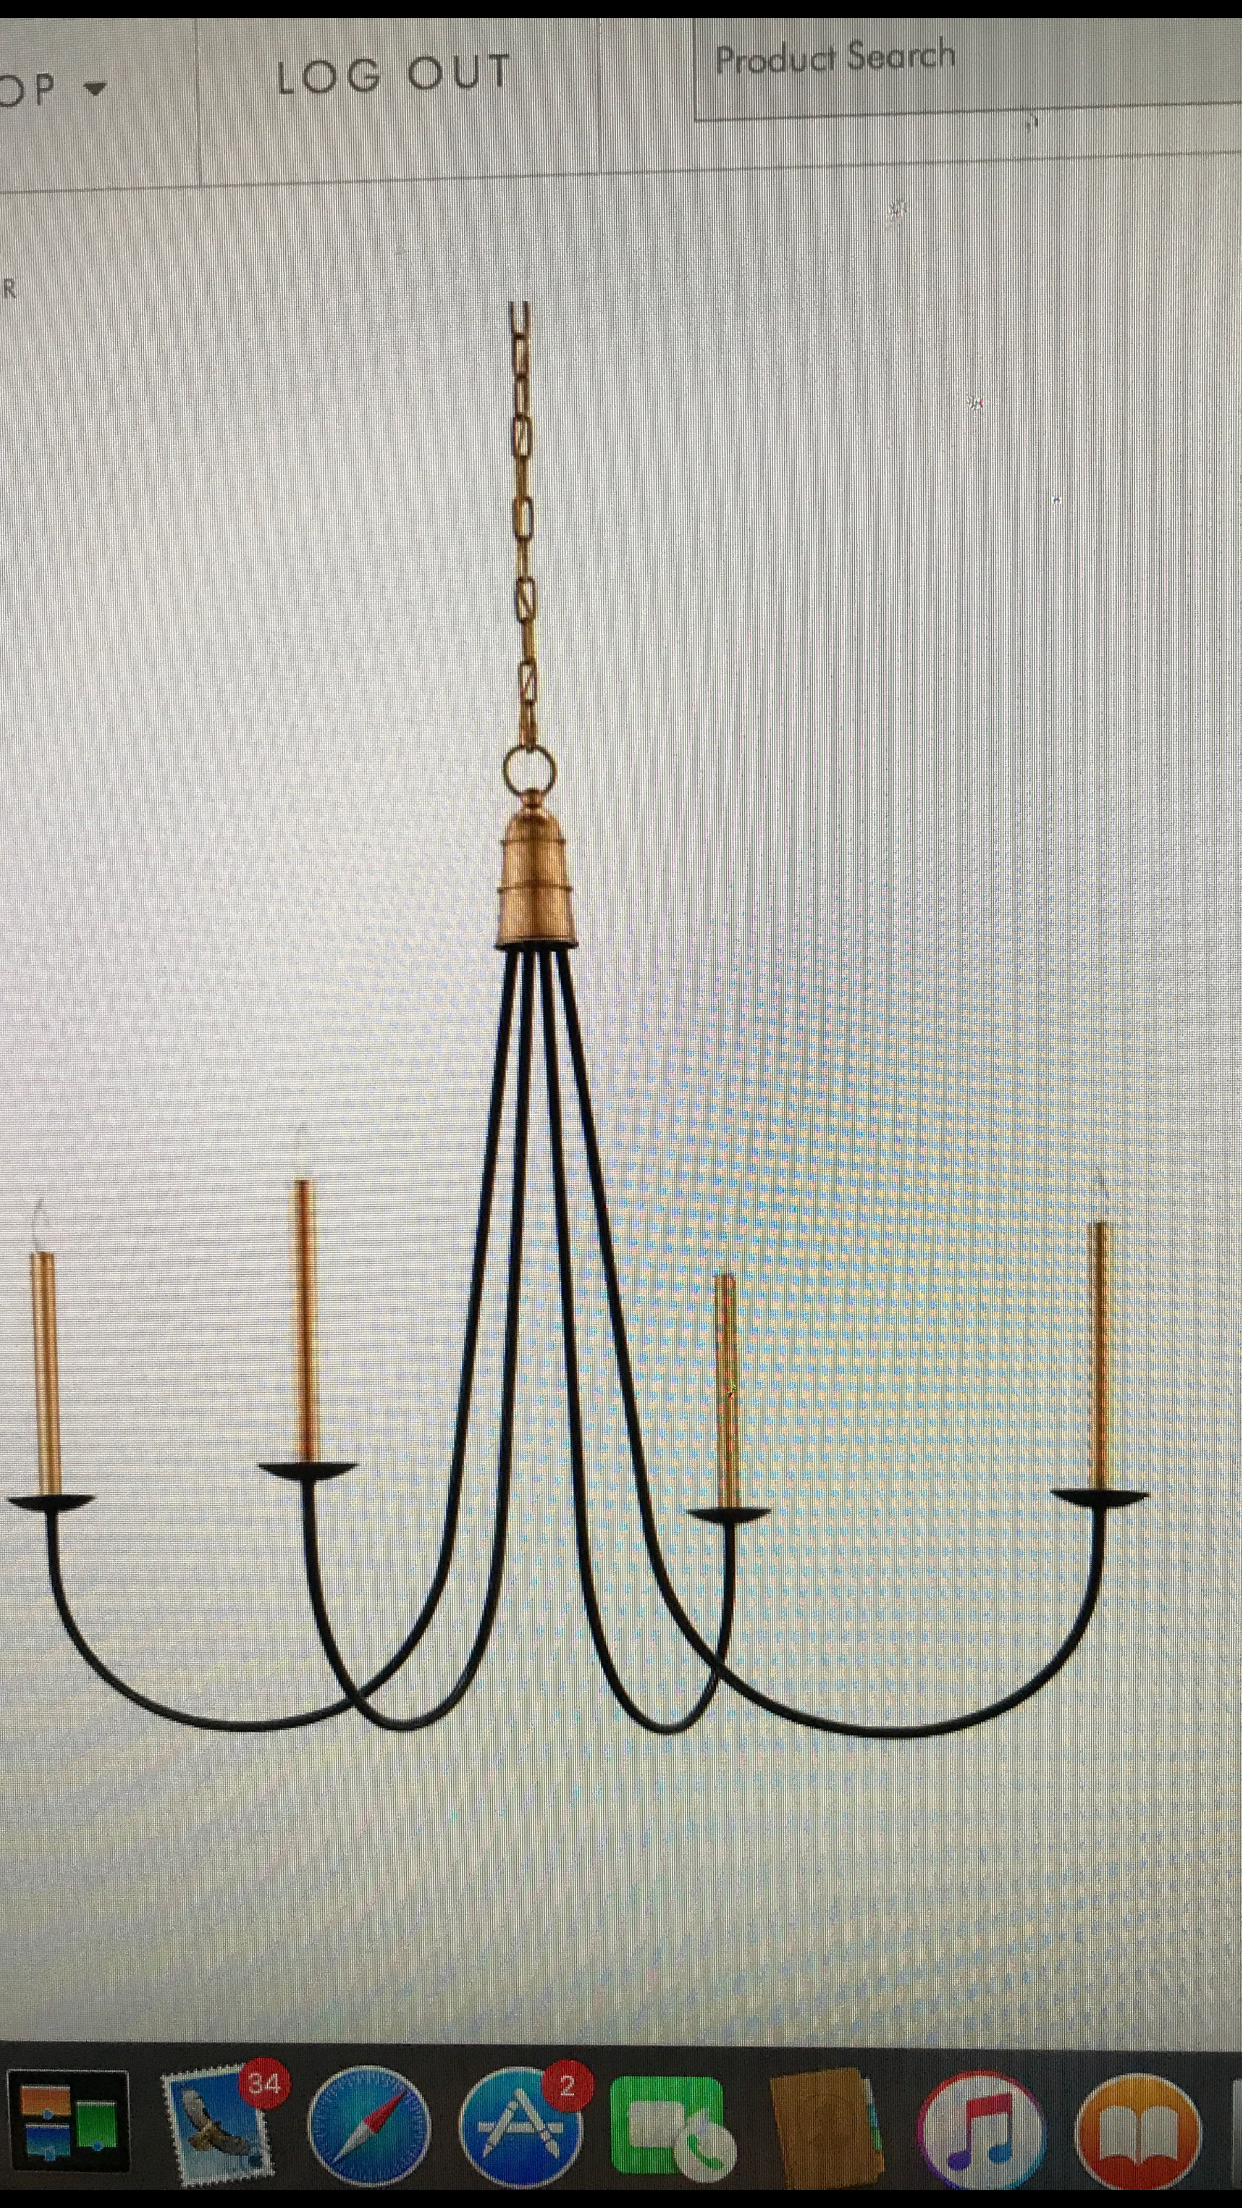
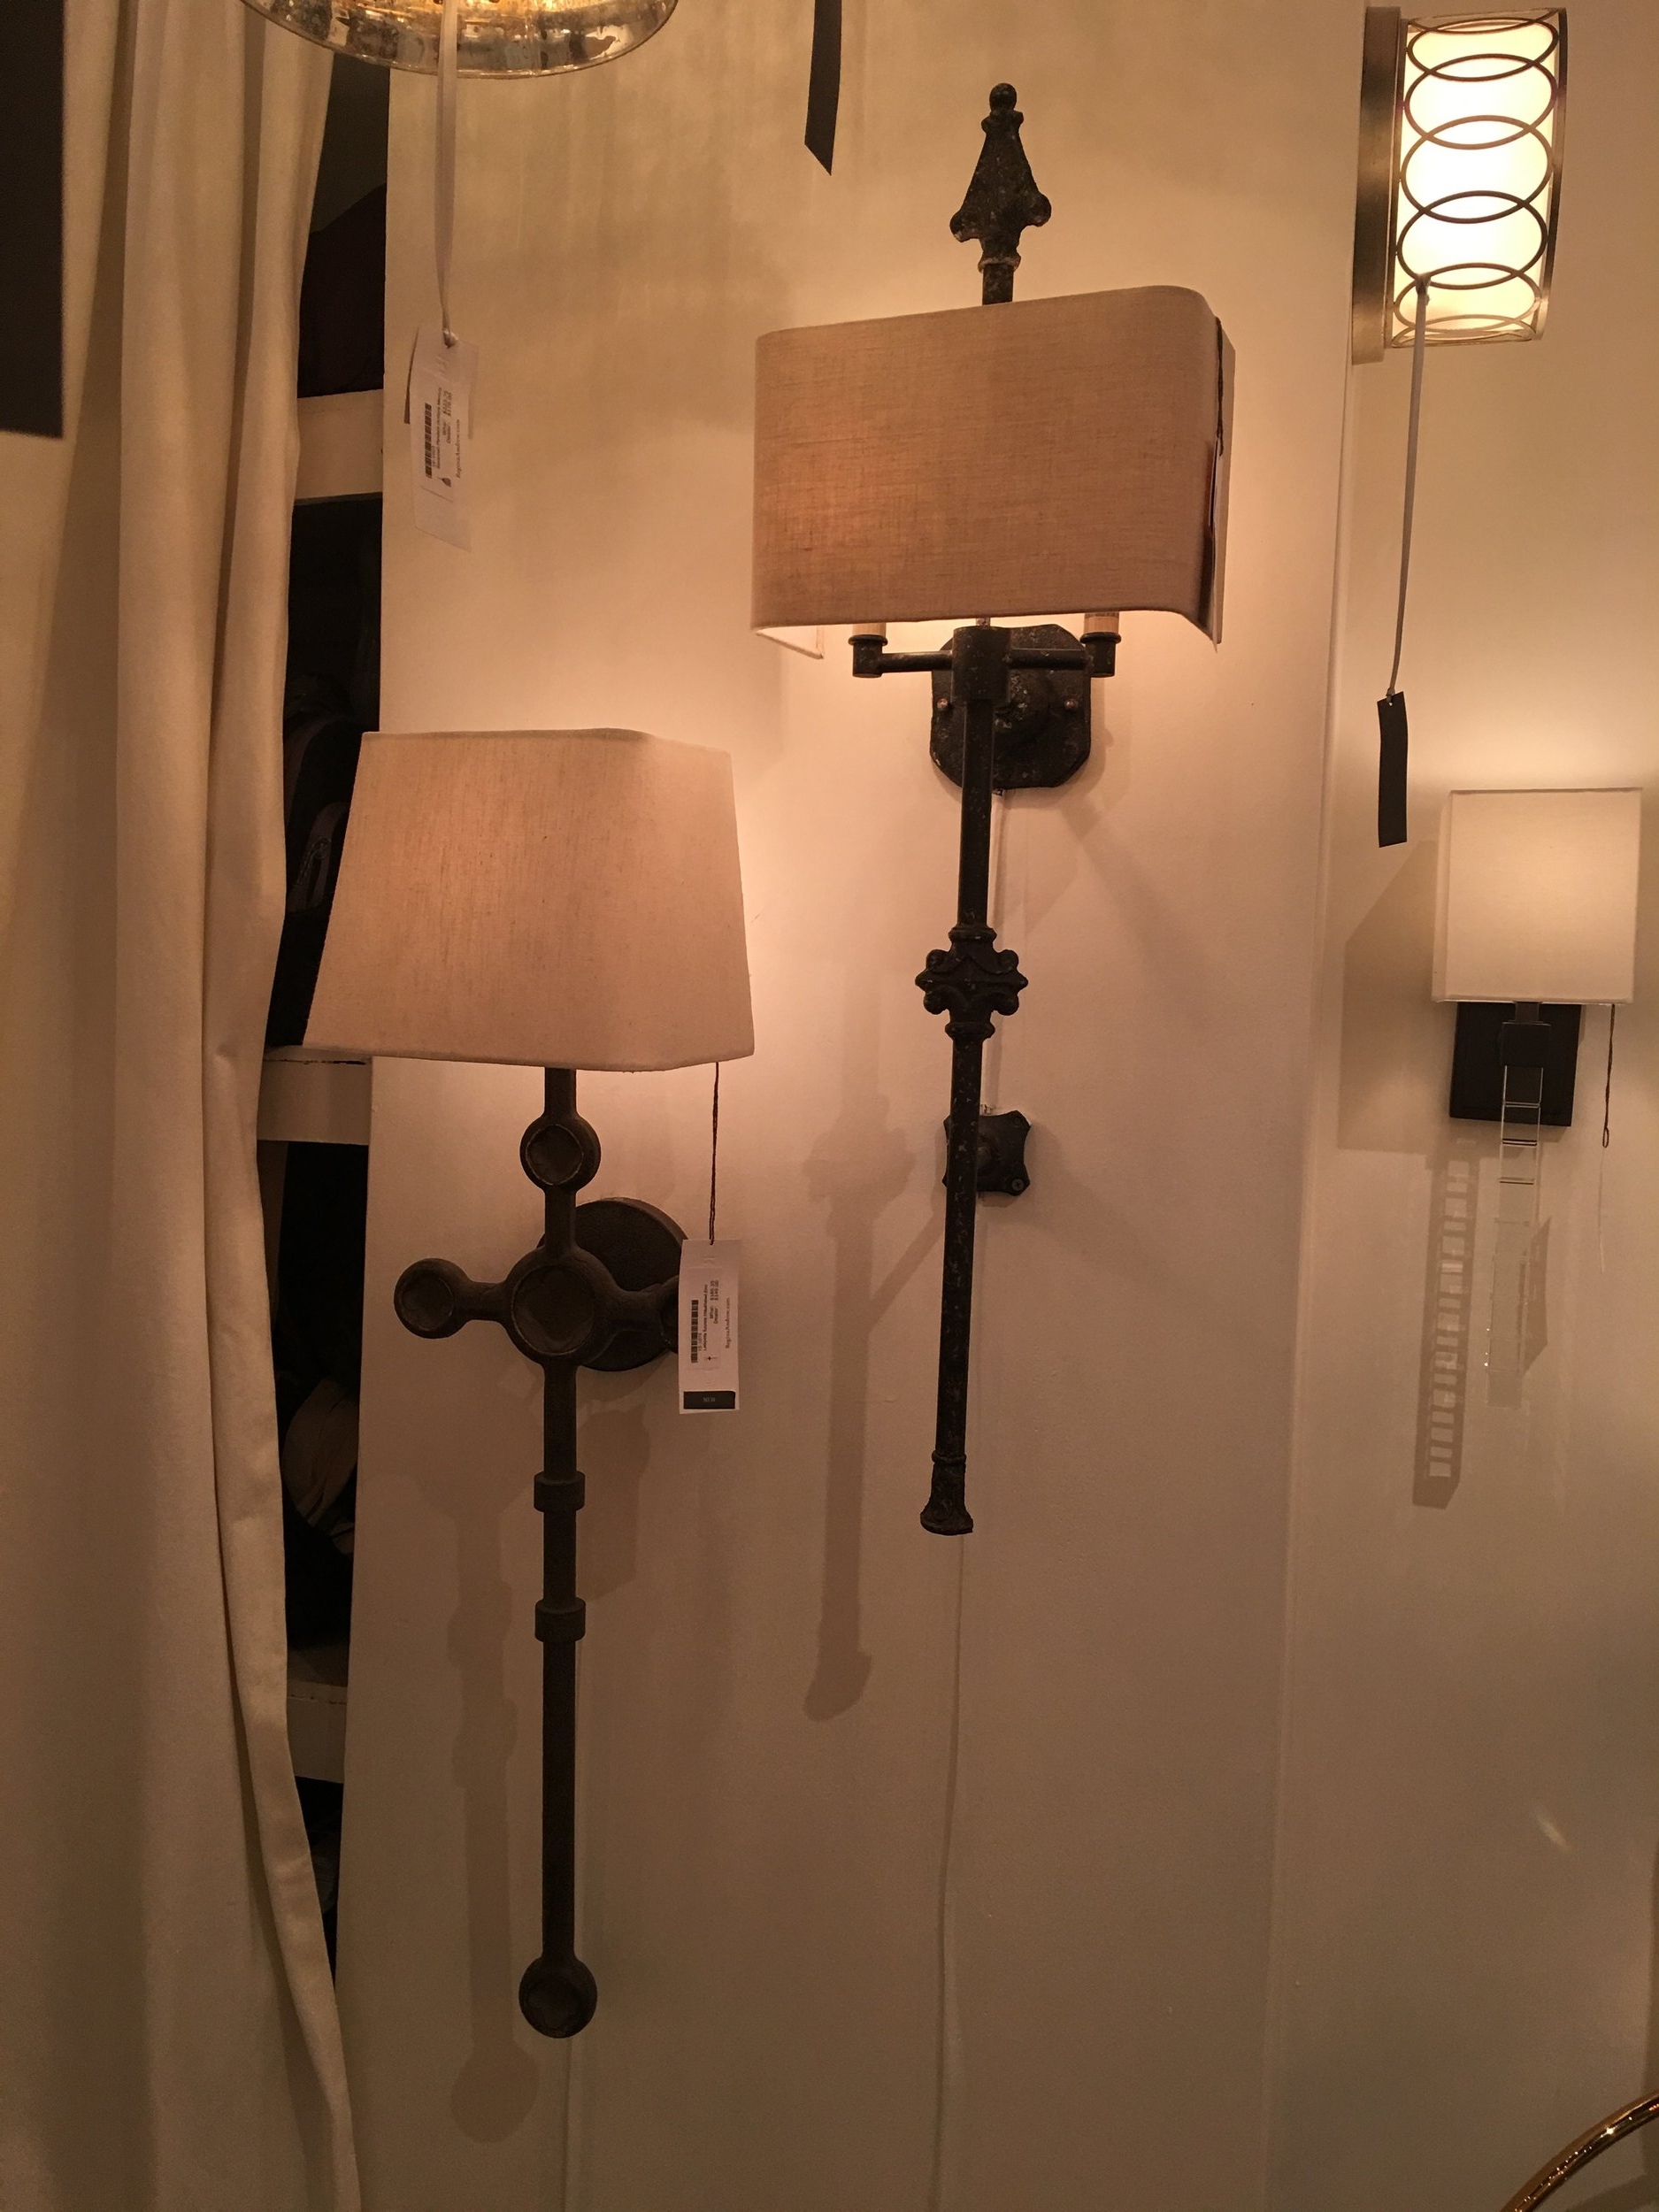
Taj Mahal quartzite was selected as the countertop material. The soft cream and gray/taupe veining perfectly compliments the floors. Designer sconces are the perfect light source, allowing light closest to your face for makeup/shaving purposes!

3.jpg

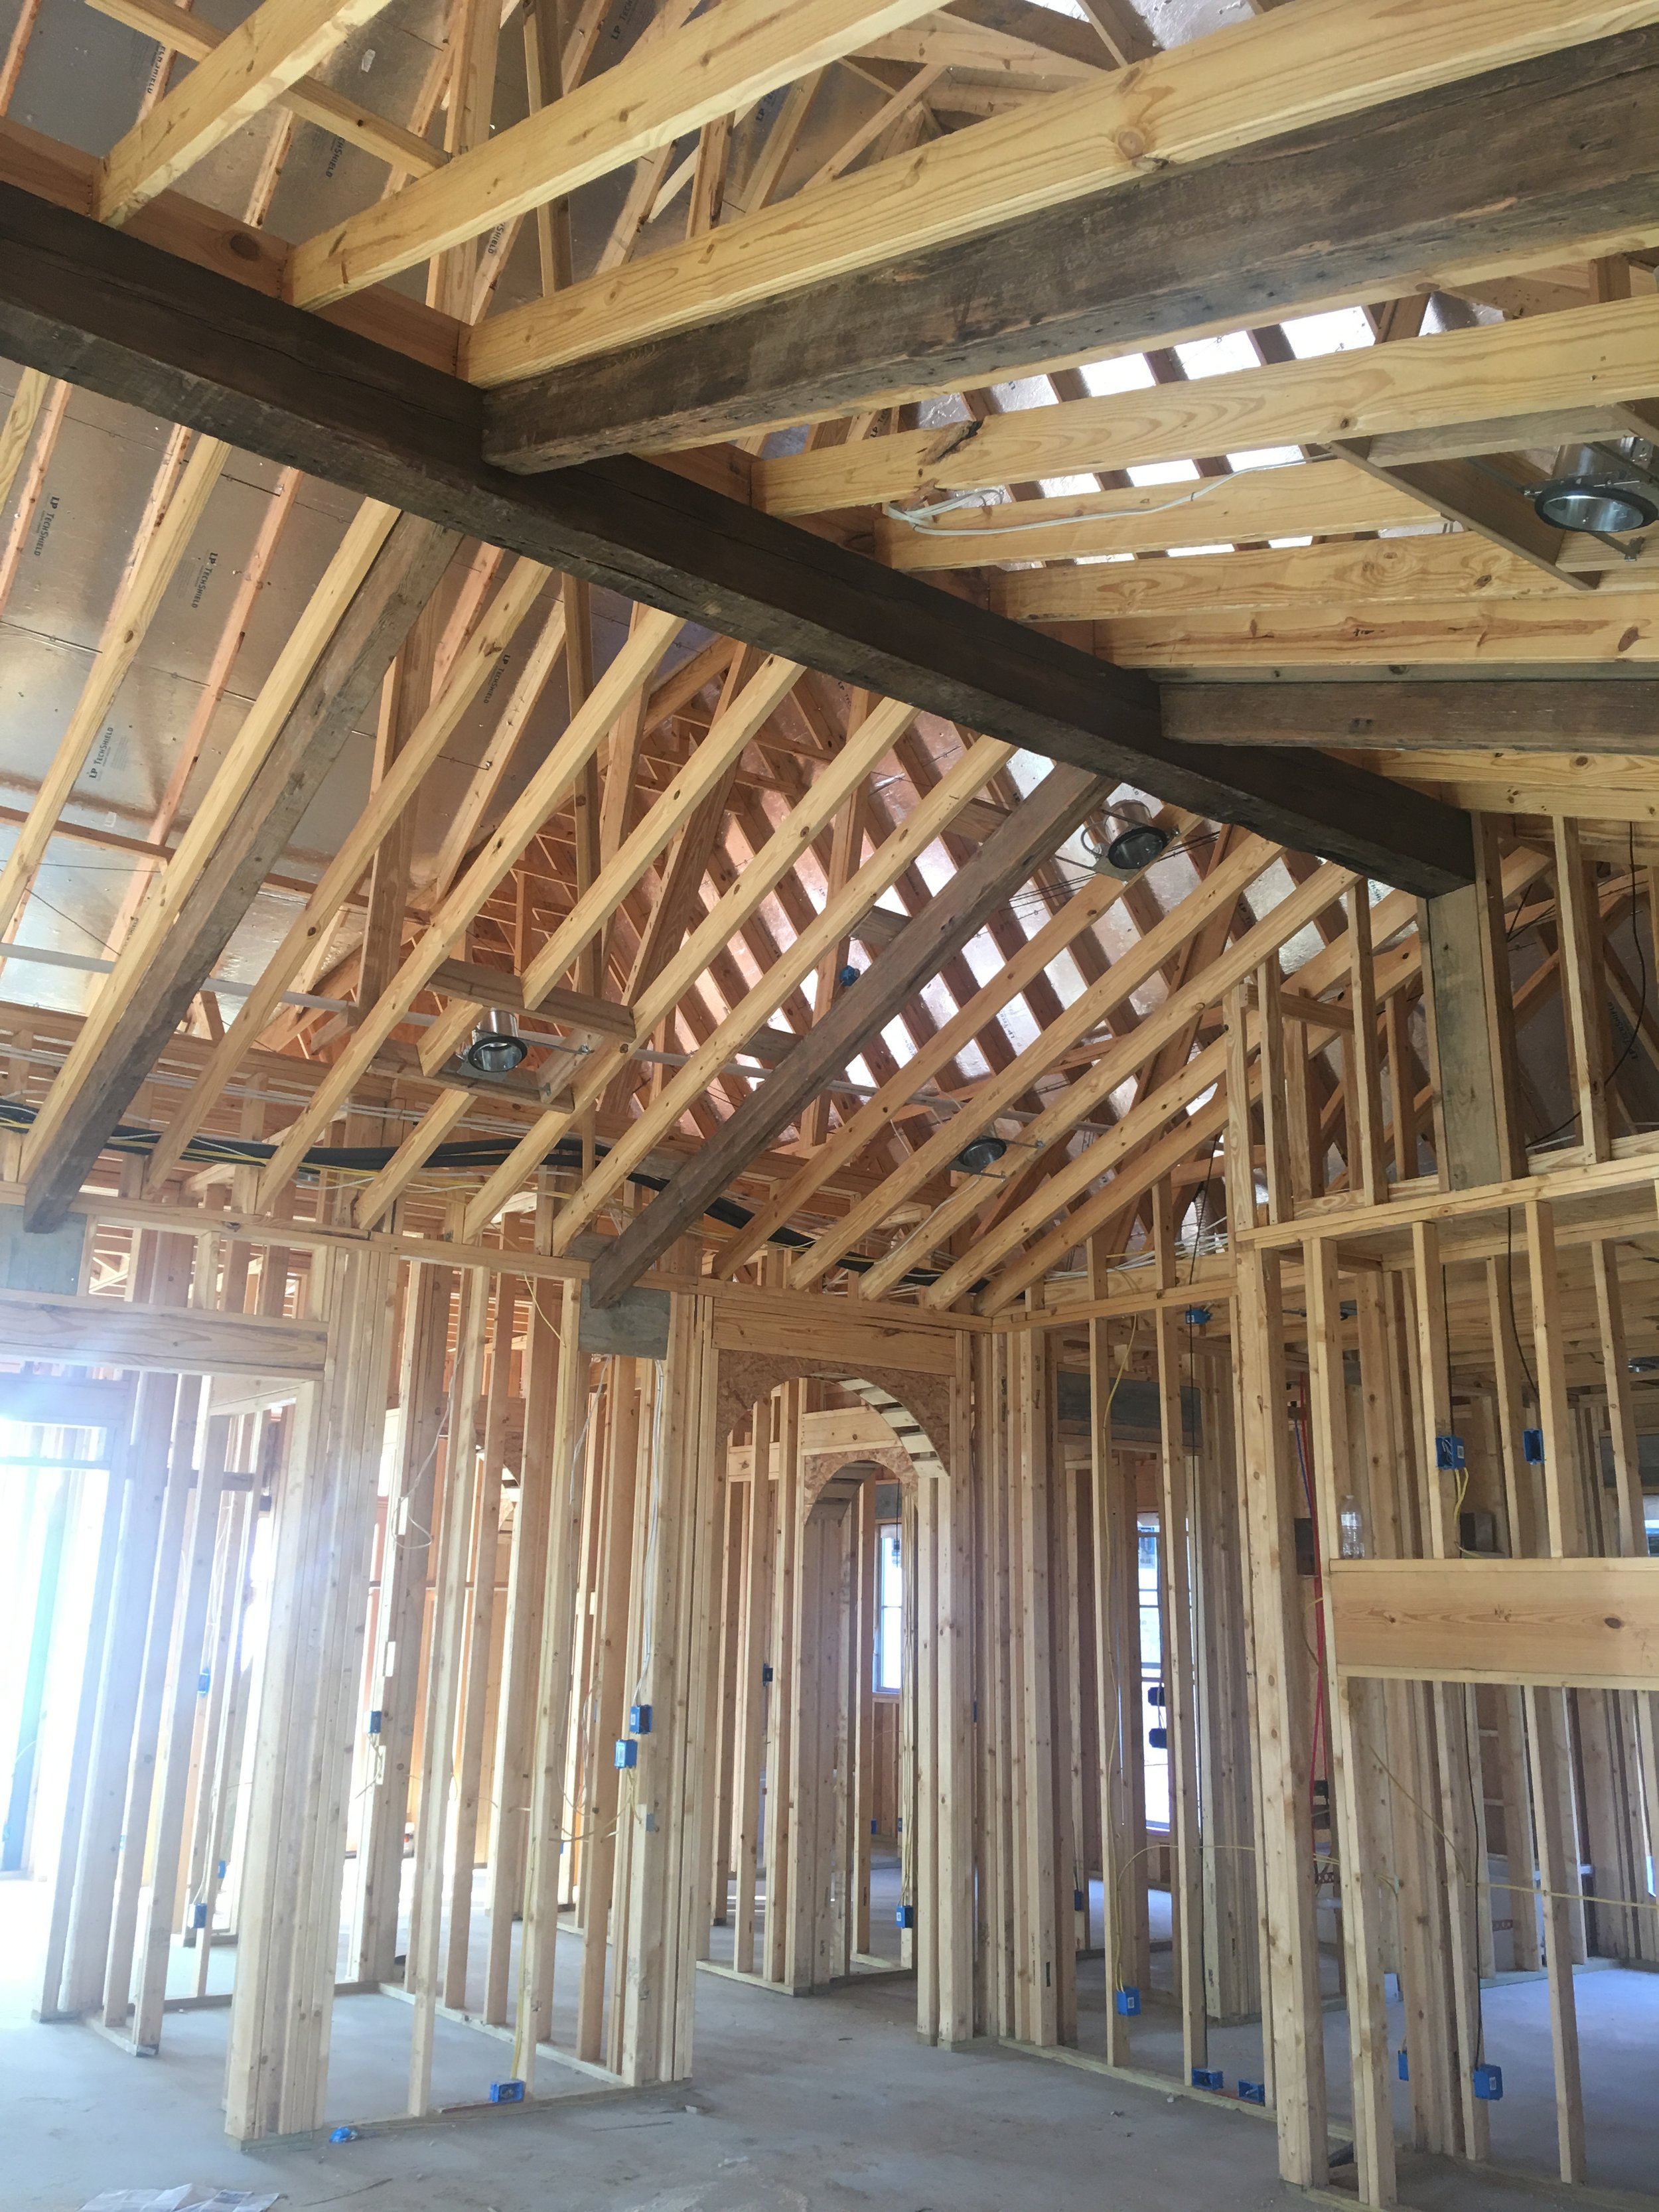
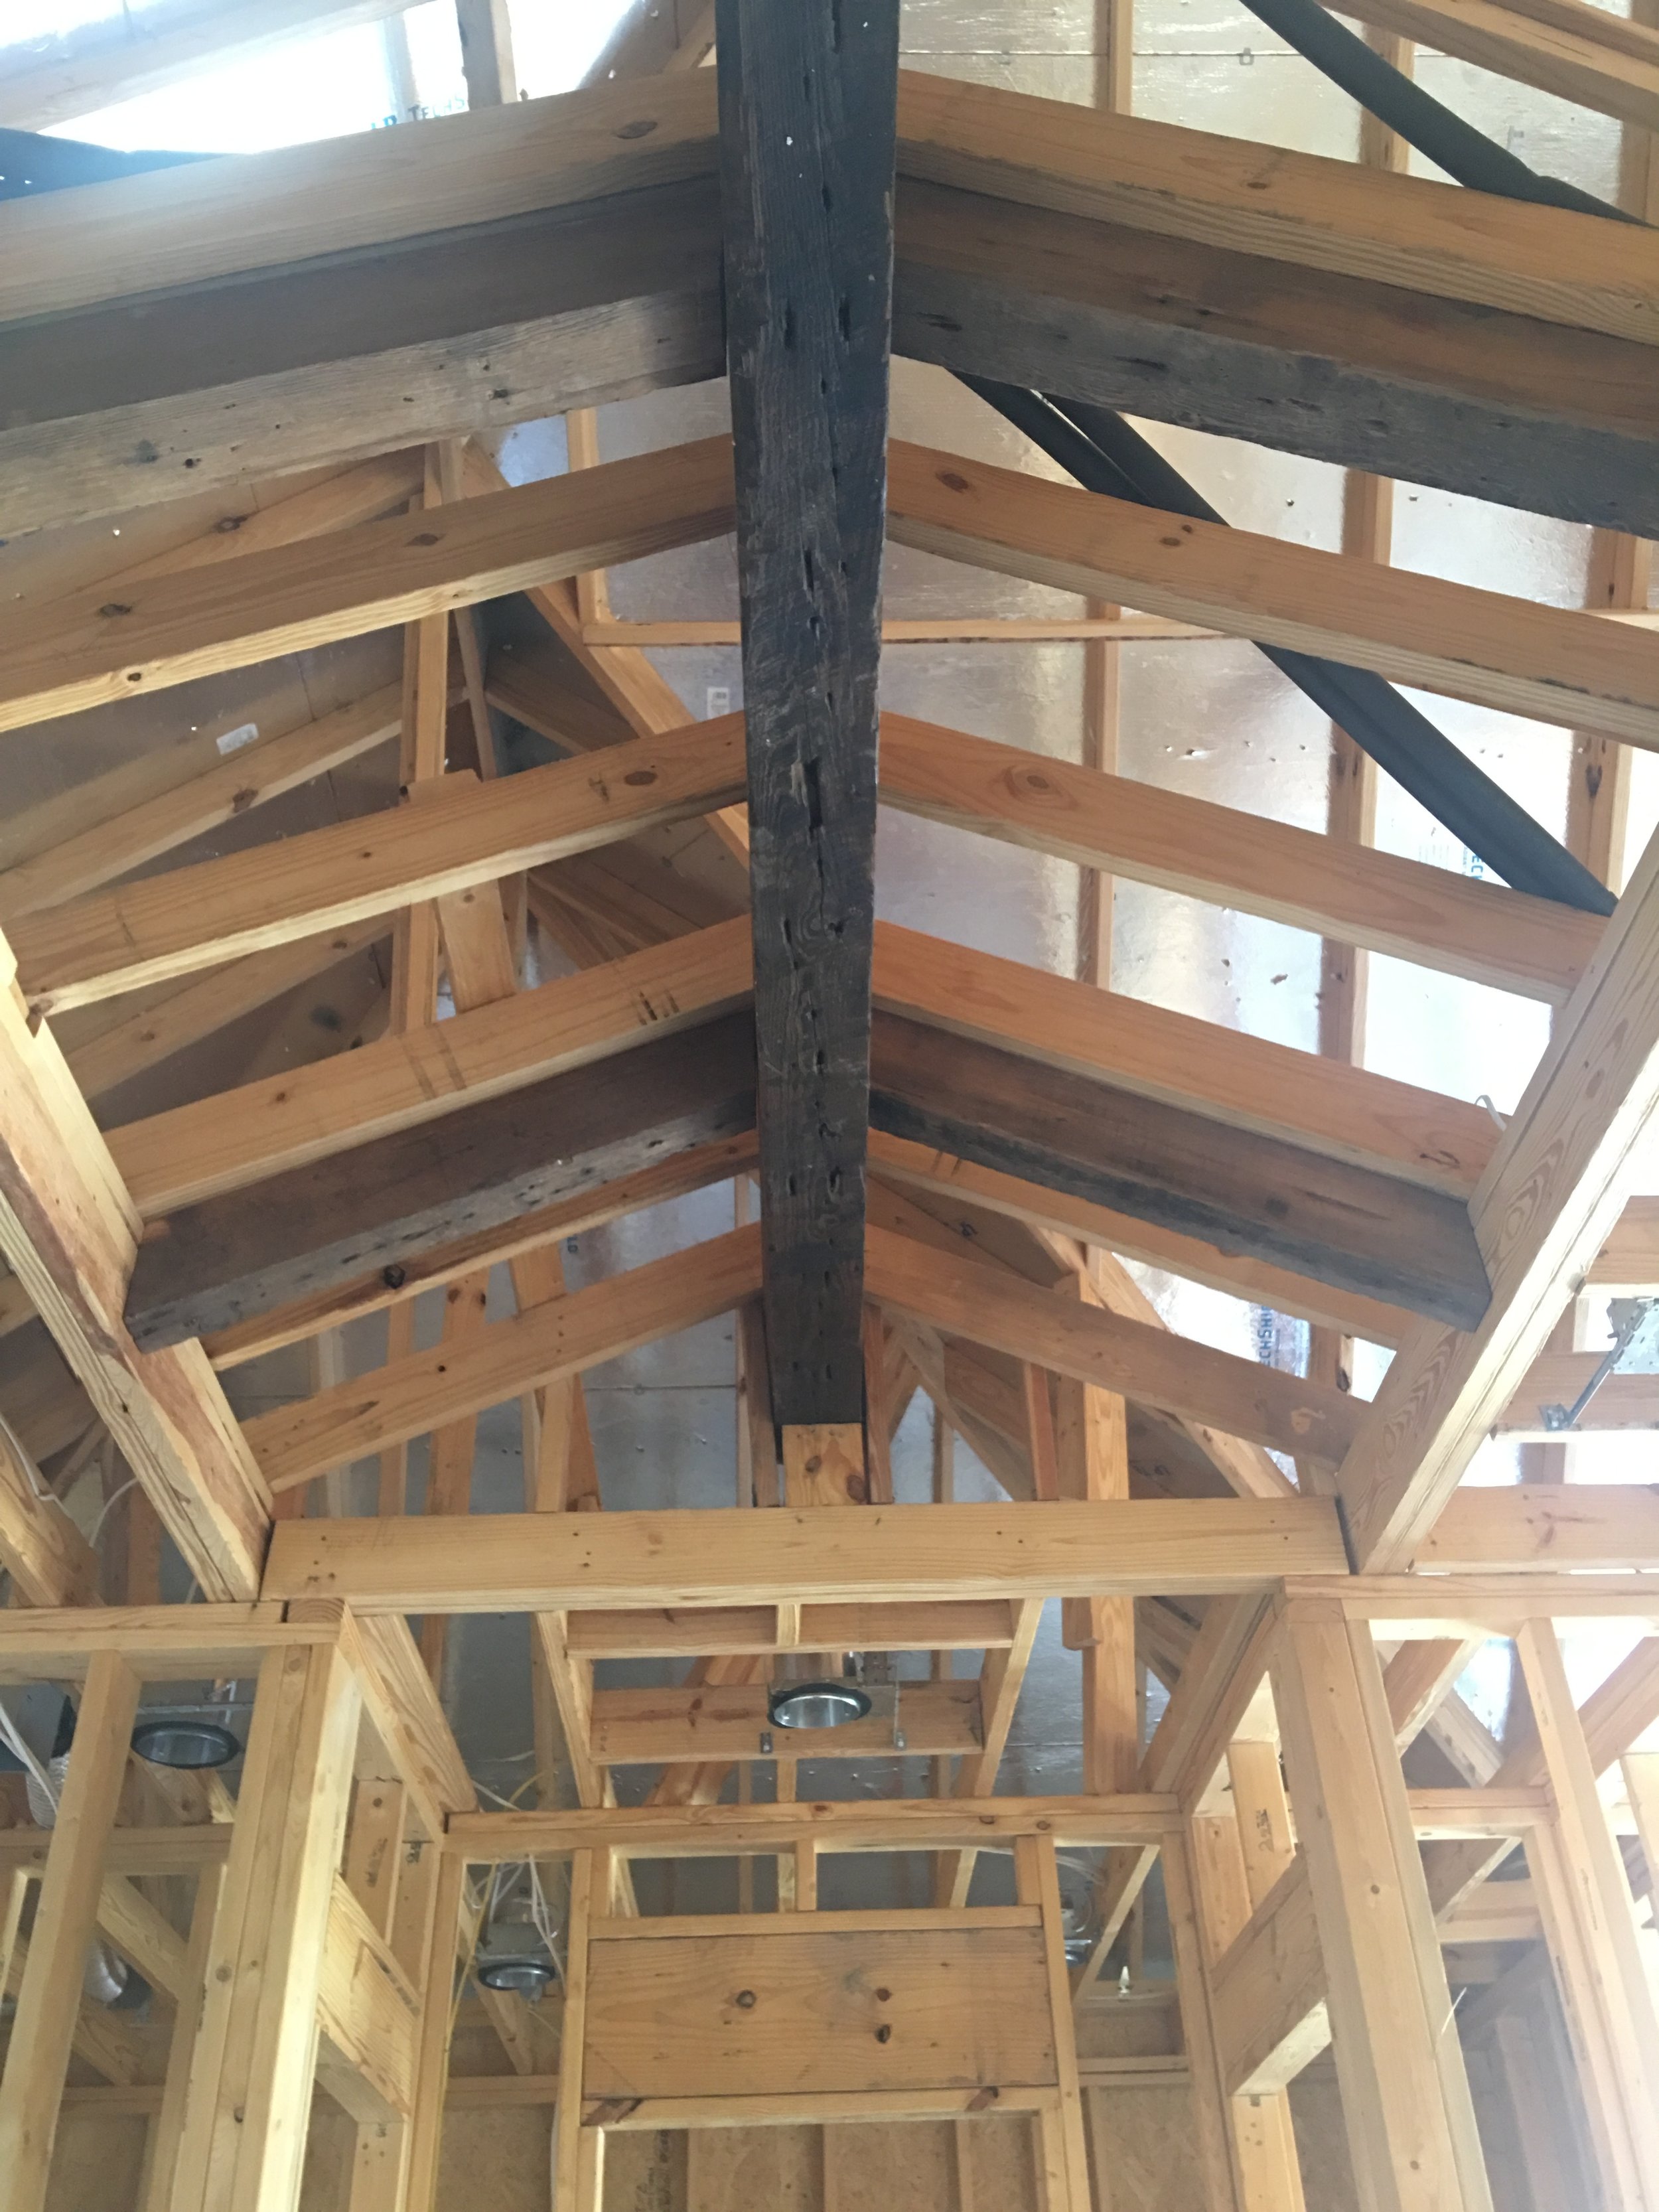
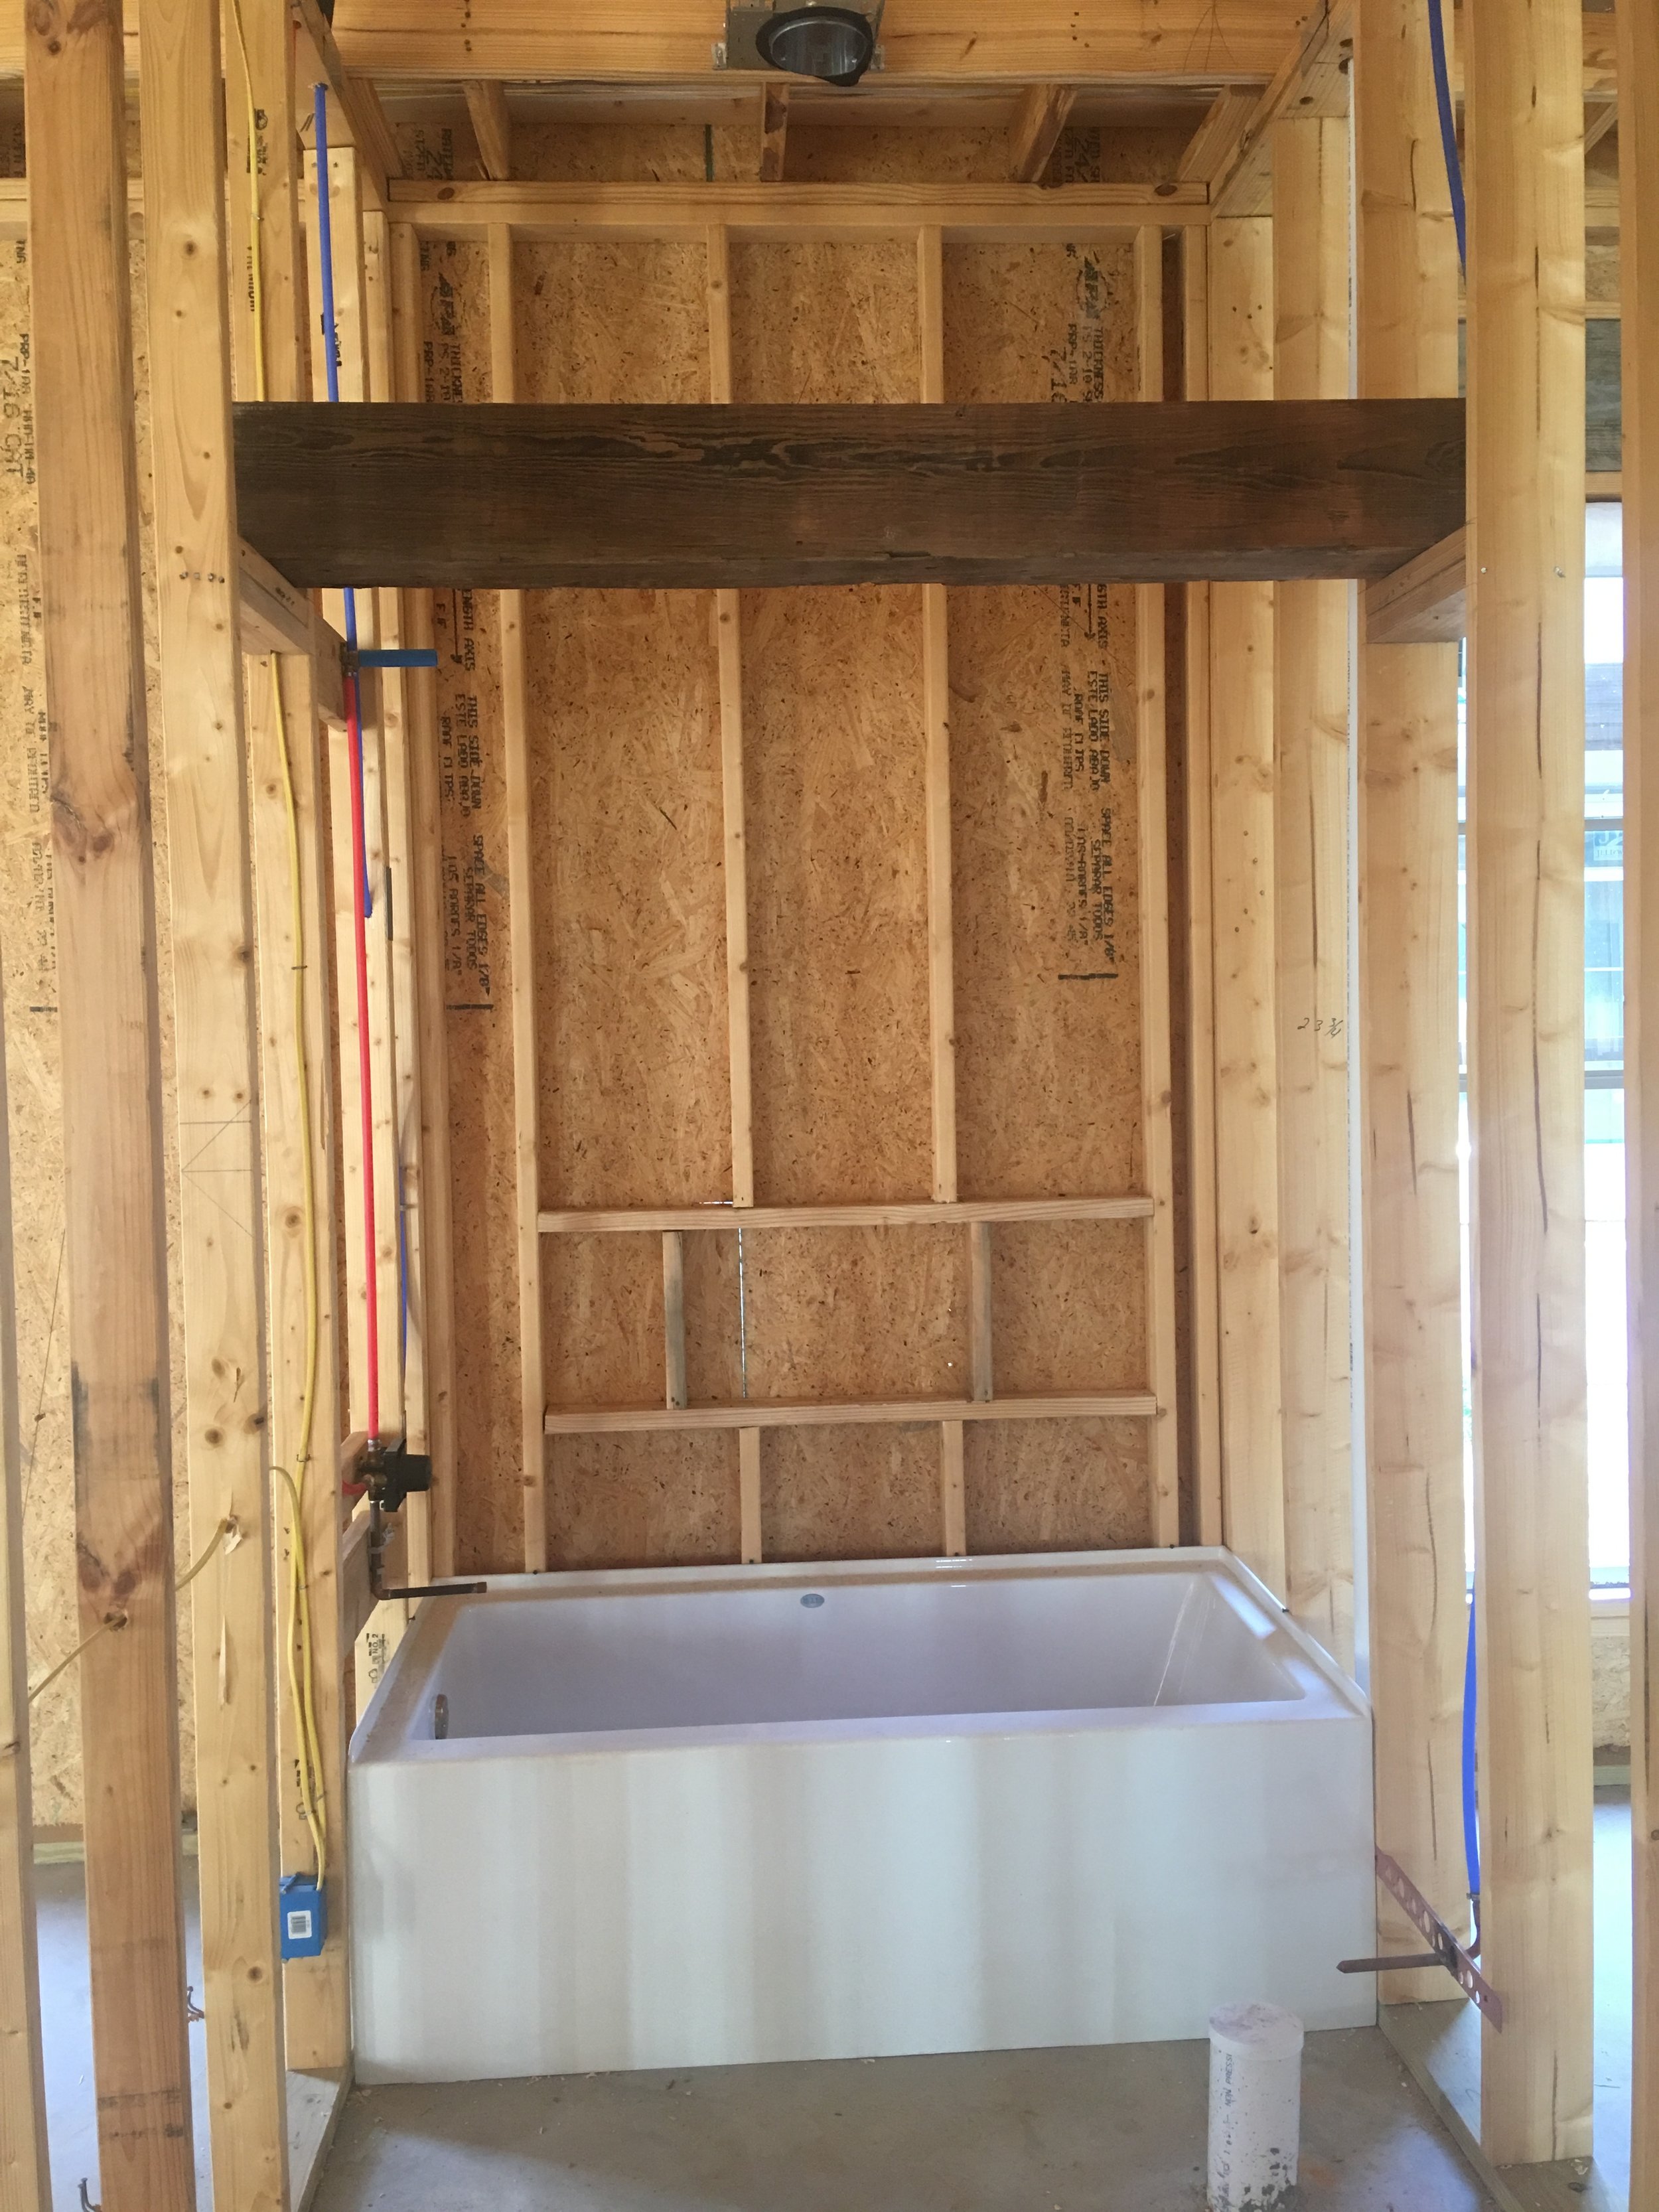
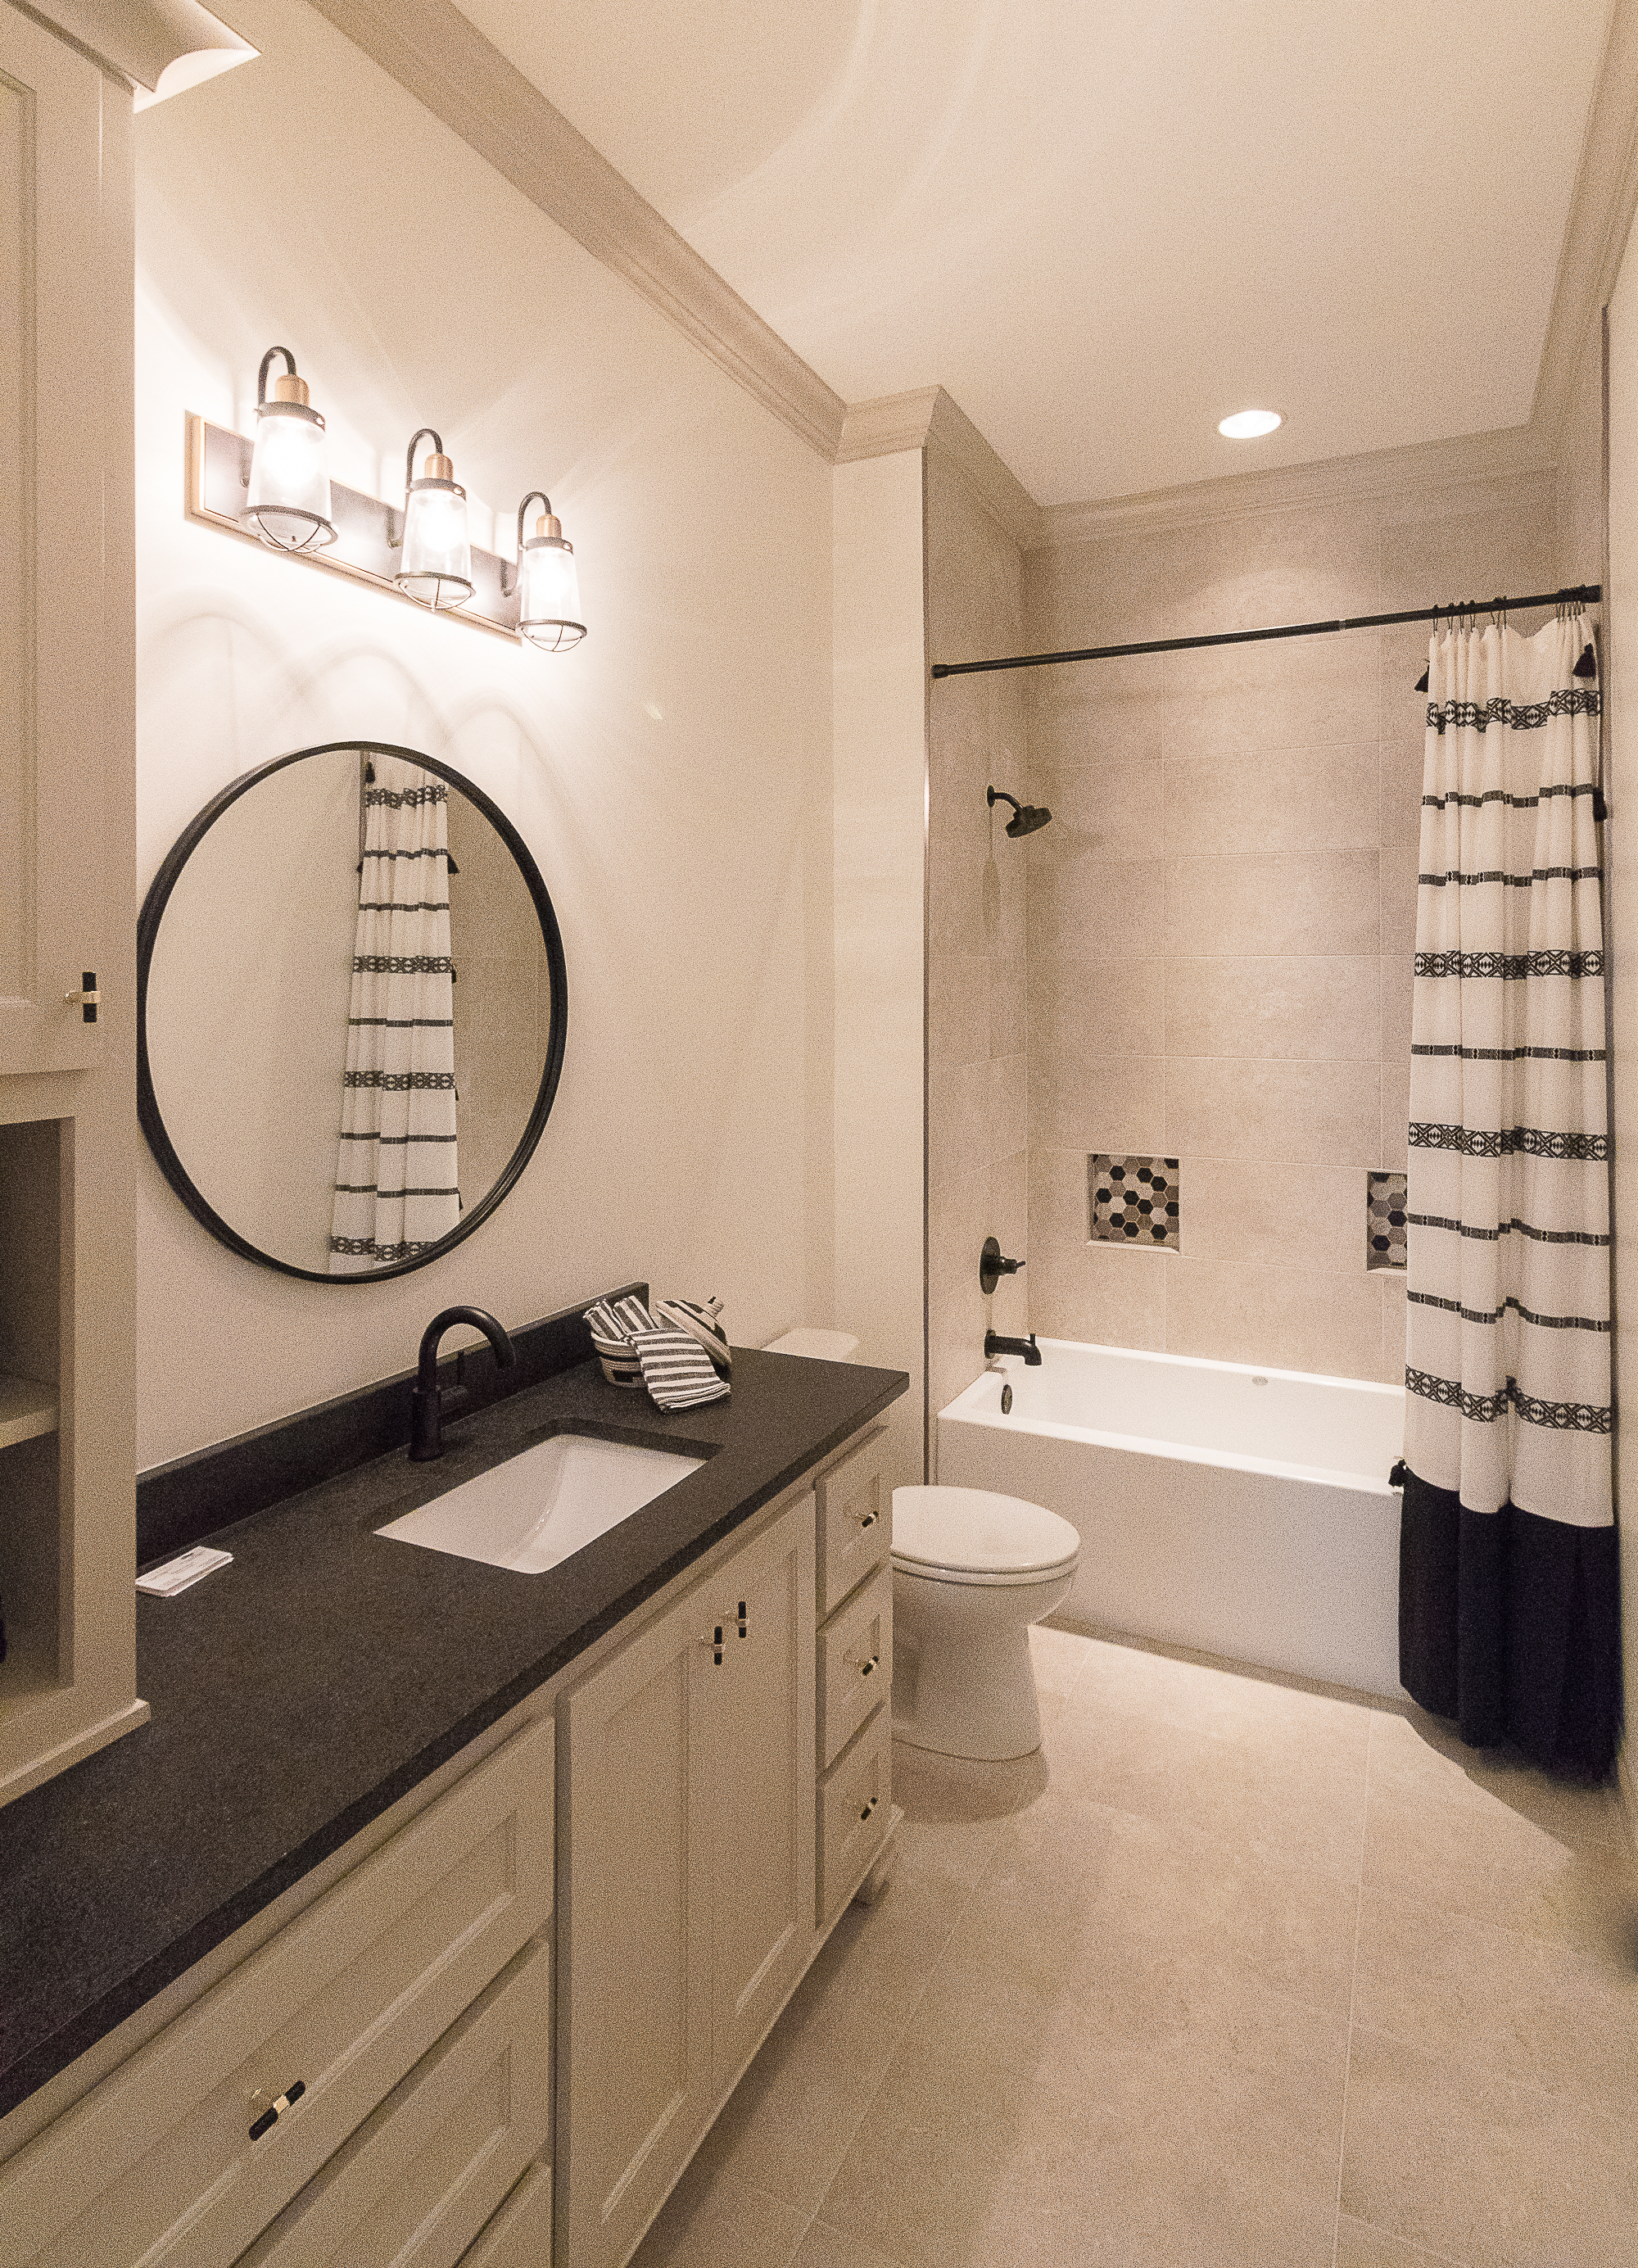
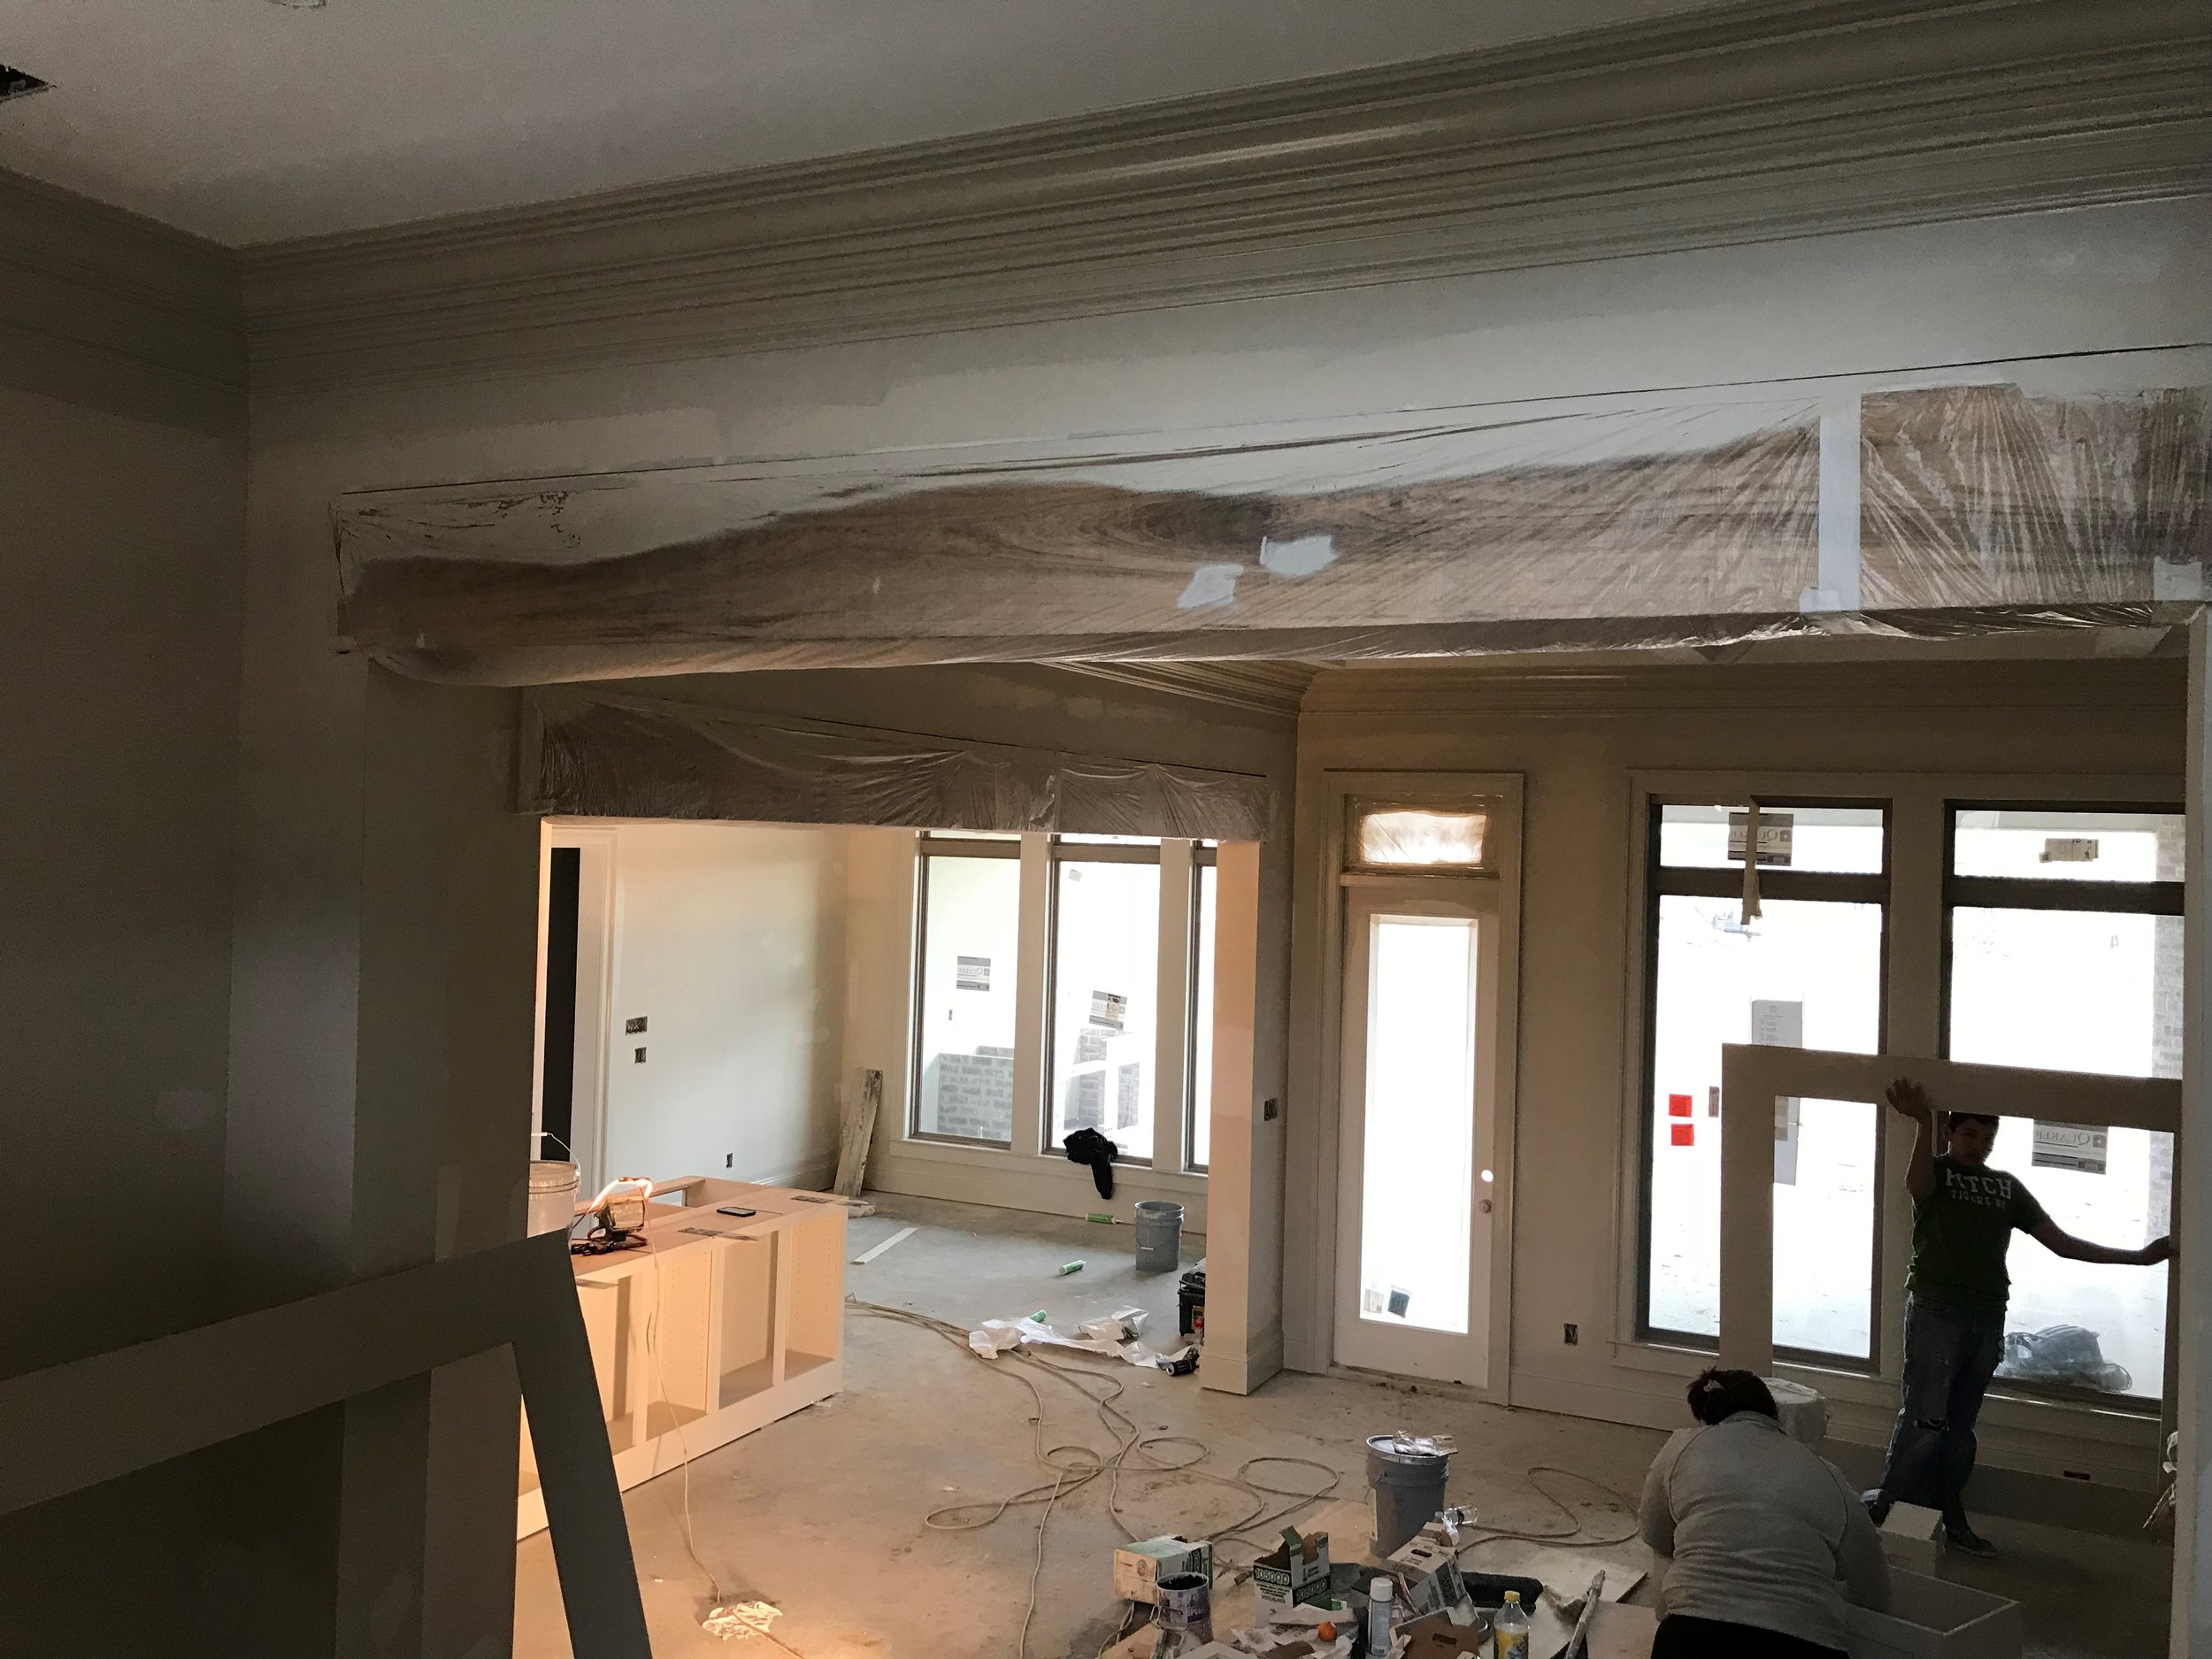
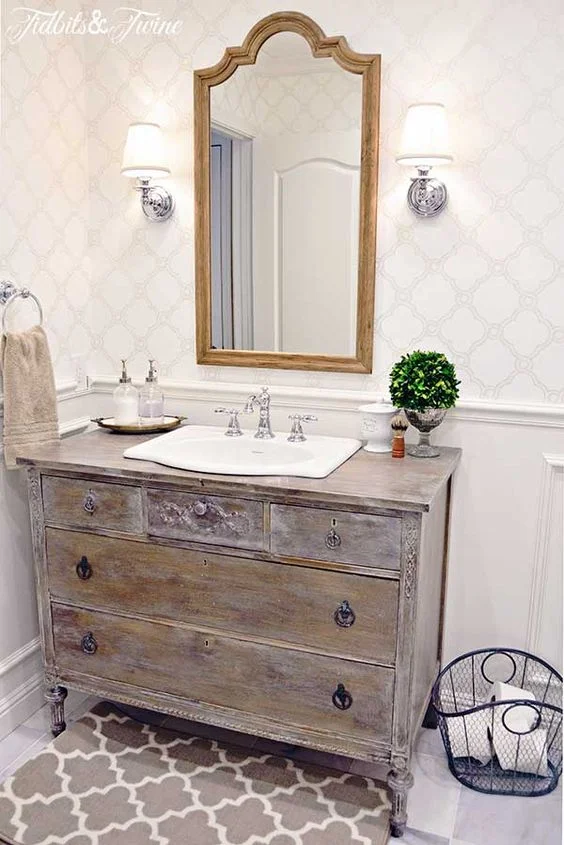
Next bath, please….. I decided to showcase an antique beam and antique furniture piece here. The beam was masterfully installed to perfectly hide the shower curtain rod- details!

4.jpg

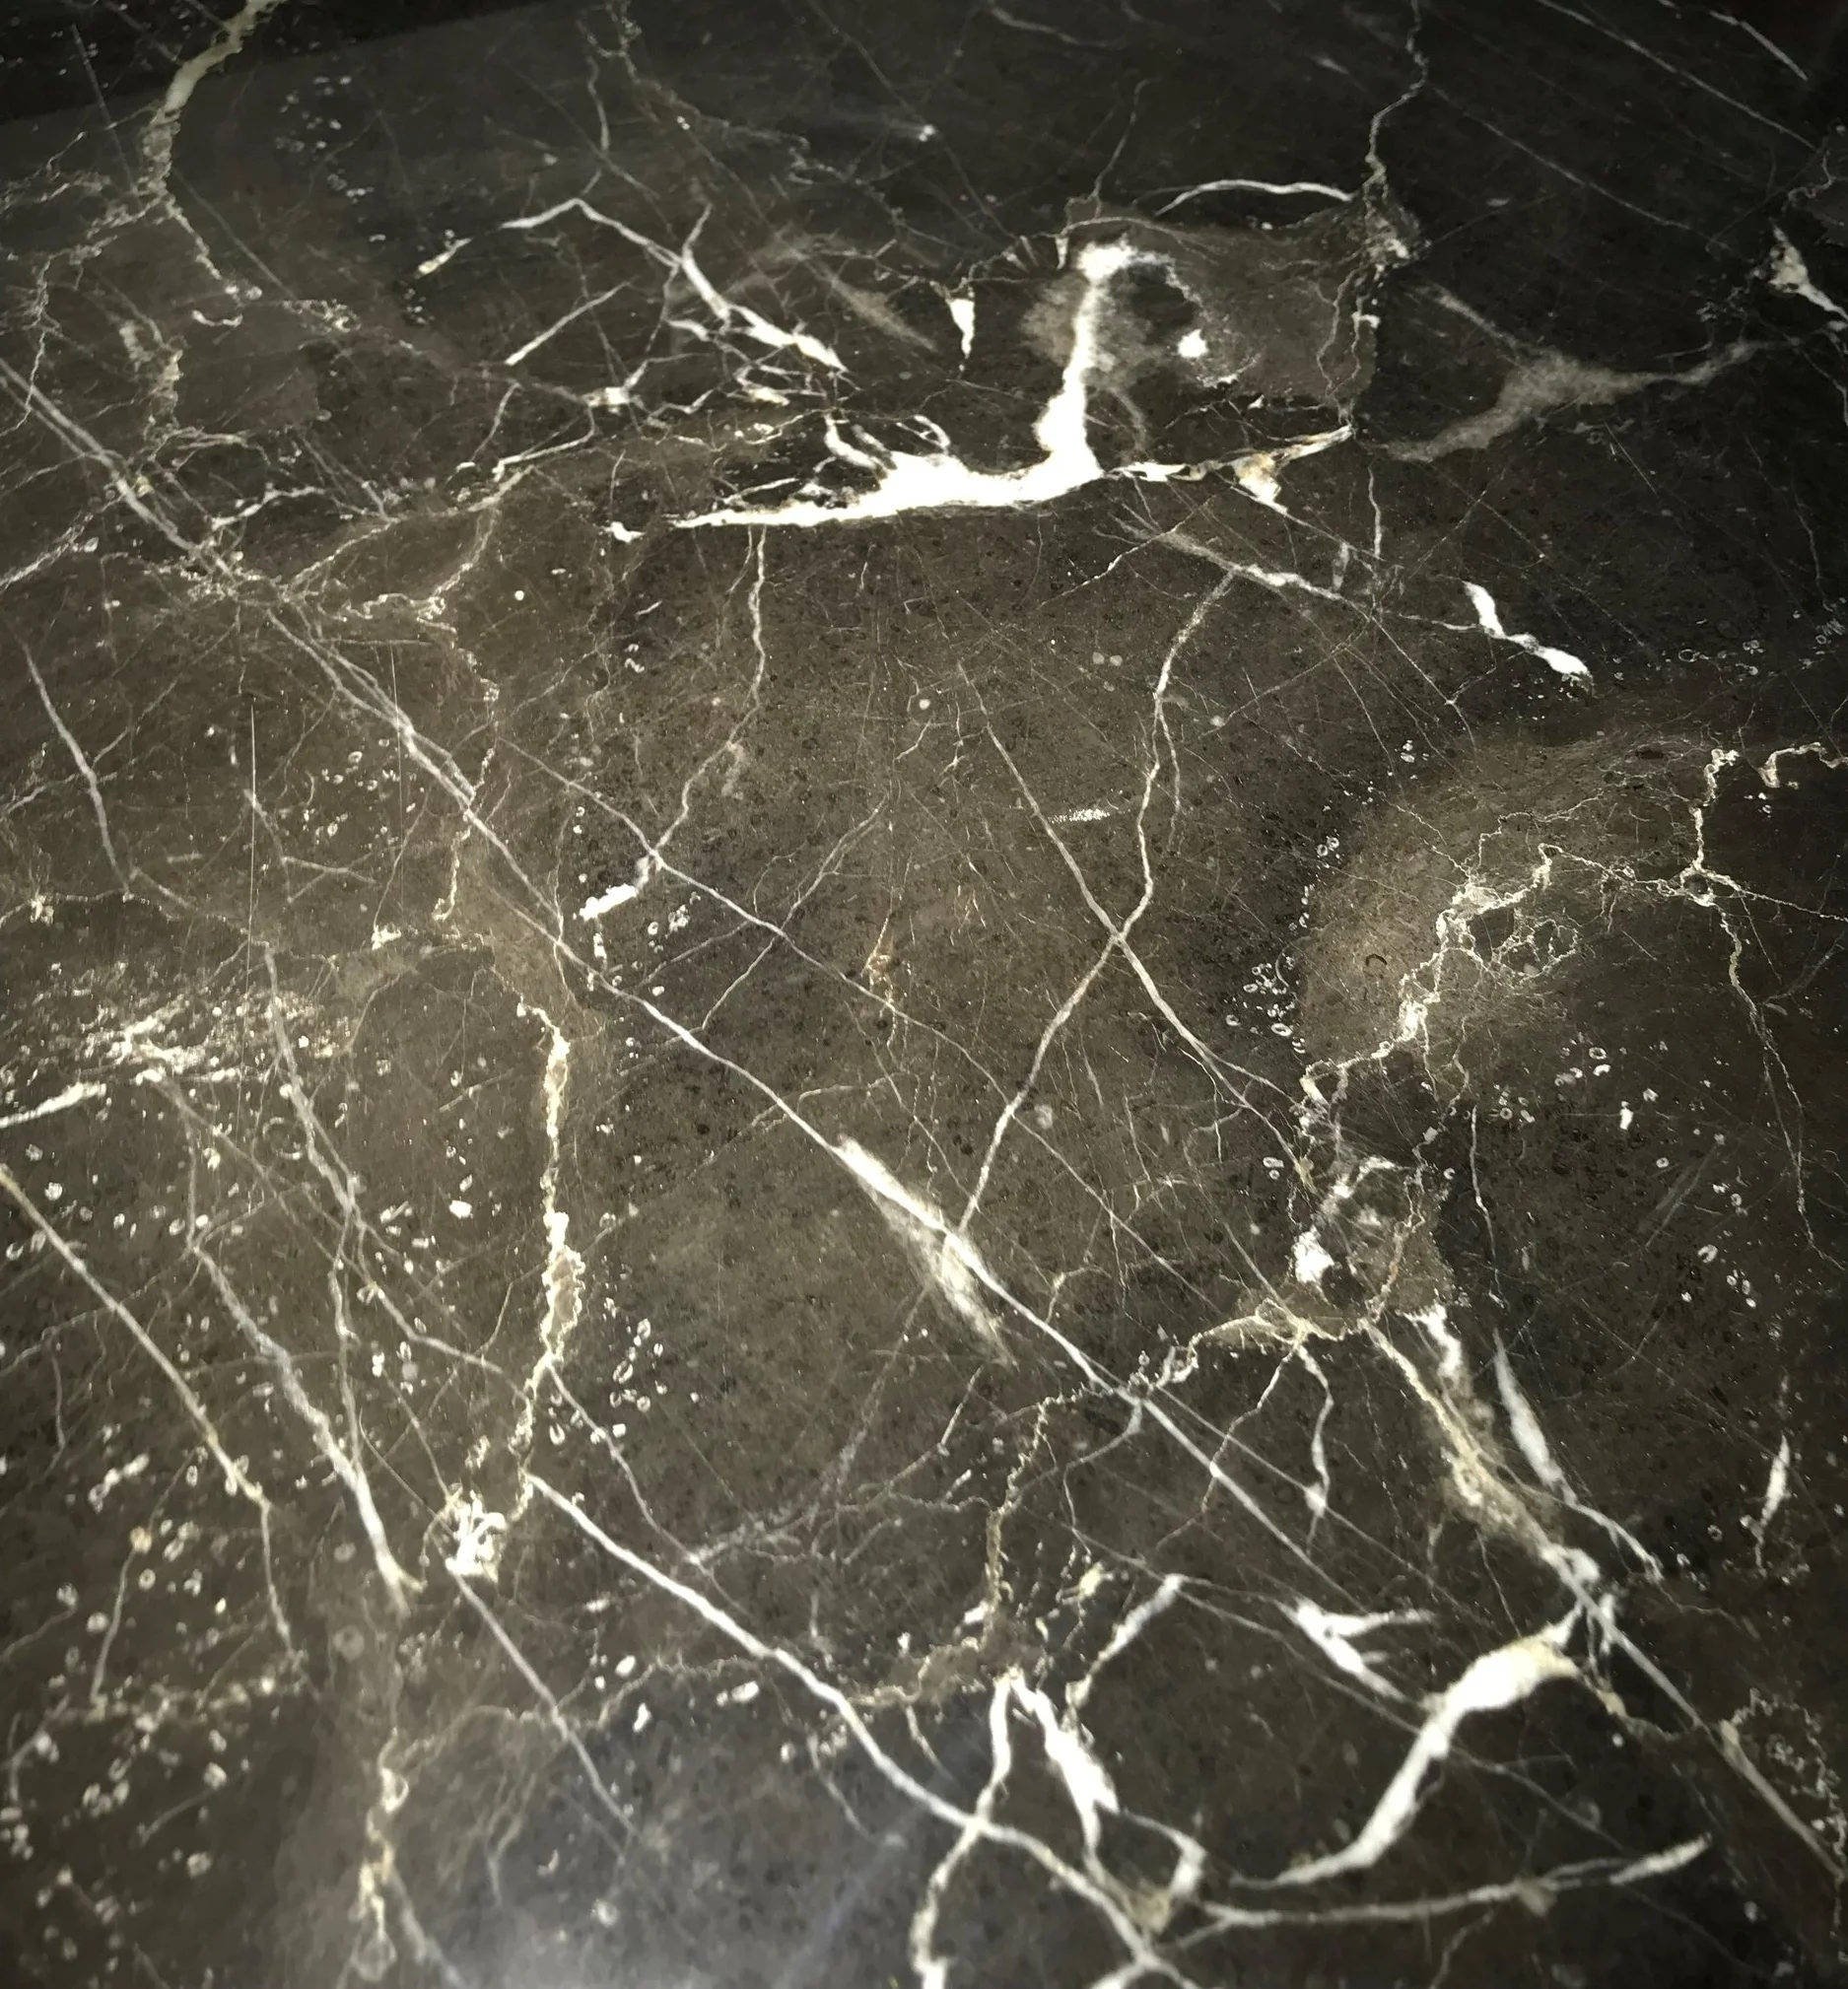
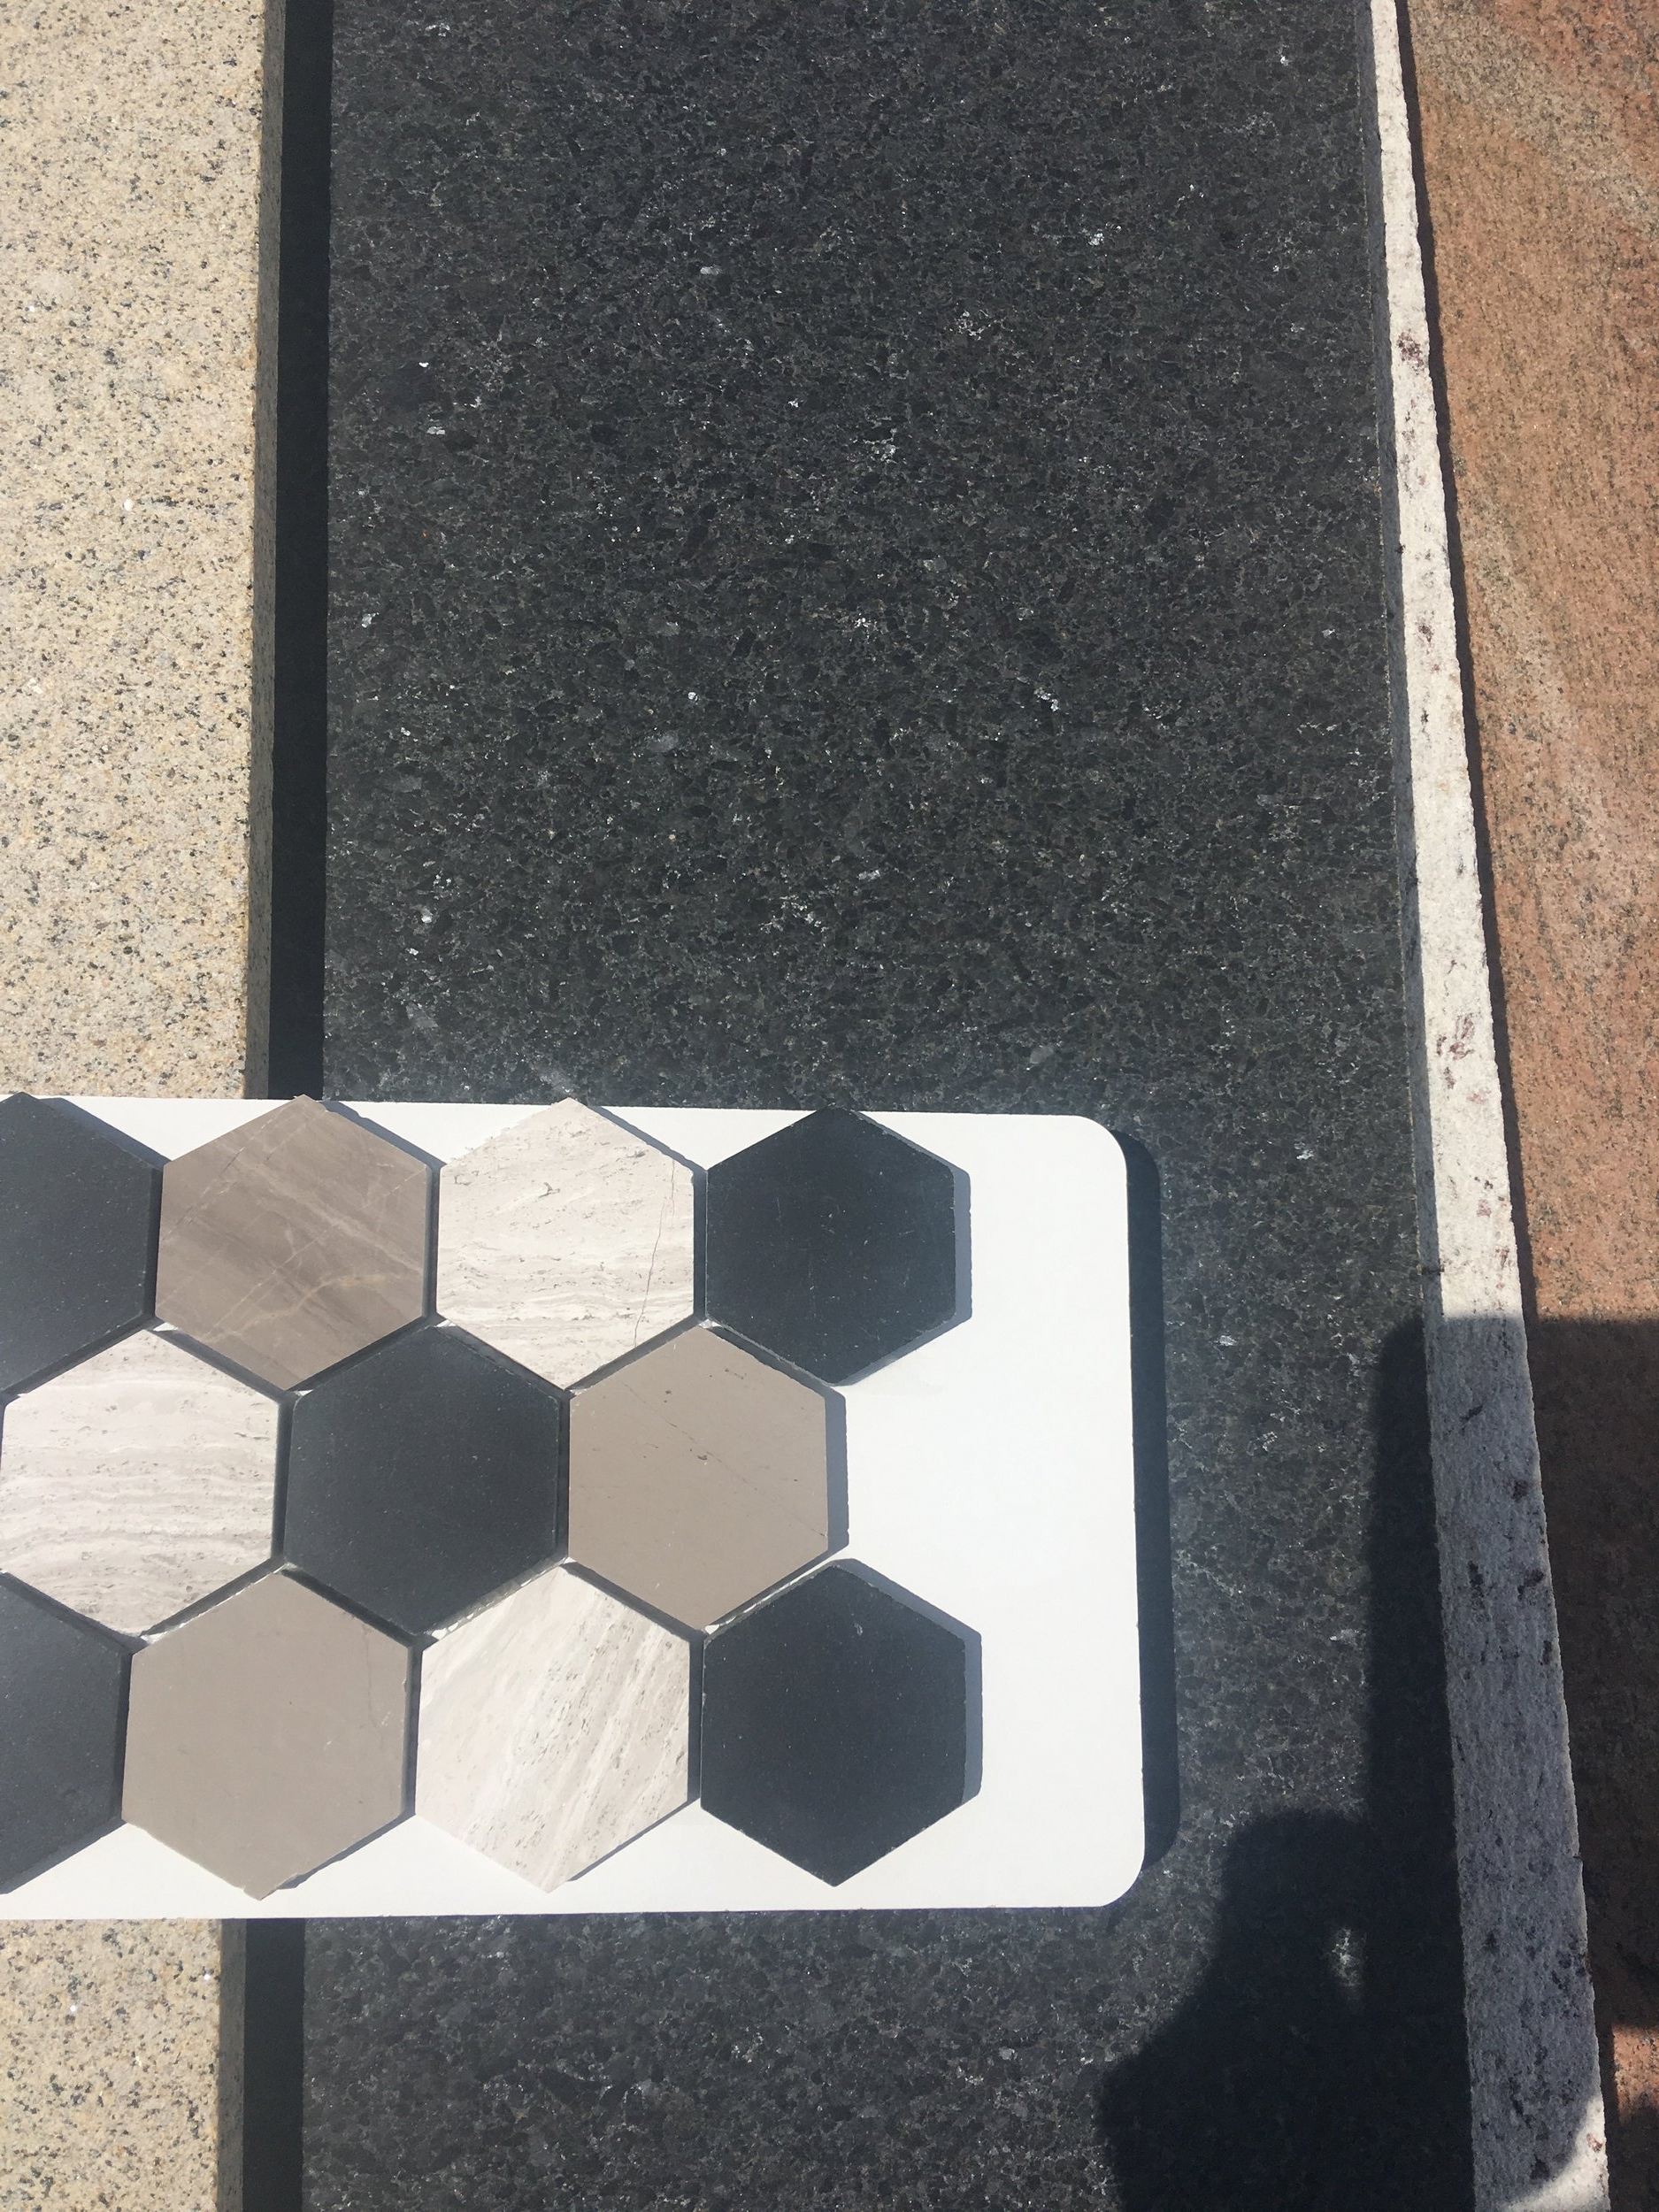
The antique furniture piece was found locally at Revival Antiques in Scott, LA. It is the absolute perfect piece for this bathroom’s vanity! A large, rectangle sink was dropped in, still allowing for plenty of countertop space. You will notice that we changed the finishes to black in this bathroom in order to contrast with the rich, warm woods found in the vanity and beam!

5.jpg

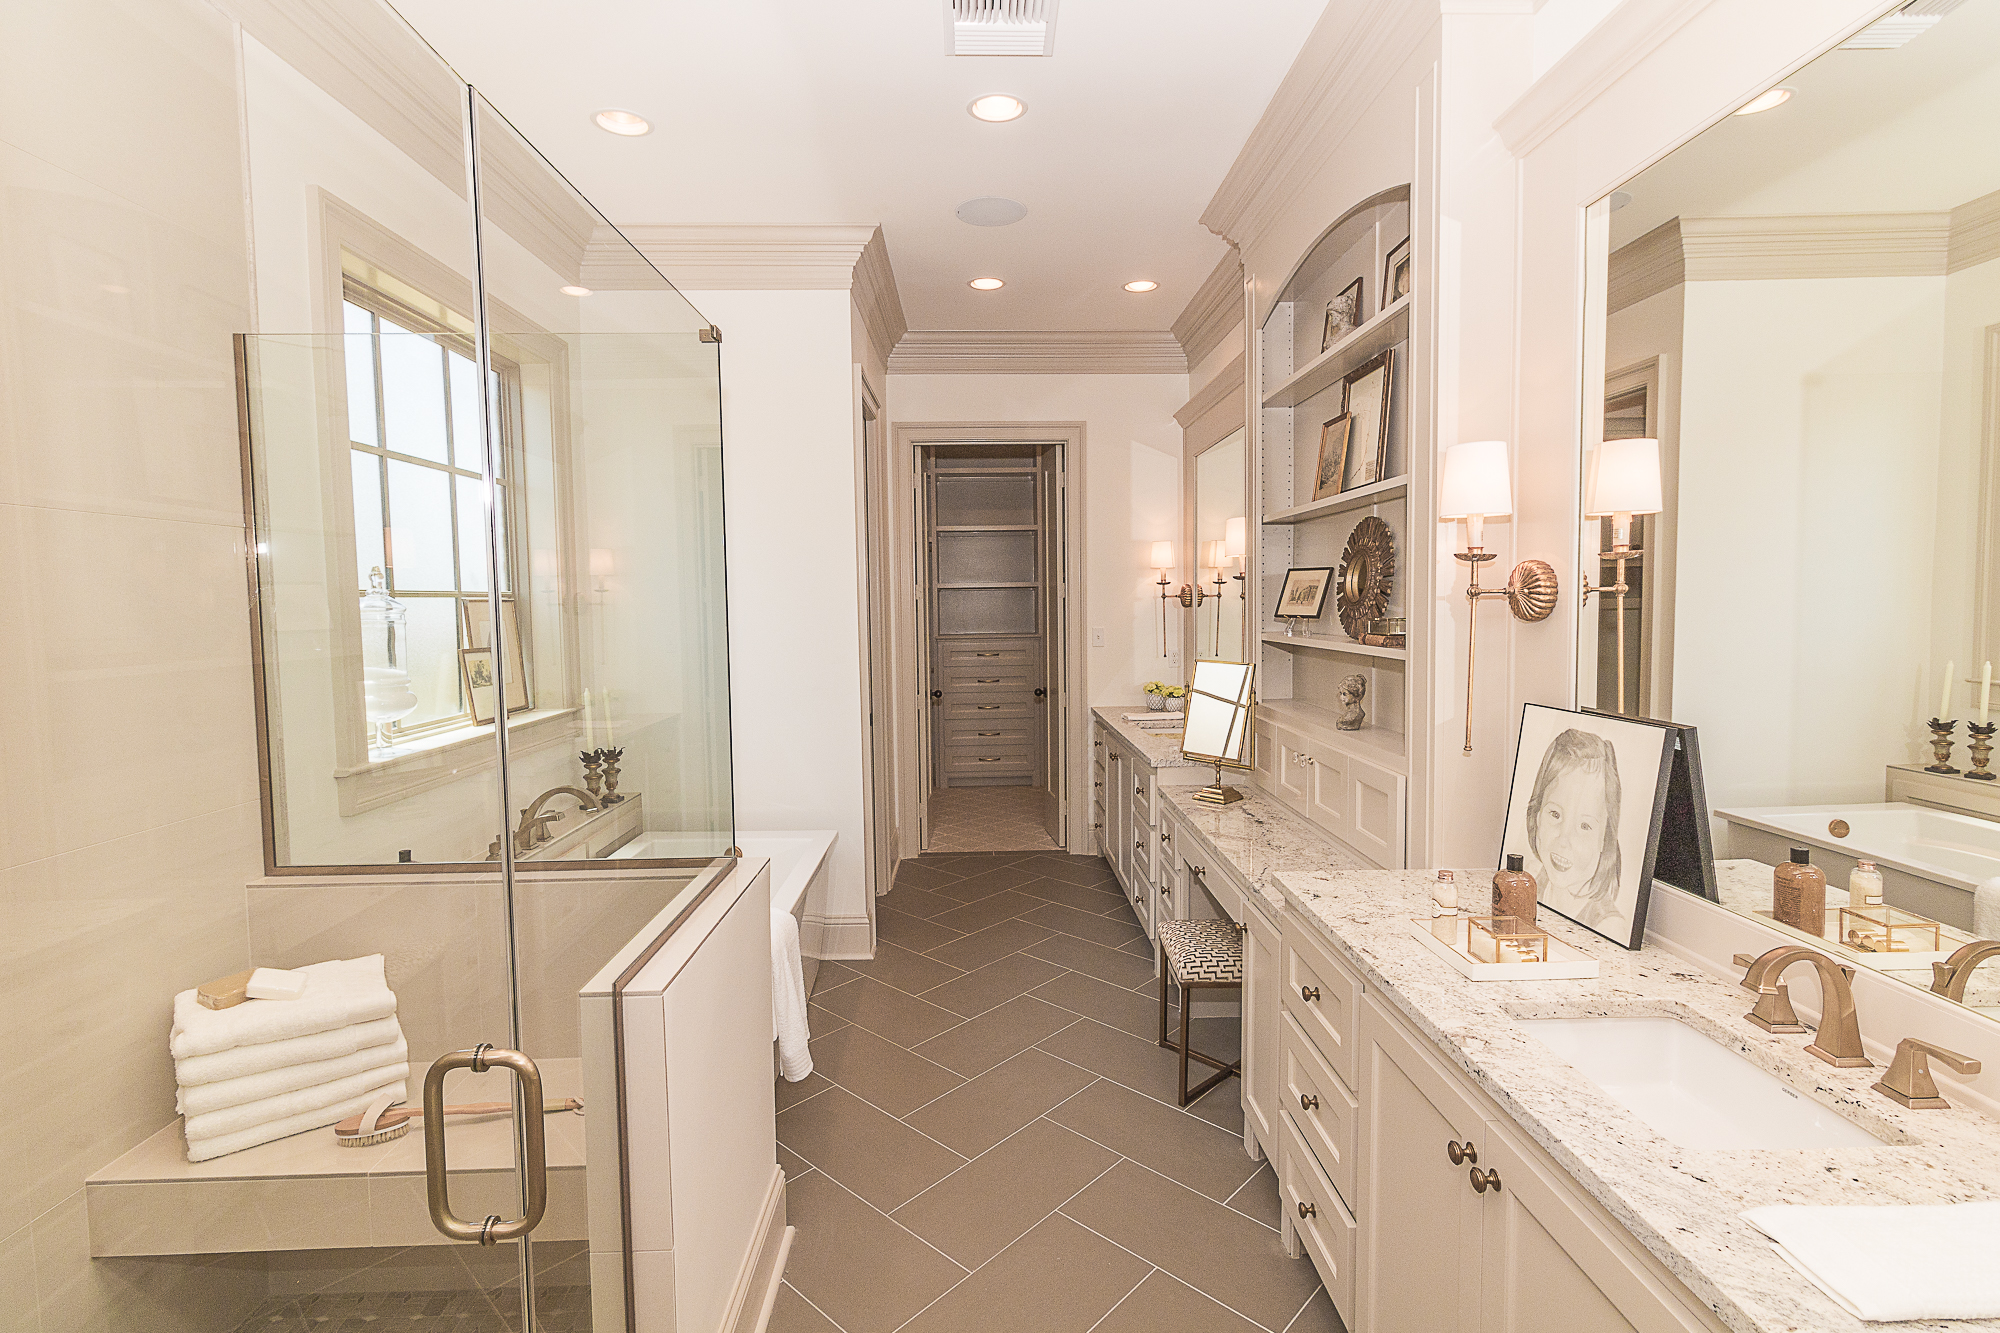
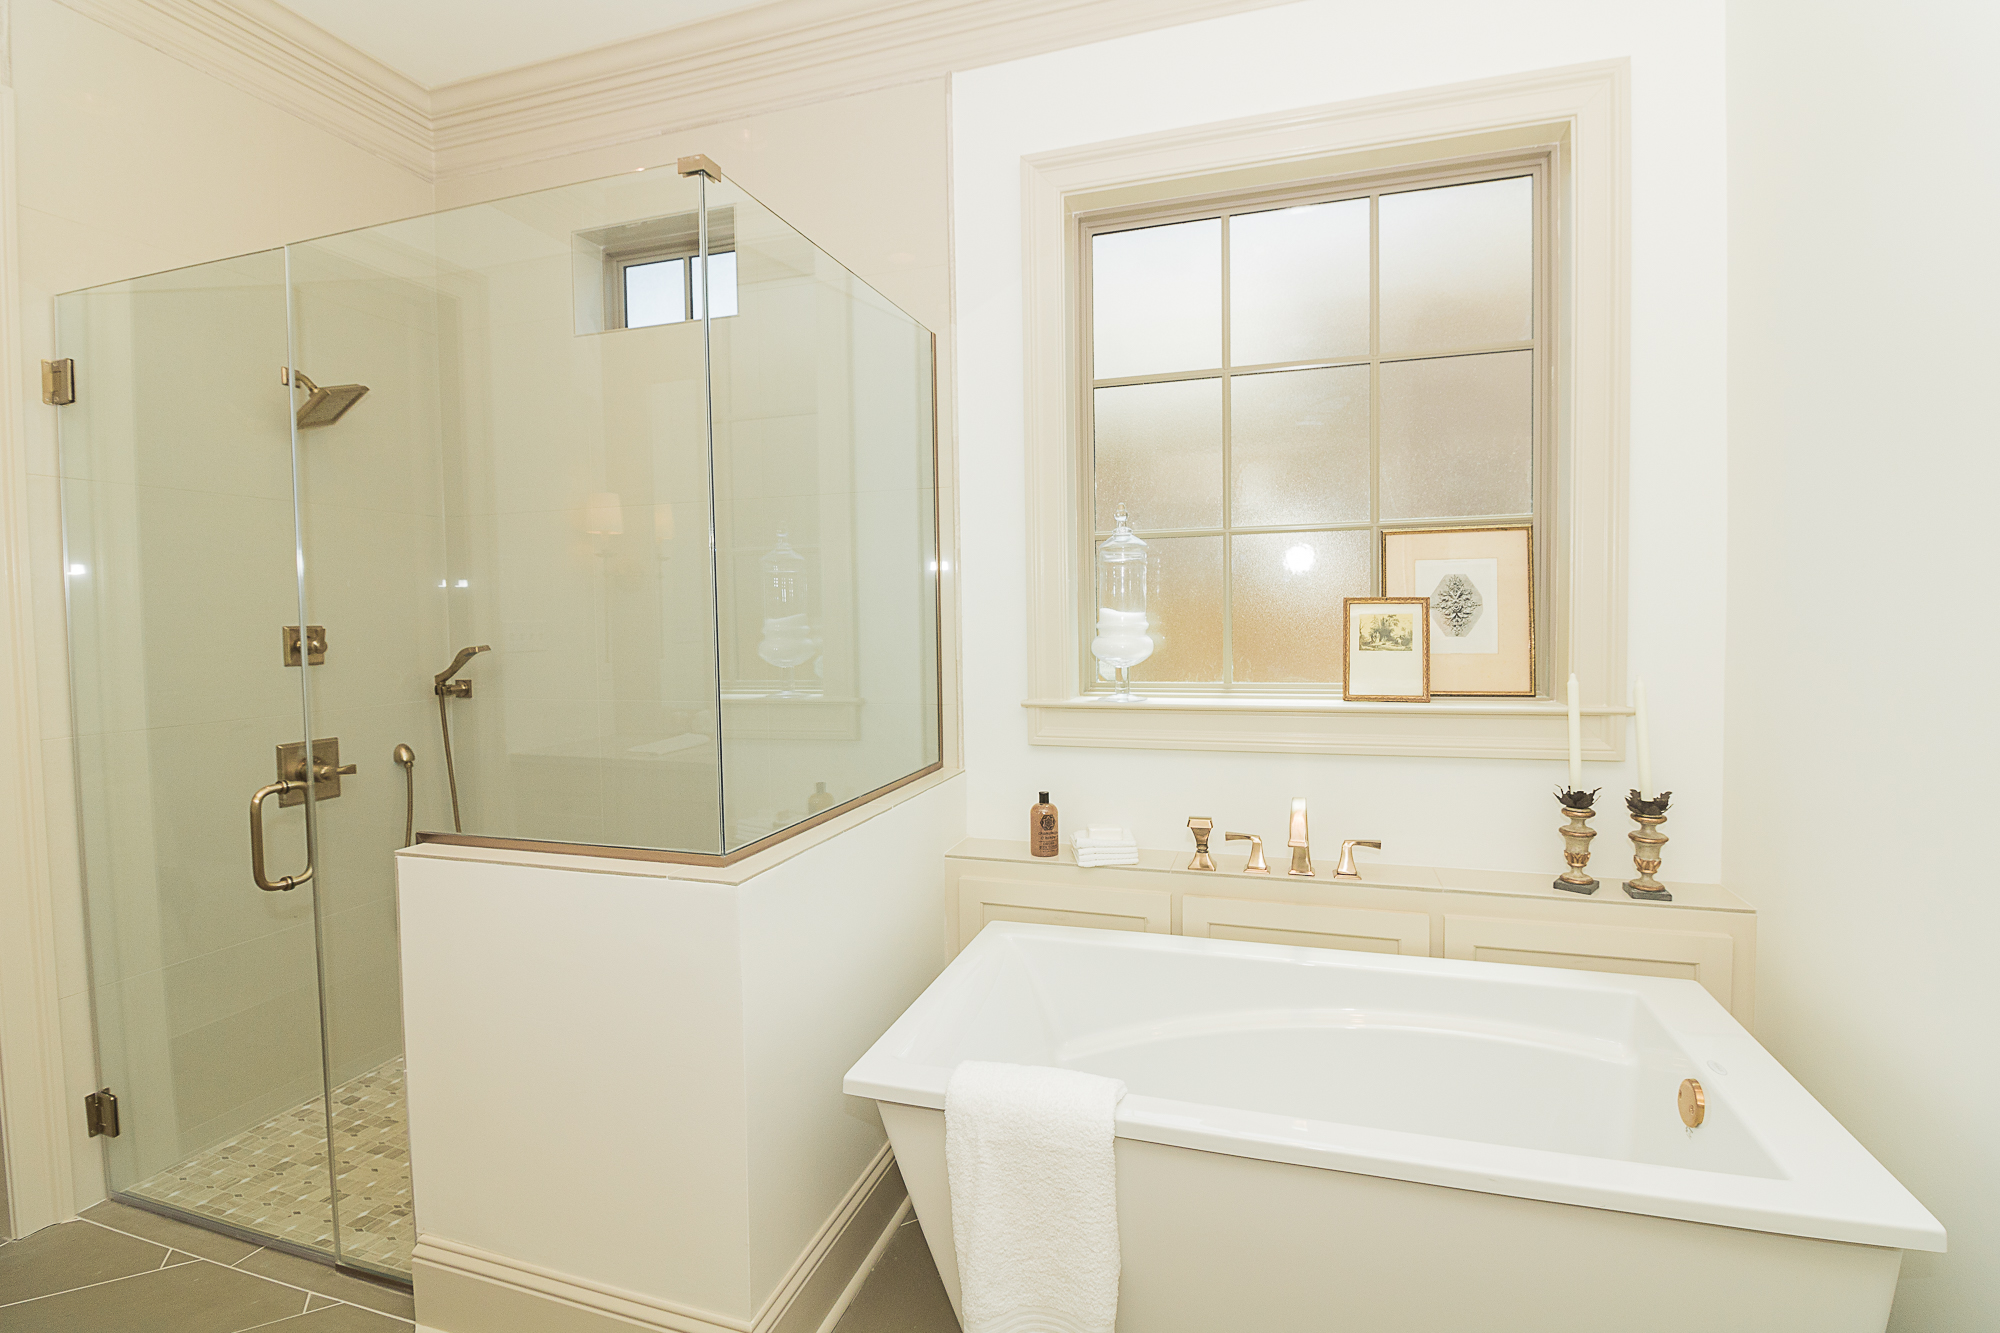
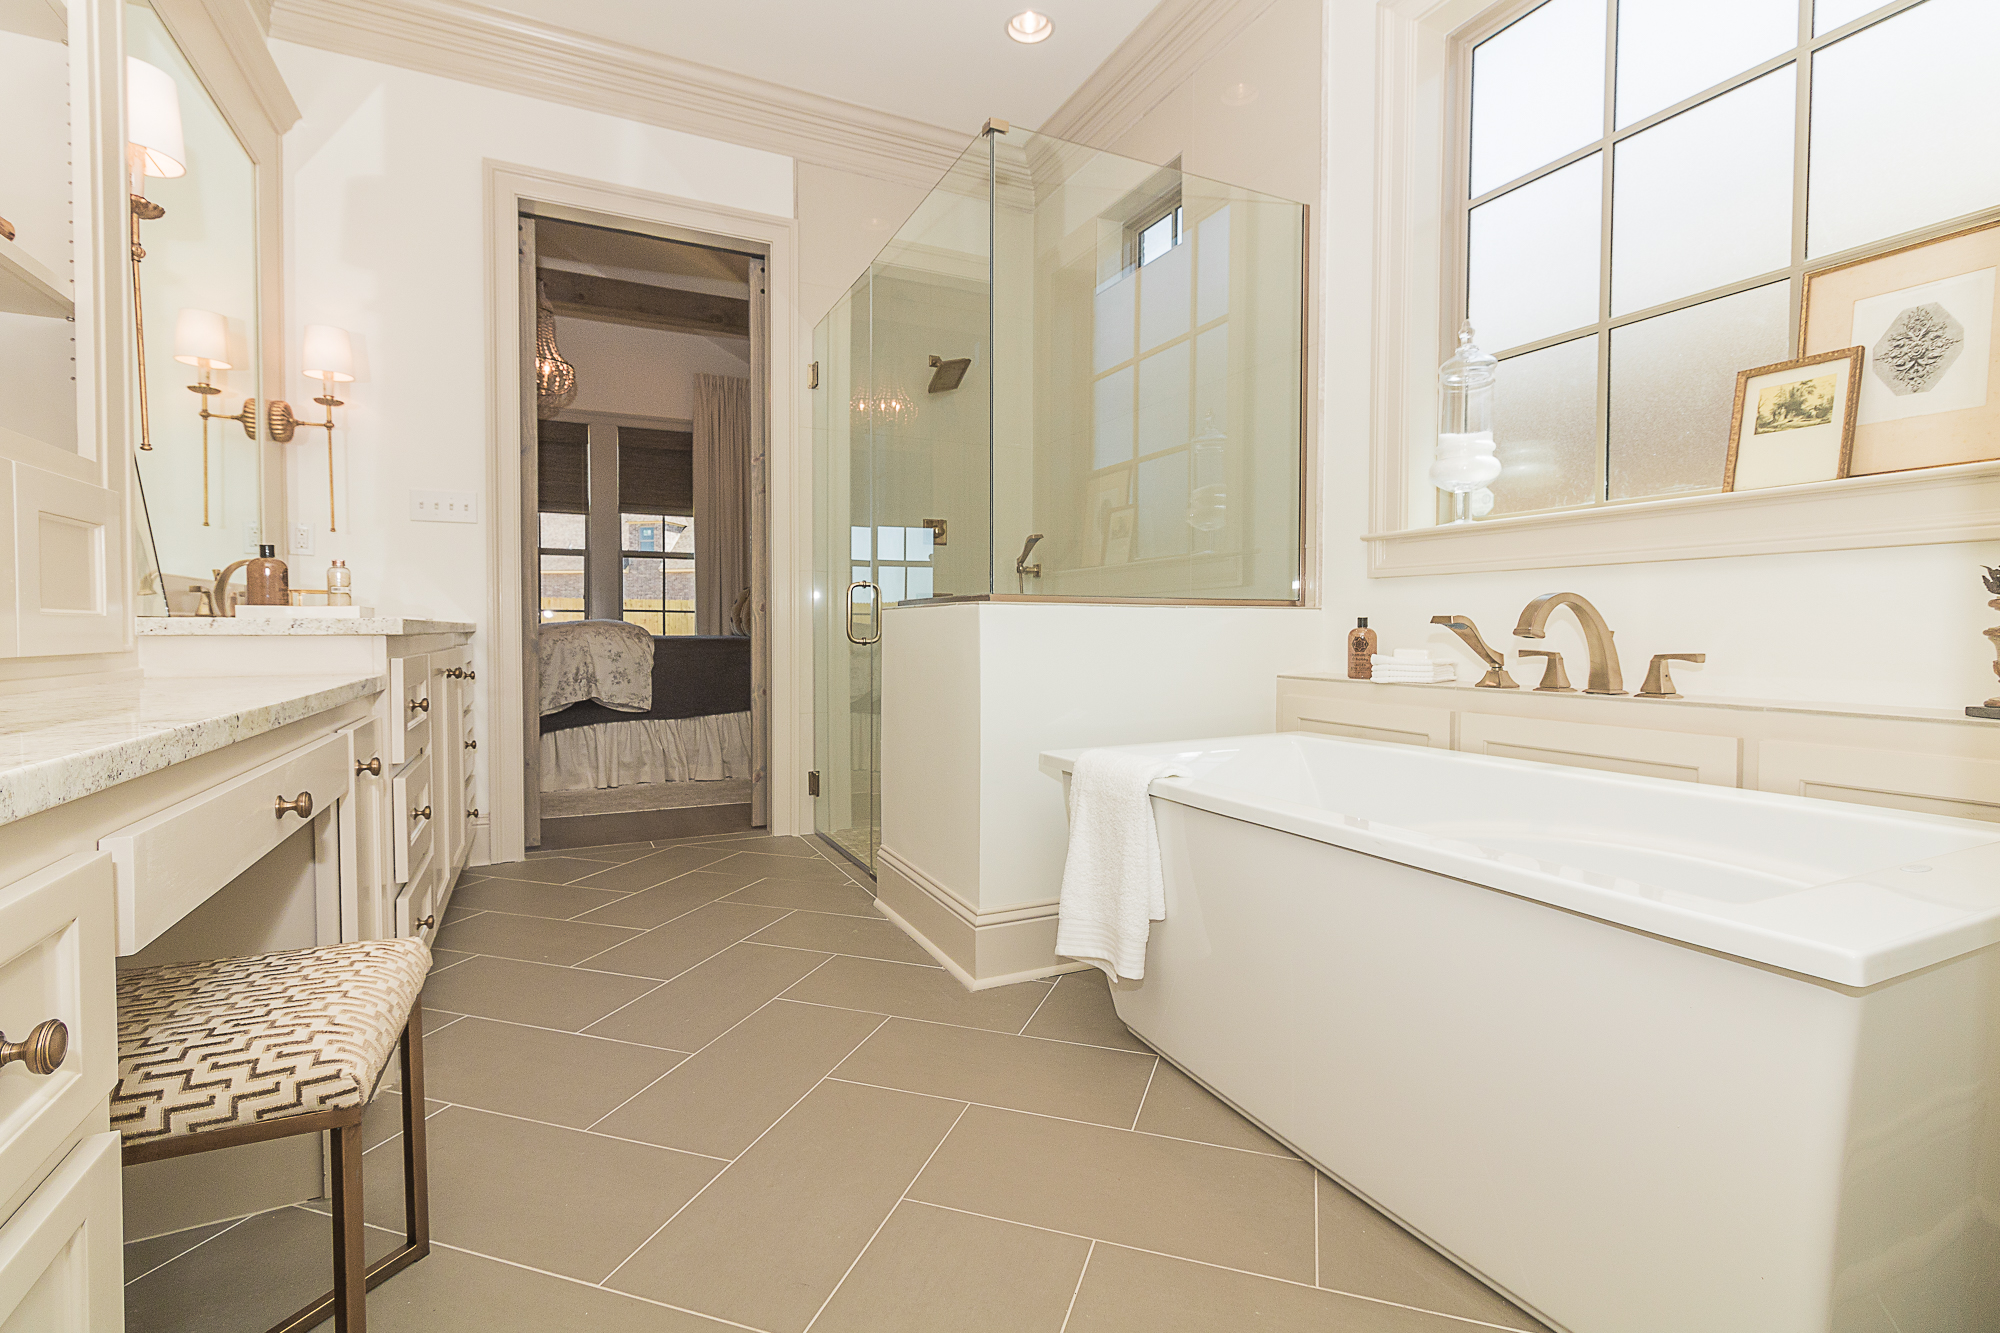
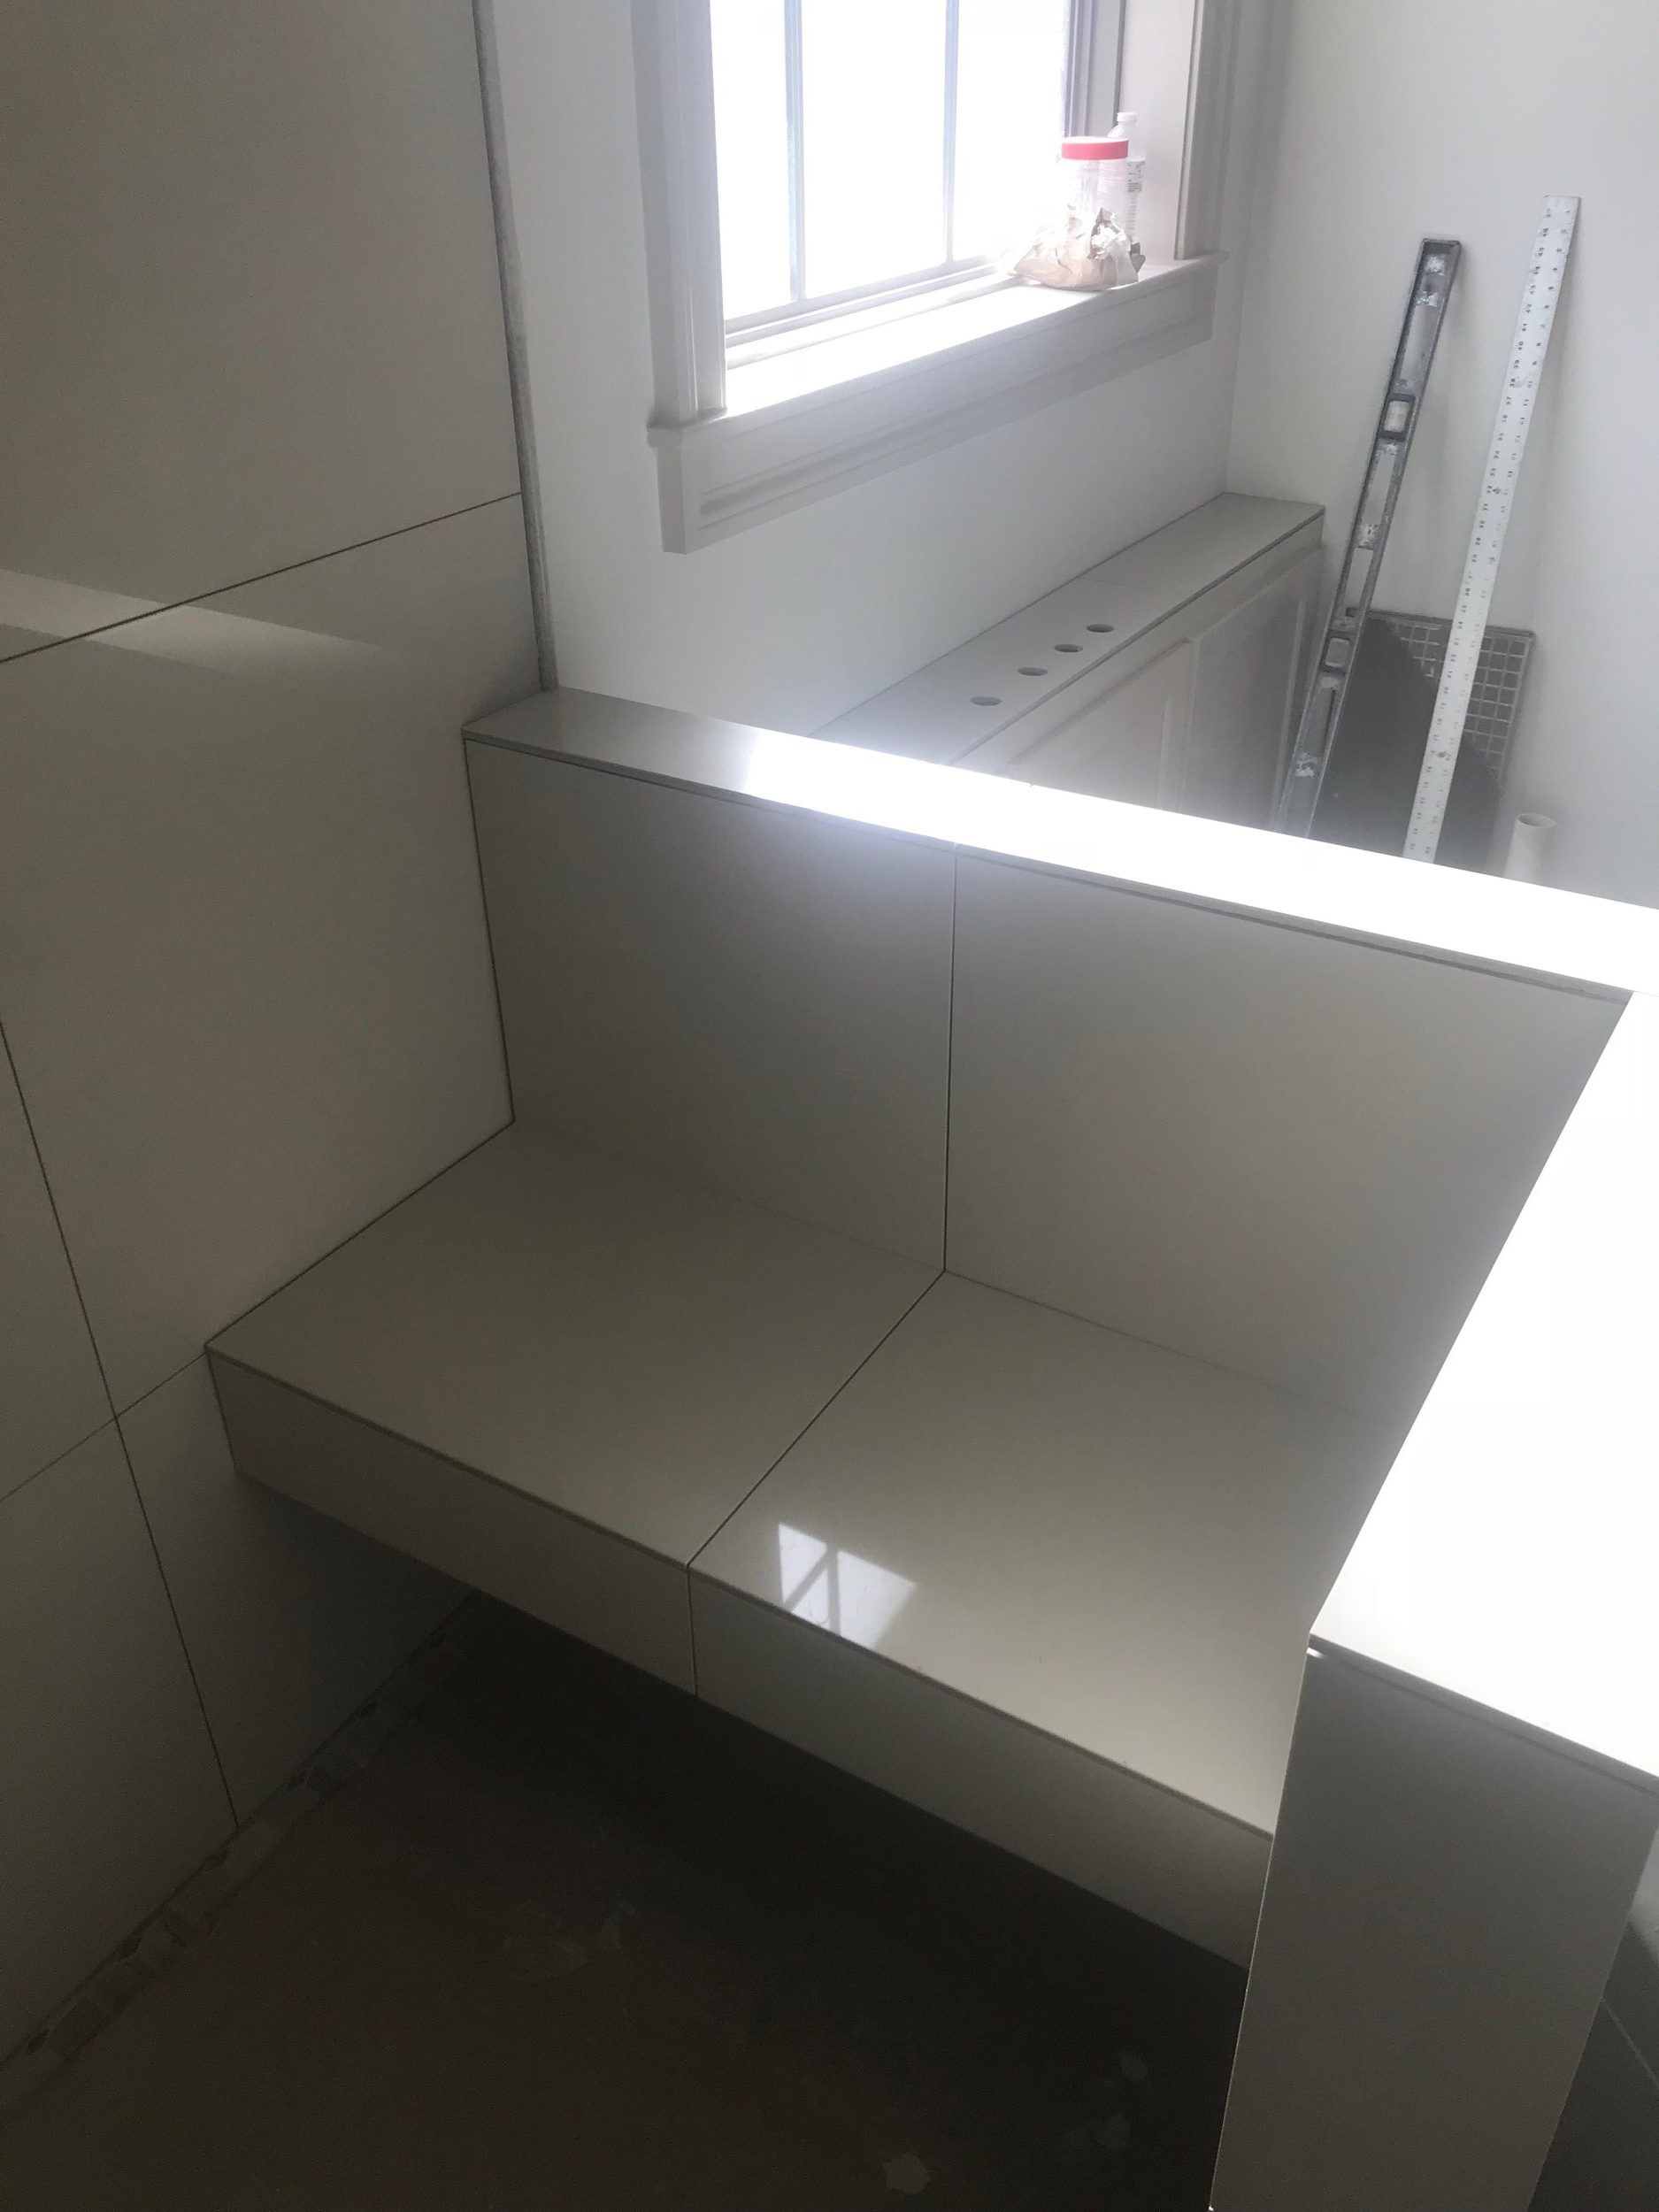
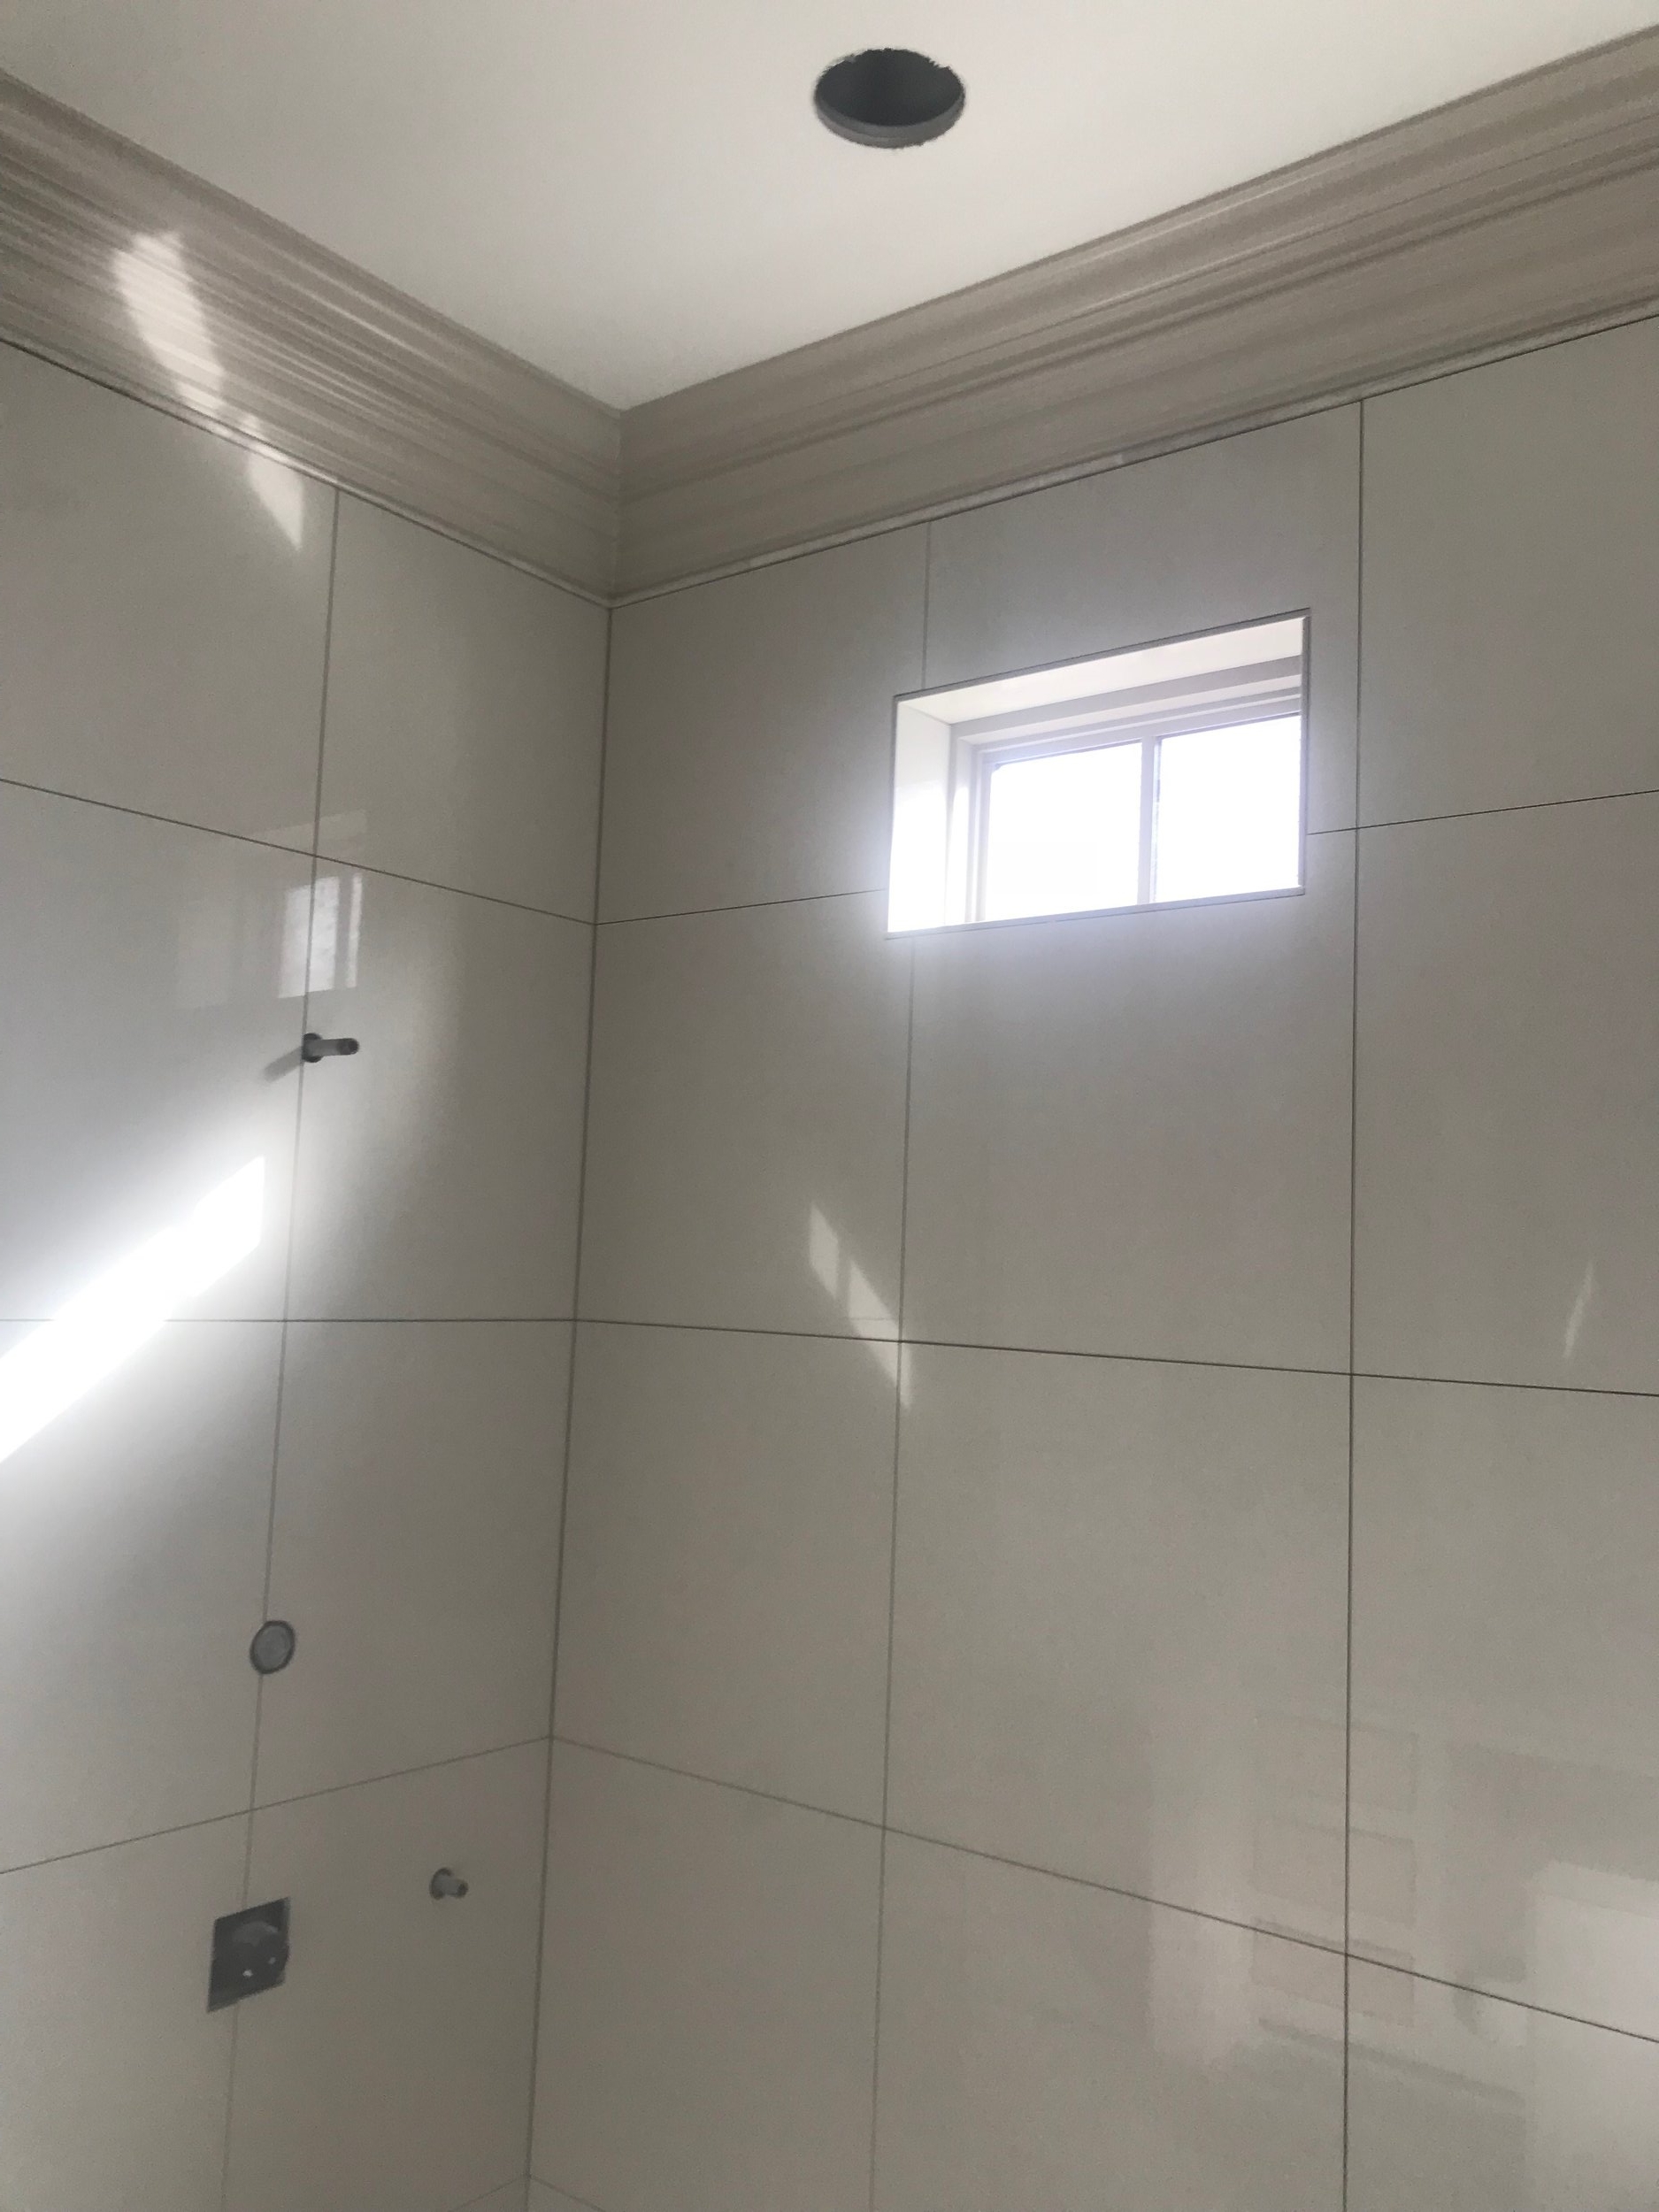
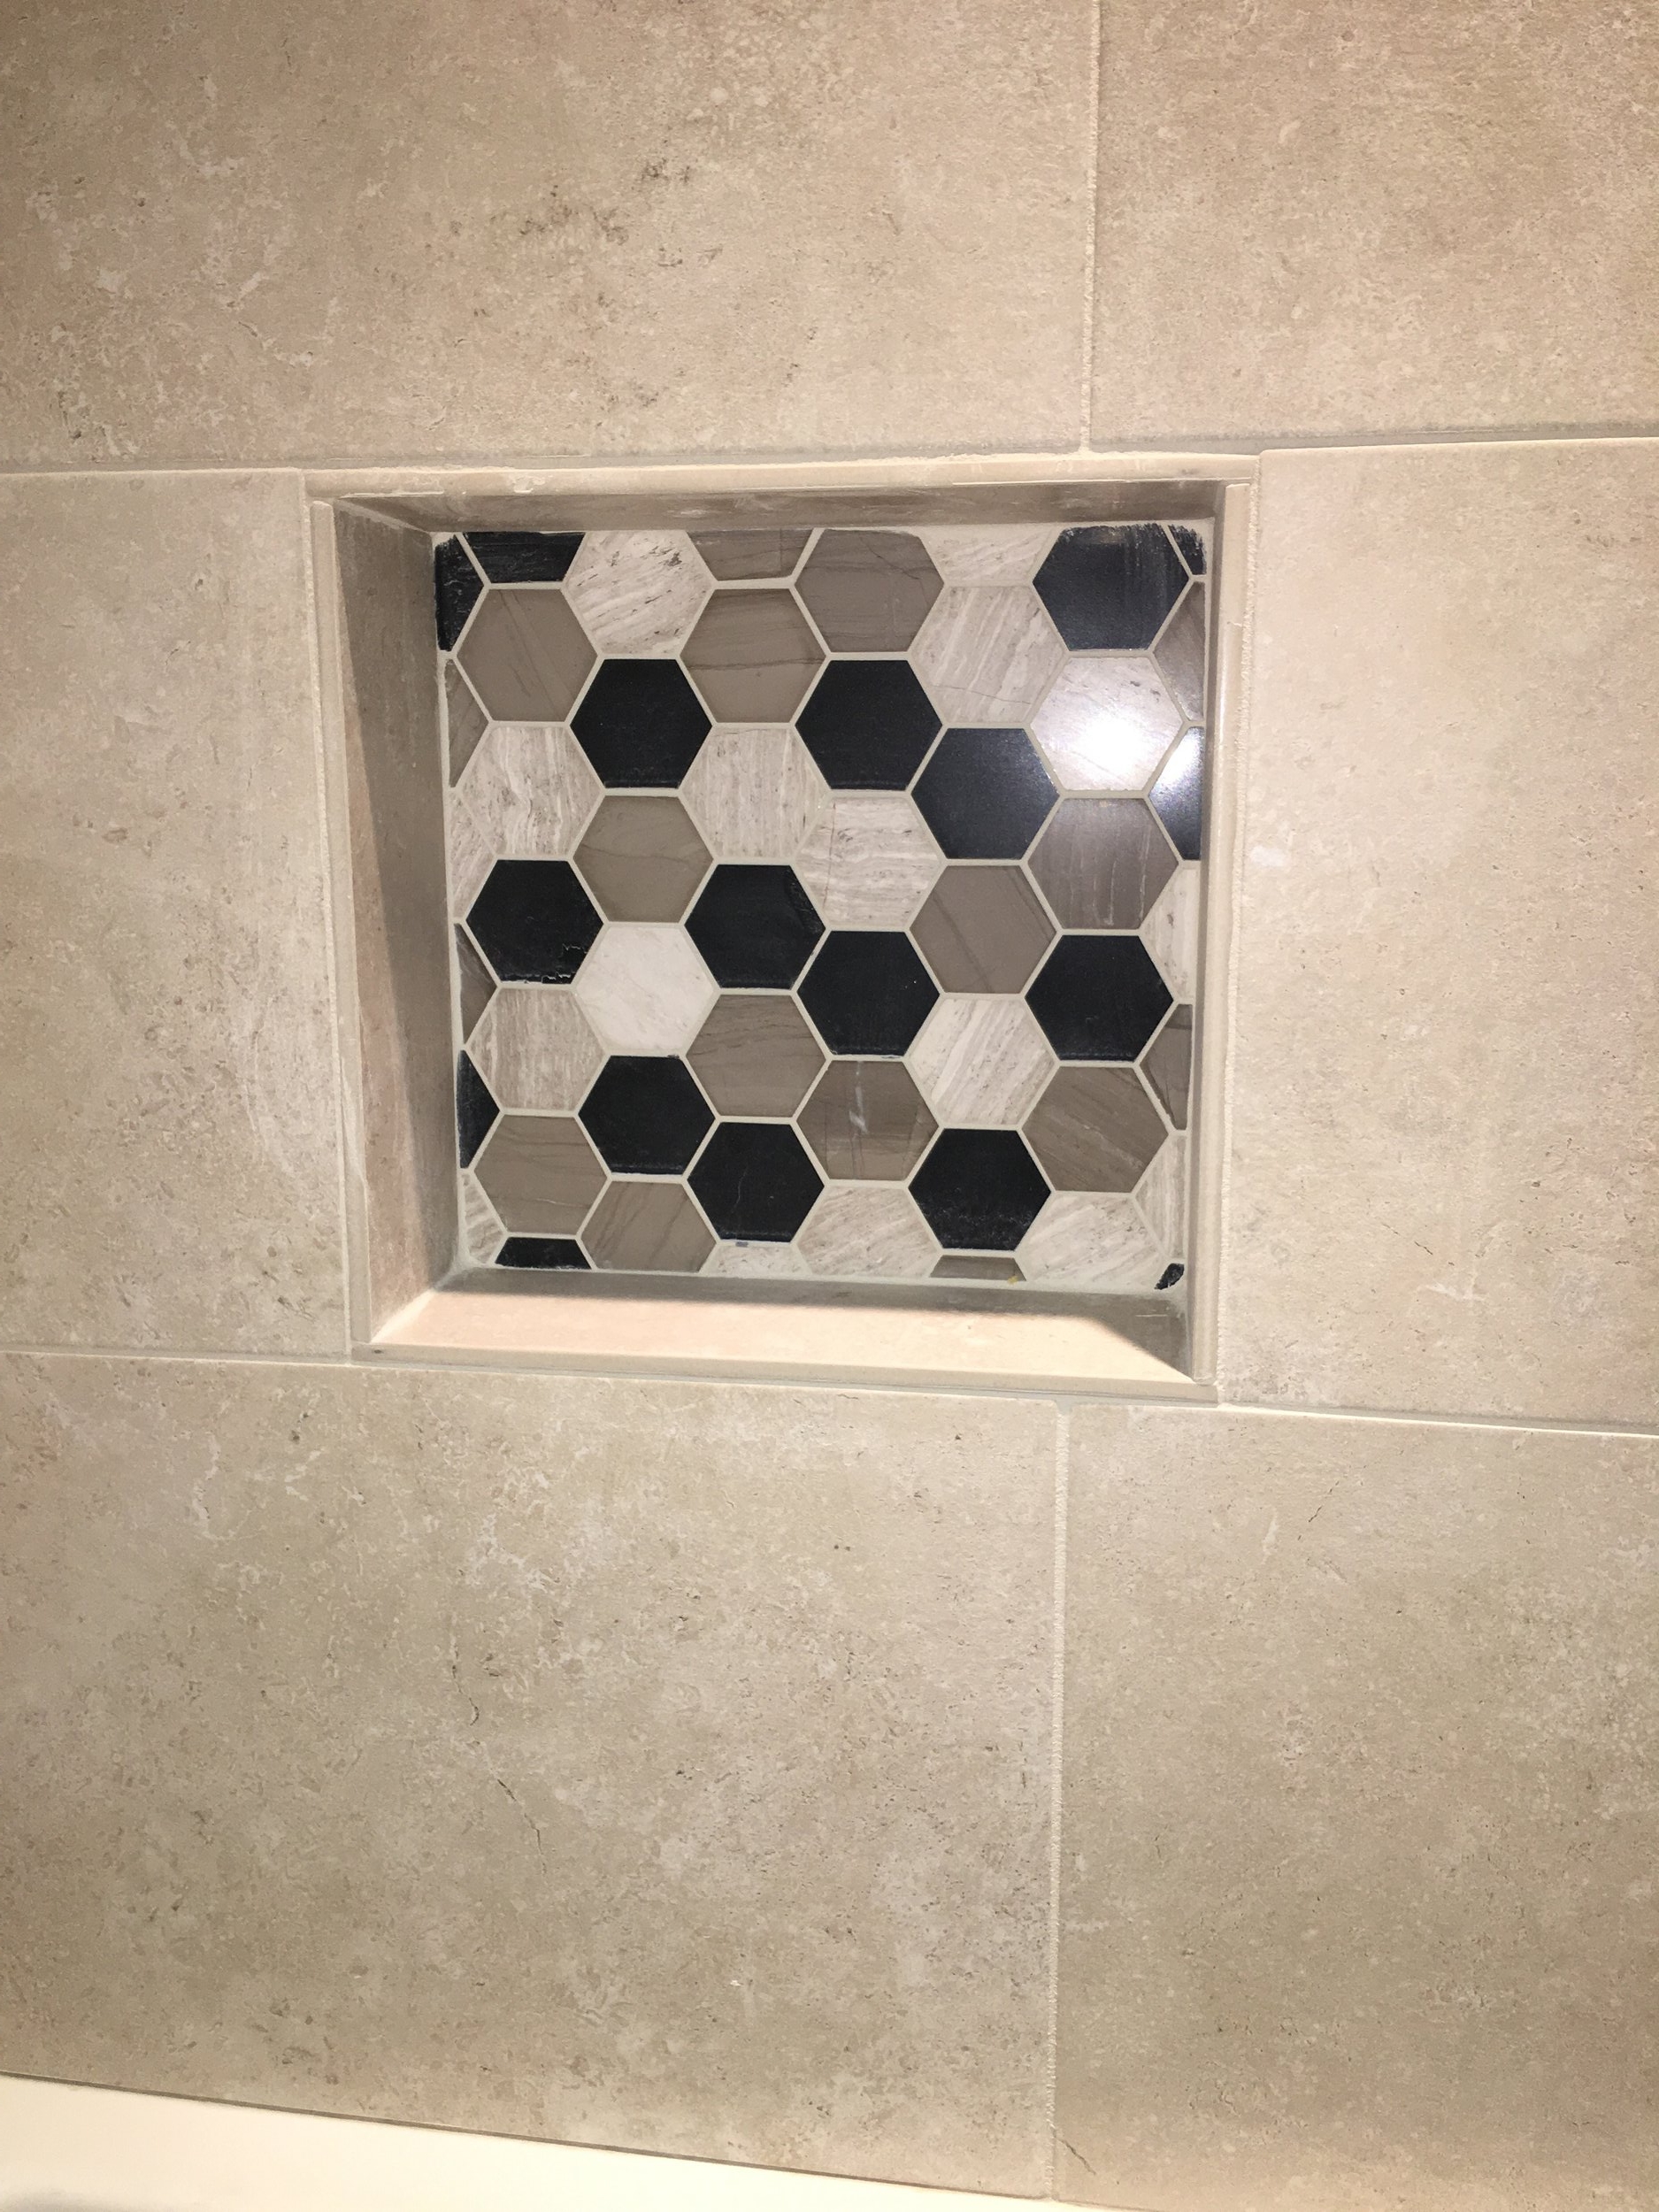
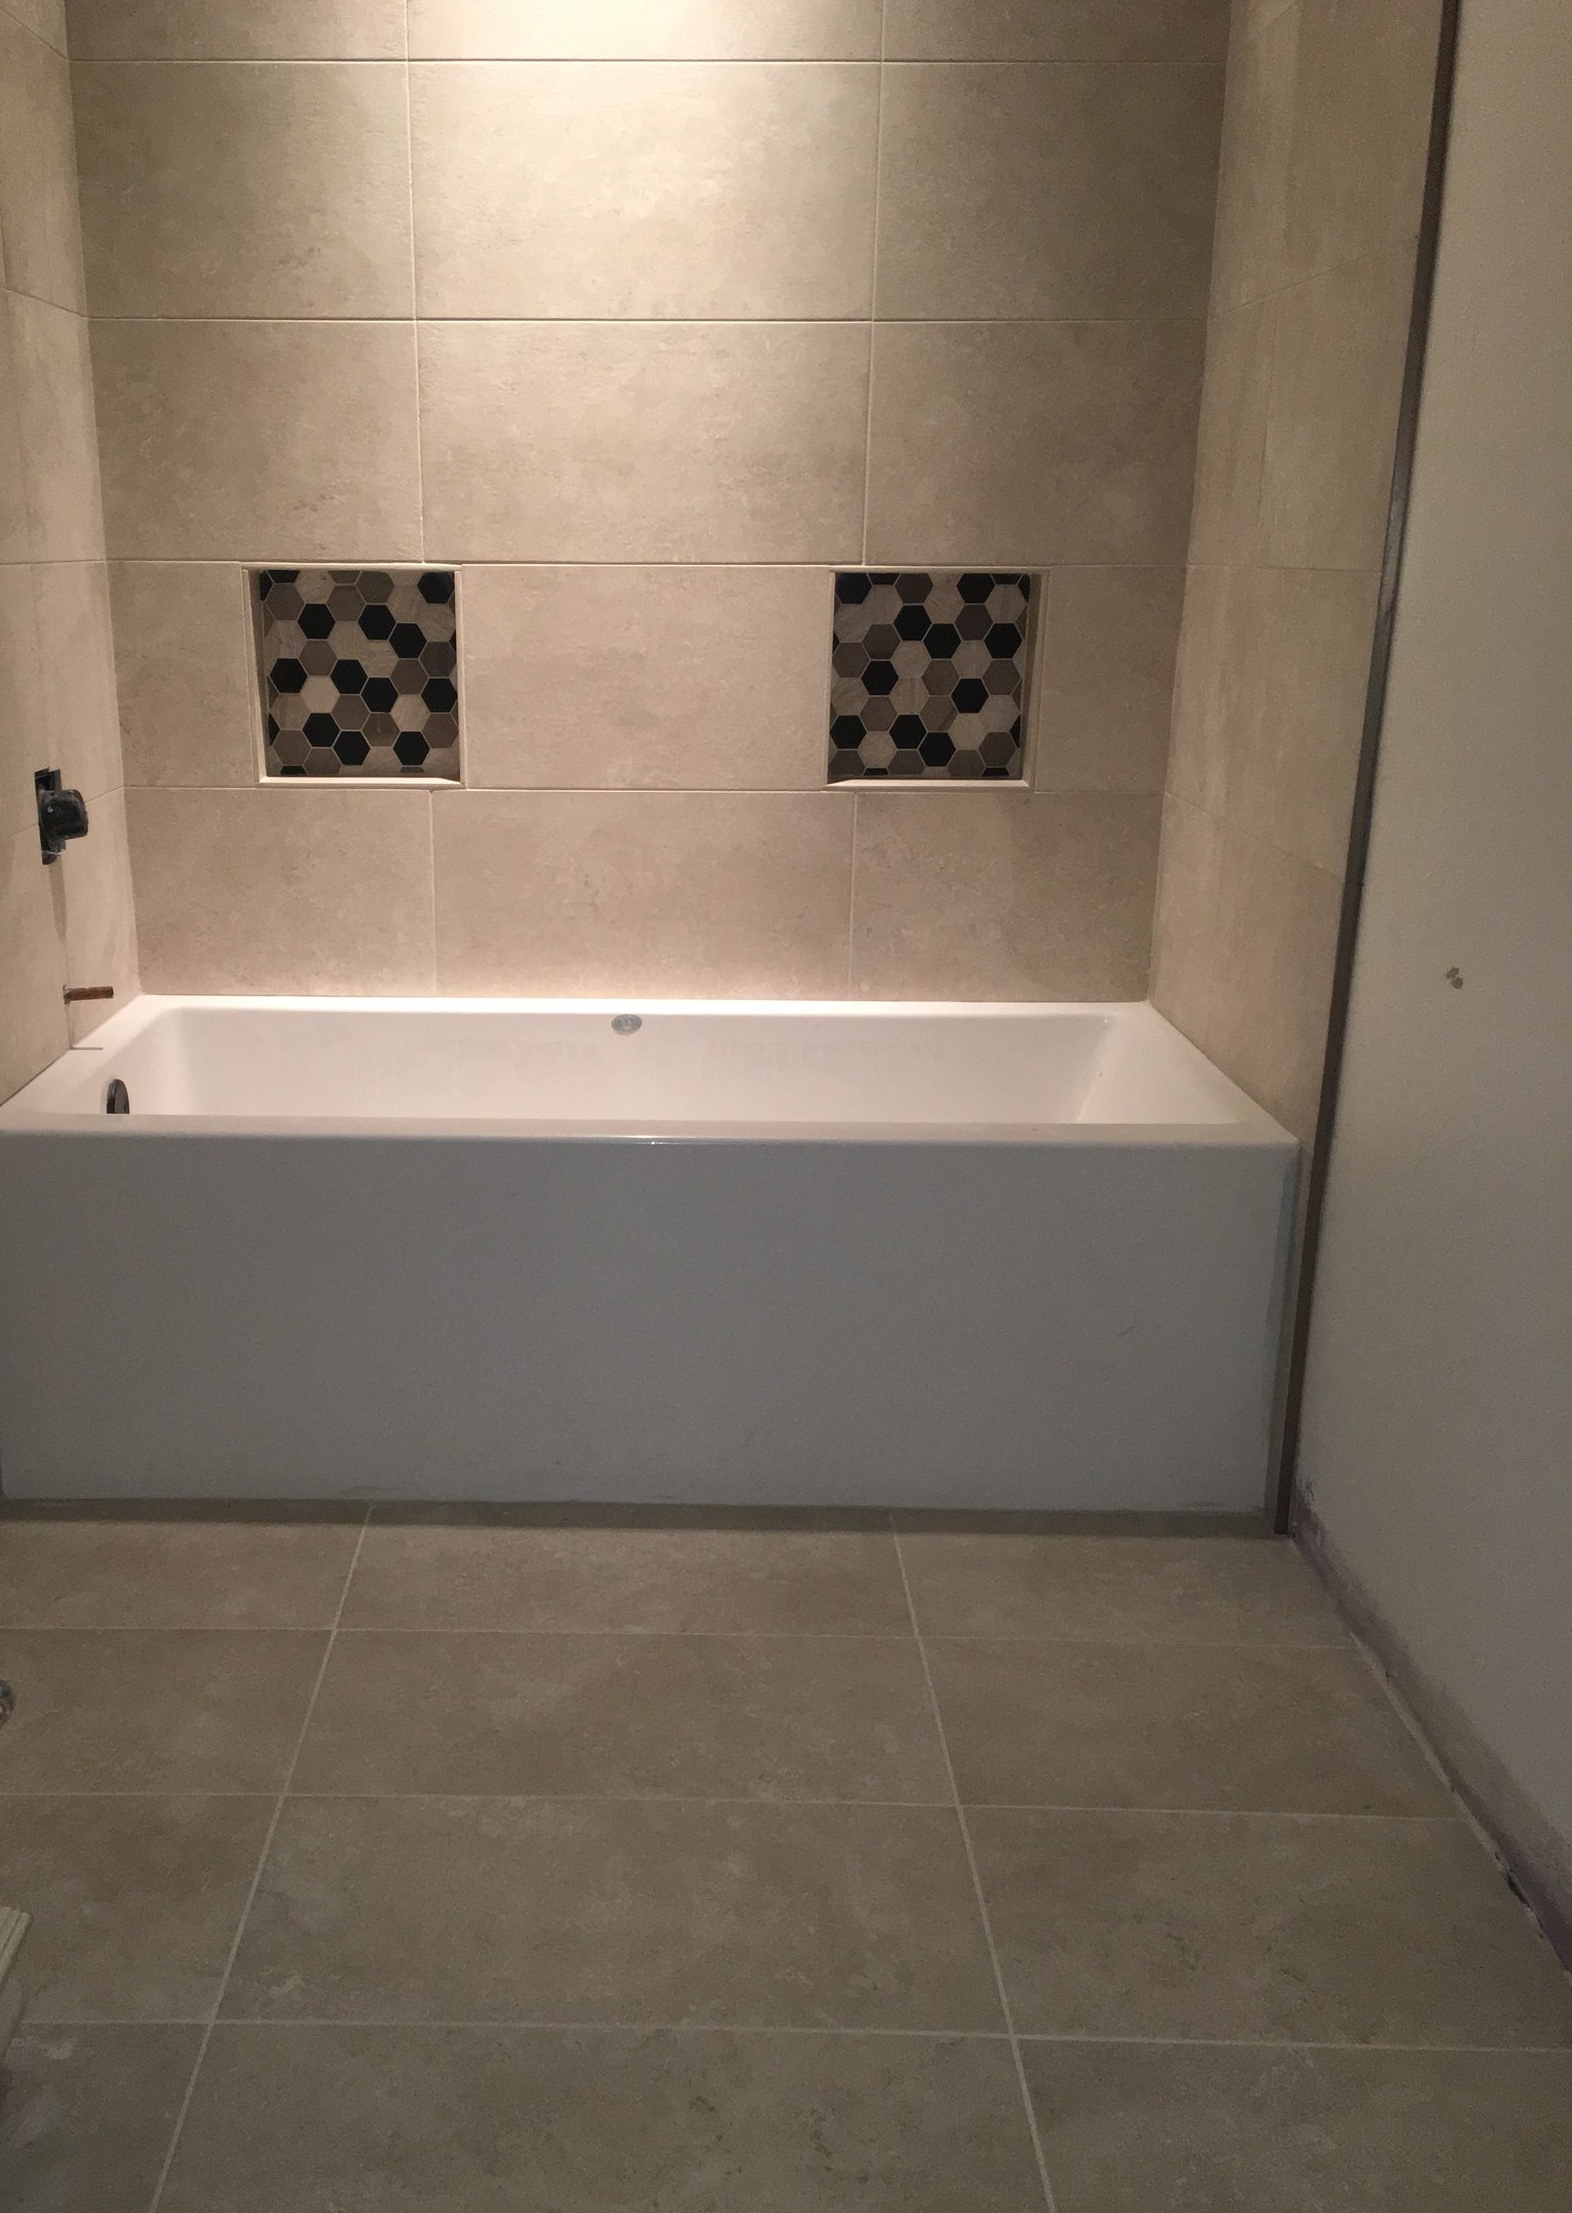
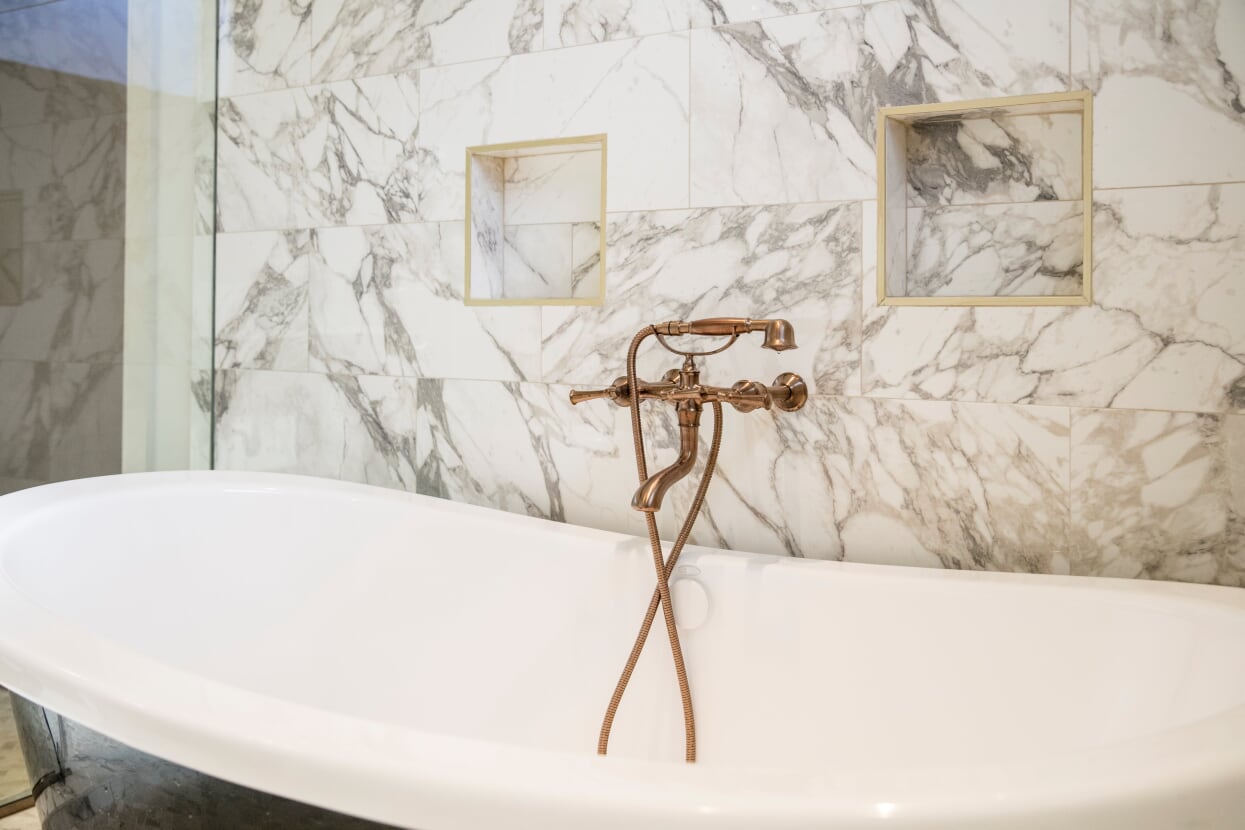
Now let’s move onto the masterpiece of this home!!! The master bath! Before these house plans were completed, Jamie and I had decided that the master bath needed to have something “extra”. We had the architect design a wet area (tub and shower combo), in order to make the master bath worthy of this luxurious home. The tiled wet area includes a beautiful, free standing tub and shower. The shower section includes a rain head and hand-held shower while the tub area includes convenient wall niches to hold soaps and candles. All of this space is enclosed by a wall of glass!

6.jpg
7.jpg
8.jpg
9.jpg

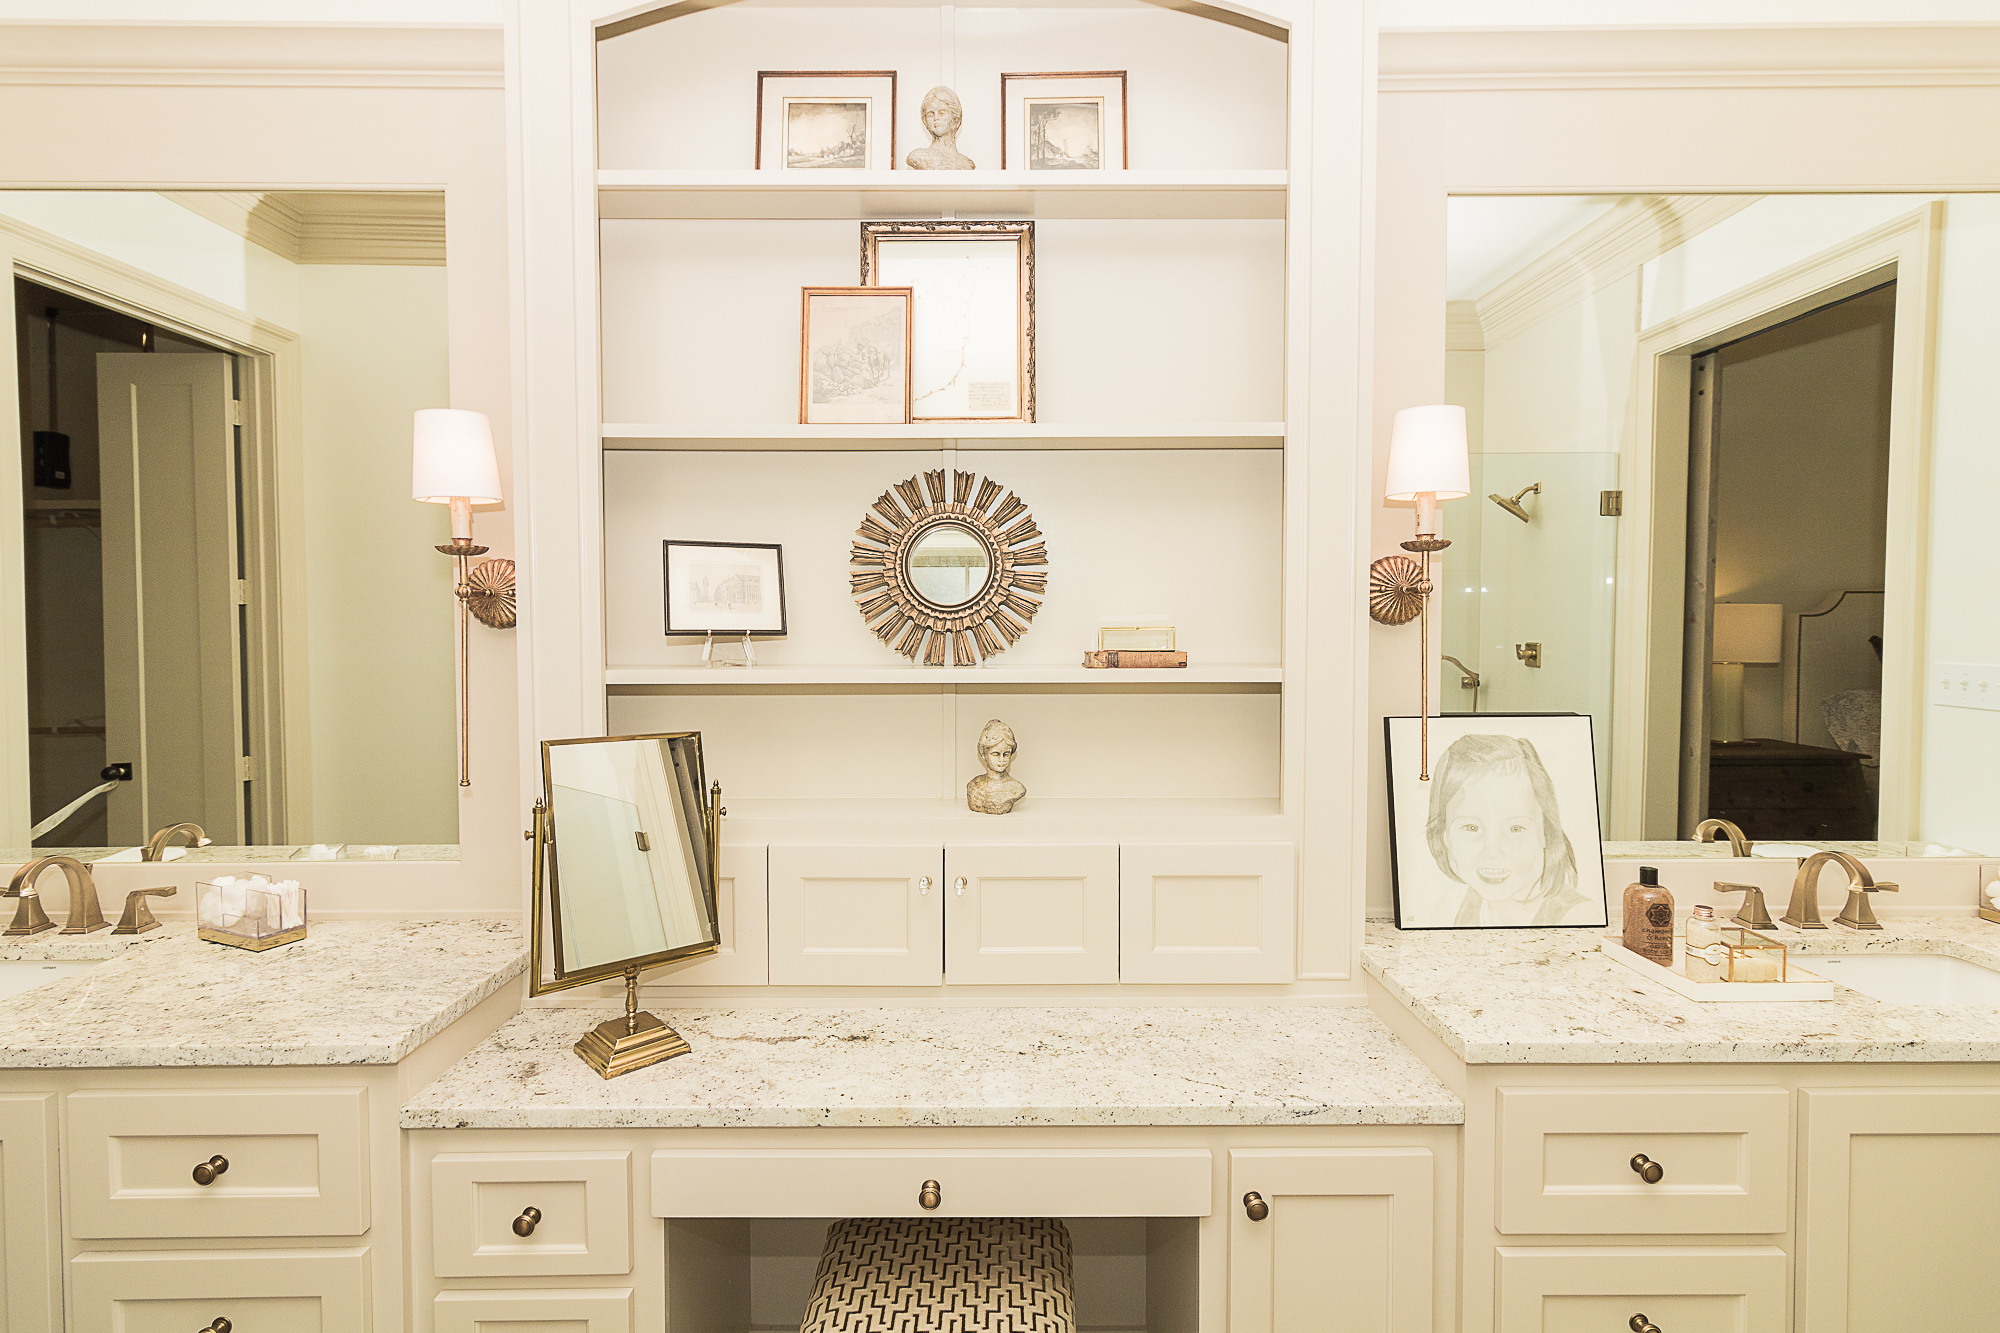
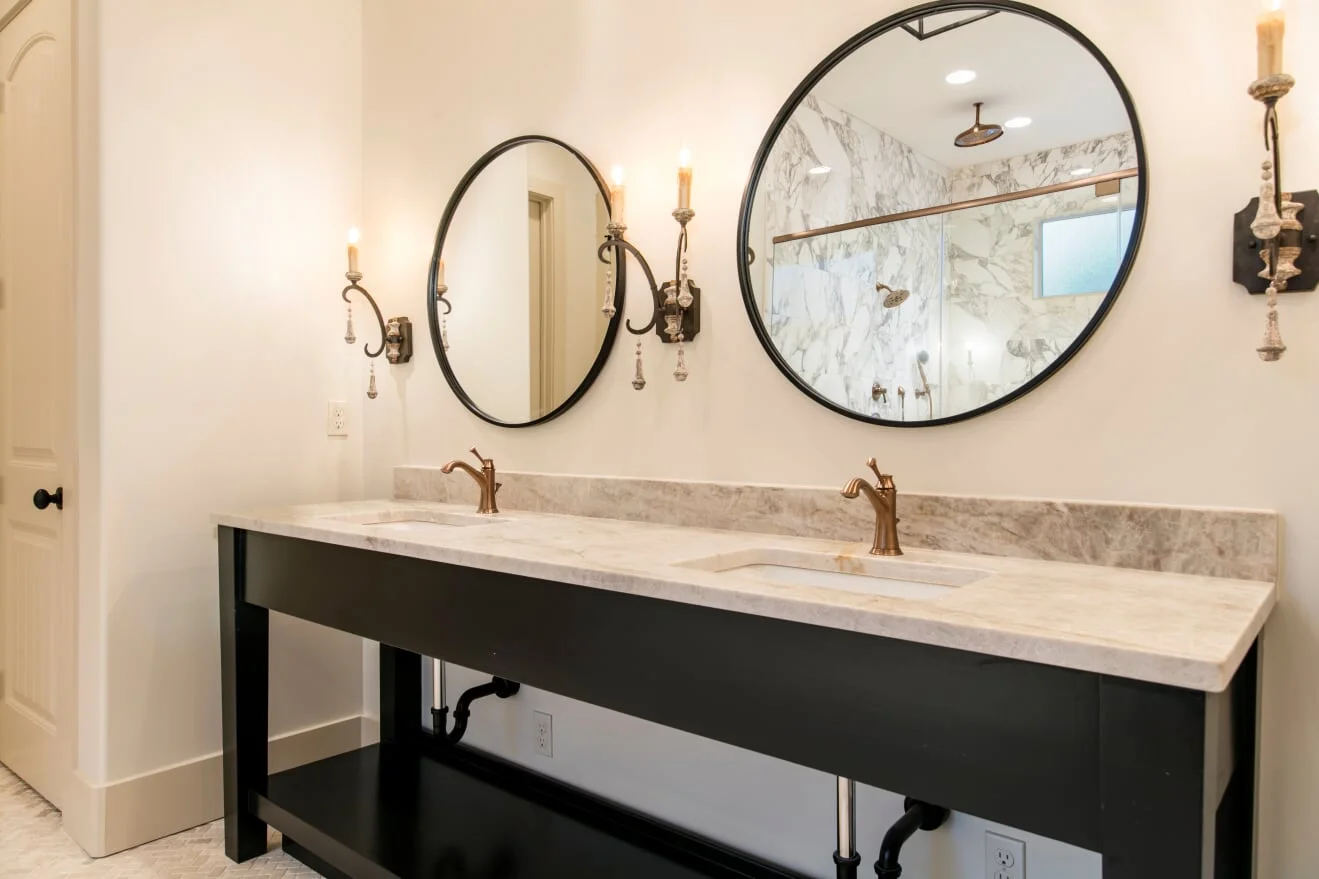
Across from the wet area sits the unique double vanity. The contrasting black paint color of the vanity compliments the black tub. The open shelving at the bottom allows for easy access to towels. Again, designer lighting beautifully completes this space. What a chic and luxurious master bath!!!

10.jpg
11.jpg

I hope you’re enjoying these posts! New construction is so fun… it’s a great feeling to see your thoughts become a reality! From dreaming of these spaces to being able to actually walk through the finished home is an incredible feeling. If you’d like to personally view this beauty, give me a call!

IMG_7205 (1).JPG

Let's Talk Kitchens

Well hello again! I’m back after very busy holiday season! I hope everyone has had a wonderful holiday. My family and I thoroughly enjoyed our Christmas and New Years celebrations, but it’s time to get back to work!! I have tile and granite to select, paint colors to choose, staging to get done and houses to sell!

Let’s start off by revisiting my luxurious co-listing in the prestigious Vineyard Subdivision.. This beautiful home is built by Eagle Nest Custom Homes and is available for sale. I recently had this super detailed home photographed and want to share the awesome pics with you! Let’s start with the kitchen….

The large kitchen is beautifully framed by an arched opening to the living room. It is architecturally symmetrical with the hood vent centered with the island.

1.jpg

Above the island are two fantastic designer pendants which draw your eye to the detailed hood vent!

2.jpg

In keeping with the “Patina Farms” inspiration, we designed this custom hood vent using the antique beams which are found throughout the home. It was important to me that the notched details of the hood vent be visible in order to showcase the history of the beams!

3.jpg

Notice, the beams have also been added to the kitchen island as legs. This theme of warmth, history, and detailed craftsmanship is carried throughout the home. The full height Taj Mahal Quartz backsplash is just another detail found in this chef’s dream kitchen!!

The appliance package is high end and includes a counter depth refrigerator!!

The warmth of satin brass is showcased in the bridge faucet and cabinet hardware. High end, detailed appliance pulls adorn the paneled appliances.

7.jpg
detail 1.jpg

Speaking of cabinets, let’s look at these! Notice the details on the lower cabinets. We decided to add stain to the lower doors and drawer fronts with a rich, warm color. All of the cabinets are inset vs. overlay. Inset cabinets require super precise work and are usually not found in a spec home! As I’ve said in the past, Jamie Leger of Eagle Nest Custom Homes, builds CUSTOM SPEC homes so I’m not surprised that he included this detail :)

8.jpg

The walk in pantry is enormous and includes tons of storage. The counter-top is made from reclaimed wood and includes an appliance area. This area is designed to act as a butler’s pantry in order to hold small appliances so that your kitchen counter-tops remain clutter-free!

Large compartments were left open to hold water bottles and such.. So much thought was put into this area to maximize the functionality!!

9.jpg

I hope enjoyed reading about the details of this kitchen! If you’d like a personal tour of this home contact me!!

Next up… bathrooms!!!


Catching Up...

Wow!! I’m back! A lot has happened since my last blog post on June 18th.. Things have gotten a little crazy as you will see later on in this post. I’m going to really, really try to get better about posting regularly here! I’ve had numerous people tell me that they miss the weekly updates. It appears that you find my blogging informative and somewhat educational.. I’m hoping that I can keep entertaining you as well as teach you a little something about the building/decorating process.

———————————————————————————————————————————————————————————————————————————————-

So far the biggest change to my business has been the addition of “Realtor” to my job title!

I decided to get my real estate license recently and let me tell you… it wasn’t easy! I thoroughly enjoyed attending the Burk Baker School of Real Estate & Appraising. Mr. Burk Baker is an icon in the Real Estate world- he’s an entertaining story teller and truly made the 2 week class fun!

I met some wonderful new friends there… Erin, Blake, Charlotte, Christy, and Lexi were my study buddies! I’m happy to report that we are all now licensed real estate agents in the Lafayette area. I’m SO excited to be a part of the District South family. District South Real Estate Co. just celebrated their one year anniversary. It’s a fresh and innovative group that is LOCAL. That was important to me when I was selecting an agency. I love Lafayette as much as they do and they have welcomed me with open arms!!

Please keep me in mind if you decide to buy or sell. I truly feel that my design background can help you see hidden potential in the buying process as well as provide valuable services to ensure a quick sale when selling your home!

Now on to the fun stuff…..

My last post referenced a new spec home that I’m privileged to be working on. This home is located in the prestigious “The Vineyard Subdivision”.

This subdivision is centrally located in Lafayette, next to St. Thomas More High School, as well as numerous shopping centers and hospitals. My inspiration for the home came from “Patina Farms”, a favorite book of mine by the incredibly talented Brooke Gianetti. Jamie Leger, Eagle Nest Custom Homes, is the super attentive builder. If you followed along in my last blog series, you know that Jamie and I like to call our specs “custom spec homes” because there is so much thought and detail put into these homes that most people assume they are custom builds.

We’ve put gorgeous old beams through the house.. These pictures show the massive beams in the living room area.

We’ve incorporated a beam in the bathroom. We will hide the shower curtain rod behind the beam- how cool!!

Old doors are incorporated in the house too! The patina on these barn doors is amazing- TRULY authentic!

This pile of antique wood was installed on the ceiling in a few rooms to create a warm and unique treatment on the “5th” wall!

We were also able to utilize antique beams in the kitchen hood-vent as well as incorporated into the kitchen island

Speaking of the kitchen, Jamie and I decided to stain the lower cabinets in order to capture the warmth of the ‘Patina Farms’ inspiration. We truly labored over the stain choice, there are so many options and ours had to be perfect!! I highly suggest you stain samples on the SAME wood that your cabinets are made of. Each wood stains differently so it’s imperative that you sample each stain.

The kitchen in this home is enormous with lots of cabinets!! Here’s a recent pic of the space with the electrician getting the proper height for the stunning island pendants. If you look closely, you can see the stained lower cabinets. This kitchen is a chef’s dream- as beautiful as it is functional!

I’ve shown you hints of the lighting on my social media, but let me tell you…. it’s amazing! The lighting budget for this home was very appropriate for the high end neighborhood and believe me when I say I spent every penny of my budget, lol! Here are just a few samples of the beautiful ‘jewelry’…

As you can tell, this home is filled with details galore!! Next week I’ll give you all the scoop on the super special master bathroom! I’ll also go over the counter-top and tile selections. In addition, I’ll show you the wonderful outdoor water feature.

This ‘custom spec’ will be move-in ready in just a few weeks! I’m in the process of scheduling professional pictures and video for Real Estate marketing materials. In the meantime, here’s an iPhone pic of the exterior with the newly planted landscape. If you or anyone you know would like a personal tour of this beauty give me a call!!

Sorry it was a long one, but it was fun catching up with you all! You can always follow along with me on Instagram (paigegarydesigns) or Facebook (Paige Gary- SOLD by Design). It’s a great way to see quick stories of all my projects!! See y’all next time :)


Inspiration

Welcome back!!

I’m often asked “where does your design inspiration come from?” My very simple answer is “everywhere”! I know, I know...what a boring answer, but it’s so true. Just the other day I designed an entire room in my head by simply admiring the gorgeous sunset. I recently recognized the most stunning and unique blush pink color in the center of a blooming flower. I try to tour as many open houses, show-houses, and parade homes as humanly possible. I receive and pour over just about every decorating publication out there from House Beautiful to Veranda; my current obsession is Atlanta Homes & Lifestyles. However, my very favorite inspiration comes from my list of daily blogs that I read each morning with my cup of coffee. I’ve been reading blogs for about 7 years now and I have to admit that I feel like these decorators are now my friends. I’ve read about their personal home designs as well as their amazing client projects. These design bloggers are located throughout the United States and truly offer the most current look into trends and new ideas in the decorating world. It’s the easiest and best way to stay ‘in the know’!

One of my favorite bloggers is Brooke Giannetti of Velvet & Linen. Brooke is an interior designer and her super talented husband, Steve, is an architect. They recently designed and built their personal home in Ojai, CA called ‘Patina Farm’. They’ve chronicled the process on both her blog as well as a beautiful hardcover book!

6.jpg

When Jamie (Eagle Nest Custom Homes) and I started discussing our newest project located in the Vineyard Subdivision, I immediately recalled ‘Patina Farm’. It’s a wonderful example of a warm and inviting home.  There are so many design features that capture that feeling of warmth that I will use in the Vineyard home. Features will include old exposed beams, antique doors, tumbled limestone floors and arches, and a stone fireplace mantle

1.JPG
4.jpeg

Jamie and I have spent countless hours planning every detail of this home. We’ve incorporated a spacious appliance garage in the large walk-in pantry, designed a super detailed wine room and wet bar area for awesome entertaining, and added exposed wood details in the ceilings! The master bathroom will showcase our new signature feature...a wet room area which houses both the shower and tub in one enormous enclosed area! This is one feature that will blow your mind! I can’t wait to show you pictures of our progress.

5.jpg

We currently are finalizing our electrical walk through and will soon be adding insulation and sheetrock. 

2.JPG

The wood beams have already gone up and are stunning. I am already so proud of this home. Our New Traditional style rocks!!!

New Project!

Hi y'all!! It feels good to be back up on here :-) 

I'm so excited to share with y'all the details of a new project I'm working on.. Lafayette's newest upscale neighborhood seems to have taken off overnight! The Vineyard Subdivision is centrally located off of Ambassador Caffrey and Kaliste Saloom, just behind St.Thomas More High School. Jamie Leger (Eagle Nest Custom Homes) and I have, once again, teamed up to build a masterpiece for some lucky homeowner!

IMG_5422.JPG

As with our previous home, this house is being built as a spec home and is available FOR SALE! We felt like our 2018 Parade Home was such an overwhelming success and we couldn't wait to start our next super detailed project.. We were able to purchase one of the last lots offered by the developer! It's a fabulous corner lot with a backload garage... my favorite!! 

Something that Jamie and I like to do before building a home is to discuss who we feel our prospective homeowners will be so that we can make this home fit to their needs. Our thoughts are that the person purchasing this home will have middle school/high school age children, they will be established in their professions and will be empty nesters in the next 5-10 years. 

Jamie and I have decided to build a single story home with a fantastic outdoor patio and kitchen and a low maintenance courtyard! For you locals following my blog, the address is: 

100 Moondance, Lafayette, LA 70508

1.png

Feel free to drive by to check on the construction progress or park your car and come on inside! You are more than welcome to call me or Jamie for your own personal tour or if you want more details- be sure to continue to follow this blog series as I will take you along this journey of designing, building, and making selections for this stunning, custom, spec home!

I know... "custom" and "spec" should not be used together to describe the same home. However, our homes are so detailed and so well thought out that they are not a typical spec home. We like to think of our homes as all custom homes just waiting to be discovered and sold to the lucky home owner!

Check back soon as I begin to reflect on where I draw my inspiration and how I incorporate it into our "new traditional" style! 

A Recap...

All I have to say is WOW!! It has been a week since the AHBA 2018 Parade of Homes has ended and my voice is still recovering.. I feel like I talked to every single one of you; the AHBA has estimated a record crowd of 2,100! I am so overwhelmed by the overload of positive feedback and love that I have received during these two weekends! The common statement that I heard from those passing through the home was how "warm and welcoming" the house felt- and that makes my job so worth it!

I am so happy to know that you all loved this home as much as Jamie (Eagle Nest Custom Homes) and I do! As some of you may have heard, the house went under contract about a month before completion and the new homeowners recently closed on it. We are so excited for them and their new future in this lovely home!! 

As I promised, I had this showstopper professionally photographed by Sydney Martien Photography and am happy to share these beautiful photographs with you!

The Foyer:

As we discussed in an earlier blog post, the front door captured everyone's attention upon entering.. the glass and steel, modern masterpiece made a great first impression! 

As we discussed in an earlier blog post, the front door captured everyone's attention upon entering.. the glass and steel, modern masterpiece made a great first impression! 

The Stairs:

Visitors immediately noticed the detail of the stairs.. notice the spindles attached to the underside of the step. Everyone appreciated the detail of the antique gold collar!

Visitors immediately noticed the detail of the stairs.. notice the spindles attached to the underside of the step. Everyone appreciated the detail of the antique gold collar!

Living Room:

Above all, the living room needed to be functional as well as beautiful! I selected tasteful, yet practical furnishings to maximize seating!

Kitchen:

The light and bright kitchen was a huge hit. The cabinet color, quartzite selection, and tile back splash were appreciated by everyone; however, the lighting was what captured everyone's attention!! As I recently heard HGTV designer Vern Yip say, "lighting is floating art" and this is a perfect example of that! Also, notice the detail of the black pantry door and with brass push plate and sign.

Breakfast/Dining Room:

The breakfast/dining room was decorated with a 72 inch round table, which fit the space perfectly. The chandelier was chosen for its simplicity. It compliments the island pendants without taking away from their beauty. The custom draperies add warmth to the space but don't detract from the beauty of the nature that's outside. 

Master Bedroom:

The rustic beams and designer lighting added to the ambiance of this master bedroom! The stain that Jamie and I selected on the barn doors and wood beams was loved by everyone!

Master Bathroom:

The main comment on this bathroom was the massive amount of cabinetry and counter top space! Also, the built in display area was so unexpected and useful. The master bath tile was also a HUGE hit!

Guest Bedroom and Bathroom:

I chose to stage this bedroom as if it was an interior designer's office. The office had a bulletin board featuring selections in the home like light fixtures, paint chips, and a wallpaper sample. The attached bathroom showcased detailed tile work in the tub area and beautiful black marble for the countertop!

Powder Room:

This was by far the most talked about room in the house!! Not sure what else there is to say about this space.. and I cannot believe the amount of calls I have gotten just from this powder room! Numerous people have told me this should be the cover …

This was by far the most talked about room in the house!! Not sure what else there is to say about this space.. and I cannot believe the amount of calls I have gotten just from this powder room! Numerous people have told me this should be the cover of a magazine... thanks to Sydney Martien Photography for this UNBELLIEVABLE shot!!

Locker Area: 

I decided to incorporate a family calendar in the locker area.. love the way this space turned out!

I decided to incorporate a family calendar in the locker area.. love the way this space turned out!

Upstairs:

The upstairs landing incorporated a homework station with a chalk board and a media area.. upstairs there were also two bedrooms that were not staged. The upstairs bathroom showcased tile, granite, and lighting- it will be awesome for the two kids that will be up here!

This Parade Home has been such a wonderful experience for both me and Jamie! This is the first project that we have worked this closely on and I can guarantee you that it will NOT be the last... We have learned that we each have our own areas of expertise that, when combined, result in an end product that is high quality, tasteful, well planned, and detailed. We are so proud of this home and are thrilled for the new homeowners!! We are confident that our projects will continue to overwhelm and excite you. I hope that you have found this blog useful- it's fun for me to look back at old blog posts and see how far we've come! I plan to continue with blogging as Jamie and I bring more of our projects to Lafayette.. so keep checking back often. We're planning a fantastic, new construction that you won't want to miss! Our "New Traditional" style is here to stay! 

Installation Day!

Installations are both exhilarating and exhausting.. so much goes on behind the scenes leading up to the installation day! Jamie (Eagle Nest Custom Homes) has kept this Parade Home on a tight but accurate timeline. It is a decorator's dream to have the house completed a few weeks prior to the opening day of the Parade of Homes! Jamie has successfully finished early! 

The cleaning crew has taken plenty of time to thoroughly clean windows, drawers, moldings, and flooring. Now that the house is sparkling clean, I am able to start scheduling the delivery of rugs and furniture.. remember my October trip to High Point Market? It was there that I sourced all furniture for this house. From the headboard to the sectional, to lamps and candlesticks... all were ordered specifically to fit this beautiful new construction!

Once orders were received from market, they were inspected and then put into storage. Now is the time to bring them to the house as we start to make this house a home! My team and I are like kids on Christmas morning as we open boxes and reminisce about our prior purchases! SO much fun! 

Once the rugs are un-rolled and the furniture is put into place, it's now time for the DETAILS! In keeping with our "New Traditional style" of home building and decorating, my team and I have mixed old and new when accessorizing and decorating. In the picture below, you can see the fantastic, modern, brass bookcase.. I am accessorizing with antique books, art, and unique finds! 

1.jpg

Draperies are installed and need to be steamed..

2.jpg

I've placed one-of-a-kind items in the master bath and commissioned art from a local up and coming artist..

We even decided to take it one step further by setting the table!

6.jpg

The exercise room is starting to take shape..

7.jpg

We've put the finishing touches on the floating shelves in the kitchen..

8.jpg

The brass accents got polished on our show stopping pantry door!

9.jpg

Wow, what a memorable journey this has been! Now that you've seen and read about this house being built from start to finish, come see it in person!! Jamie and I are so excited to meet y'all! The Parade of Homes starts next week; the dates are April 14th, 15th, 21st, and 22nd, from 1-6.

10.JPG

The New Traditional

Hey y'all! Hope you had a wonderful Easter filled with family and fun.. back to work!

So let’s go back to the beginning.  Jamie (Eagle Nest Custom Homes) and I have had numerous conversations and discussions about our ‘style’. This home is our first major Parade Home collaboration together, so we wanted to have a clear vision of our finished project. Over the past 10 years, homes and their furnishings have been moving toward a more clean lined, modern look... the problem with the modern trend is that it usually feels cold and uncomfortable. The same can be said for super traditional designs... they can feel formal and stuffy.

Jamie and I know that there must be a way to blend together the best elements of both traditional and modern design. Drumroll, please... we are introducing you to “The New Traditional” style in home building and interior design!! “The New Traditional” mixes a little bit of old tradition into a more modern aesthetic. “The New Traditional” style takes traditional design in houses and decor and adds a twist! “The New Traditional” feels collected and curated but is clean and unfussy. This style is what Jamie and I strive for in ALL of our homes!

Let’s go over a few examples.. last week we discussed the powder room.

3.jpg

This powder room is the perfect blend of traditional and modern! The aged brick floor, the dresser turned into a vanity, and the gold leaf sconces all add a traditional and classic flavor to the room. Layer in the contemporary gold faucet, the clean, simple, round mirror and the large scale wallpaper and VOILA...”The New Traditional”.

Here’s another example...

1.png

*Piece of art on the top shelf*

Notice the piece of art on the top shelf... I found the frame at an antique store. It was old, peeling, and definitely had patina. It was interesting!  I searched for the perfect art piece to be displayed in this interesting frame. I found it at High Point Market – SCORE! The modern feel of the art juxtaposed with the antique gold leaf frame creates the epitome of “The New Traditional” style that Jamie and I are showcasing. 

One last example...The kitchen sink.

2.png

Nothing is more traditional than a cast-iron apron front sink. Mix in the super modern, sleek, black and gold faucet and here you go...”The New Traditional”!  It’s all about making the classics feel modern.

So what do you think?

I hope that y'all like this style as much as we do!! Come see it for yourself on April 14th and 15th and 21st and 22nd! See ya next Monday :) 

Powerful Powder Rooms

How's your Monday morning going? Welcome back!

I've never forgotten a statement made by one of my design instructors...

"Don't neglect the powder room/guest bath in your design work. It's the one room that all of your guests will visit at one time or another."

Wise words from an experienced, knowledgeable, and PRACTICAL professor!

Jamie (Eagle Nest Custom Homes) and I spent a lot of time analyzing the plans of our Parade Home. Before the slab was poured we met to make any "adjustments". Communication is SO important between the builder and decorator... let's just say that Jamie and I have communicated a lot during this process!!!

One thing that we "adjusted" to the house plans was the layout of the powder room. The original plan showed the toilet on the back wall and the vanity on a side wall. We decided to show-case the back wall by switching up the placement of the vanity and toilet. Now, the first thing you will see when you open the door is the beautiful vanity instead of a toilet. As you can see in this picture, we've marked up the plans reflecting this change.

plans.jpg

So, how do we make a powder room special? Let's start with the vanity: we decided to order a premade vanity from one of my furniture lines. It's a piece of furniture with a white marble countertop!

vanity and marble countertop.jpg

The vanity will provide ample storage for toilet paper as well as hand towels.

Now, who says a designers' life is glamorous?! There's SO much that we handle behind the scenes... like broken items! The sink on our vanity was damaged during shipping!! Good thing we ordered early. I had to contact the company, send pics of damages, then wait for the new one to come in..

broken sink.jpg

As I've told you in earlier blog posts, I sourced all of our lighting at market in High Point, NC. I found the perfect pair of sconces for both sides of the mirror above the vanity. They are gorgeous and really carry on our French Quarter feel for the home!

sconces.jpg

Next, what about the back wall?? What can we do to make it special? In one of our previous homes, we tiled the wall in order to make it a beautiful focal point.

glass tile.jpg

See how your eyes are immediately drawn to the beautiful glass tile.. what a statement! Needless to say, we had no problems selling this detailed spec home to some very lucky and appreciative homeowners.

Jamie and I have decided to install wall-paper in our powder room. Wallpaper?? Yes, wallpaper is back in style and is making a huge comeback. I found a fantastic wallpaper that combines all of the colors that I've used throughout the house.

blurred out wall paper.jpg

This subtle colored, yet bold pattern will definitely capture your attention... in a good way! I decided to only paper the back/focal wall and I have the remaining three walls painted Sherwin Williams Greek Villa. Here's a pic of the focal wall with the wallpaper installed..

just wallpaper.jpg

I am in LOVE with this detail!! The large pattern but soft colors make a dramatic statement!

So what does it look like all together....?

finished product.jpg

Wallpaper is up, vanity is installed, faucet is mounted, and sconces are lit! I can't believe how fabulous it all looks together.. The new homeowners' guests will surely be impressed.

Come see for yourself on April 14th and 15th as well as April 21st and 22nd at the AHBA's Parade of Homes!

More Details...

Good morning, it's great to see you! 

As we all know...first impressions are invaluable.  We all remember the old saying – you never get a second chance to make a first impression.  What’s the first impression you’ll get when you walk into this home?  Well, the very first thing that you will see once you step inside is the stairwell.  The stairs are to the immediate right of the gorgeous front door.  It was super important to me that the stairs be equally as gorgeous as the door. Jamie (Eagle Nest Custom Homes) and I did a lot of research on iron handrails and staircase banisters.  There are so many opportunities to truly make a detailed statement. 

Jamie and I work very closely with a local iron works company in order to customize and monitor each of our creations.  We love being totally involved!

8.jpg

One unique feature that I love is when the spindle attaches to the under side of the step on the stair.  This is a photo that I used for inspiration when meeting with our ‘iron guy’. 

9.png

Code requires us to have three spindles per step compared to the two used in the above pic.  We decided to add some detail onto the center spindle to truly customize our design.  This decorative piece is called a collar.

7.jpg

I took it one step further and added an artist’s touch by gold leafing the collar for additional detail...feels so French Quarter!!!

5.jpg

In the pictures below you can see what the collar looks like on the spindle.  Remember, there will be three spindles per step and only the center spindle will have the collar.  The other two spindles will be plain.  Notice, in these pictures, how the spindles will be attached to the underside of the steps.  I chose a very simple backplate design.

The iron works’ owner personally came to install the handrail.  It looks like he pays as much attention to detail as Jamie and I do!

2.jpg

And here is a picture of the finished product!!!!!   So unique and So detailed!

1.jpg

I can’t say enough about how important details are in truly customizing your home.  Jamie and I are proof positive that details make the difference.  You’re invited to come and see our details in person on April 14th & 15th, as well as 21st & 22nd at the AHBA Parade of Homes! Hope to see y'all there!! 

See ya next Monday for more talk on this home!

Homework!

Hello everybody!! We're almost a month away from the big weekend! Don't forget to come out and walk through this VERY detailed home.. plus, you can meet me, Paige Gary of Paige Gary Designs, and Jamie Leger of Eagle Nest Custom Homes! The dates are below:

April 14th, 15th, 21st, 22nd

Jamie and I have spent numerous hours envisioning who will purchase his home. Remember, as I told you earlier, this home is being built as a spec home. There is no homeowner.  We've discussed... will the future homeowner be a retired couple? Will they be a young family, newly married and hoping to start a family soon? Ultimately, we envisioned our future homeowner as a young family with school age children looking to live in Youngsville because of its dynamic sports complex and beautiful, state of the art high school. Our fantastic floorplan, large covered patio, and super-sized backyard add to our speculation that we'll soon have school kids running up and down these stairs.

Keeping this in mind, Jamie and I have decided to create a "homework" station in the upstairs' landing. This room is a large space with plenty of room for a sitting area (sofa and chairs) as well as a television for an xbox/playstation. How cute, right?!? We decided to create a desk top with enough space for two work stations. The desktop is made from a piece of reclaimed wood that has been sanded (no splinters!) and mounted to the wall with heavy duty iron brackets. These brackets are secured to the wall studs to ensure stability. 

Because Jamie and I planned ahead for this special feature, we were able to install receptacle outlets at desktop level for easy access for lap top plug-ins. We were also able to install black plugs. Yes, BLACK...You'll soon see why this is so important!!

3.jpg

In this picture, we are waiting on the wood floors to be installed. The first coat of black paint has been completed on the accent wall. You can get a feel for how useful this space will be for kids!

We put our thinking caps on and came up with ANOTHER handy feature... a chalkboard!!! This chalkboard will be placed above the homework station and will be available for working out Math problems or writing motivational messages. Now you can see the need for black plugs!

4.jpg
5.jpg

This space is still a work in progress. I plan to have it fully staged for the Parade of Homes.. I can't wait to see you there!

Color

How's it going? Welcome back!

Color is one of the most important design decisions a designer makes... Color can make or break a room. Color can make a room feel calm and relaxed or vibrant and stimulating. Color can impress, motivate, excite, and inspire!!

Trends in color change from year to year. We all remember the 80's color palette of country blue and mauve pink. Soon after, we recall the forest green, maroon, and navy colors of the 90's. Currently the trends in color are neutrals. Neutral means without color.. Neutrals include beige, ivory, taupe, black, gray, and shades of white. You will never get tired of neutrals, neutrals are classic! Neutral decor (walls and furnishings) allows you the opportunity to add a pop of color with a bold pillow or in a small upholstered chair.

My theory is to let your largest, most expensive pieces be neutral. It is so easy and MUCH more affordable to add trendy, colored pillows or accessories that can be replaced when the color trends change!

Another option for decorating with a neutral palette is to add interest through texture. Grasscloth wallpaper, linen draperies, velvet and chenille fabrics are all examples of "texture". By adding interest through the use of similar colored fabrics that have depth and texture you will guarantee that your rooms will be anything but boring!!

Gray has been the go-to  neutral for a few years now. Gray can go either cool or warm. Below is a room that I designed for the St. Jude Dream Home in which I chose an off-white wall color, gray furnishings, and added a pop of color in the blue/green ottoman. 

St+Jude+2014.jpg

This photo was recently posted on a nationally followed Instagram account called the_real_houses_of_ig. It received over 197 positive comments noting the 'pop of color' from the ottoman. It appears that neutral color schemes are popular nationally as well as locally!

Here's another example of a neutral room with pops of color. I designed this kids' den for another St. Jude Dream Home.

5.jpg

You will notice very neutral furniture with pops of green in pillows and accessories. Cream walls, cream sofas, and a black chair will allow this room to stand the test of time. The expensive pieces are all neutral and the pillows and a few items are trendy green!

So what does this have to do with our fantastic Parade Home?? Well, Jamie (Eagle Nest Custom Homes) tells me it's time for me to select our interior paint colors and guess what they'll be..... Neutrals!!! I've decided on three, beautiful, neutral colors- Sherwin Williams Greek Villa #7551 for walls, Accessible Beige #7036 for cabinets and trim, and Benjamin Moore Graphite for accents.

1.jpg

You'll notice that I've chosen a cabinet and trim color that is darker than the wall color. This is a wonderful new decorator's trend that I've been seeing more of recently.. 

On to the process of painting this stunning Parade Home... after the sheetrock went up, the walls and ceiling were primed by the painters. Next, the trim, crown molding, base boards, window casings, and interior doors were installed and the painter painted the ceiling completely. Afterwards, the painters put the first coat on the walls and trim. In these pictures you'll see the paint process. Once the ceiling is completely painted, the painters cover it up to protect it while the trim is painted. I've also decided to stain our beams "Weathered Oak". Once they're stained, the painters will again cover them to protect them from possible drips.

The colors in this house are light and bright but still warm. It's coming along so nicely... I can't wait for you locals to see it!! Just a reminder, if you haven't already done so, mark your calendars for the AHBA Parade of Homes on April 14th, 15th, 21st, 22nd! See y'all on the blog next week!!

House Progress...

As you could probably tell from last week's blog post, October's High Point Market was an amazing experience. I came home feeling so inspired and energized. I had tons of ideas flowing through my head and I couldn't wait to share them with Jamie (Eagle Nest Custom Homes)!

While I was gone, lots of progress was made on the house. We had some great Fall weather in Lafayette so that really helped the framers, stucco guys, and roofers make progress. Thank goodness!!!

On October 3rd, the walls of the house were still open, you can see in this pic below that the electrical wires and plumbing lines are being run inside of the walls. It's important that the electrical wiring be in the proper location because the sheetrock is about to go up which makes it a little more difficult to move wires if needed.

1.jpg

On October 20th, I was thrilled to see the beautiful shingles that I had selected earlier go onto the house. The gray color really compliments the black windows on this home and contrasts nicely with the light stucco. 

In early November, the walls are officially closed. This means all insulation and sheetrock are complete. You will notice in the pictures below that Jamie (Eagle Nest Custom Homes) and I have decided to add some ceiling details. In the decorating world, the ceiling is sometimes referred to as the 5th wall. It's so enjoyable to add some interest to this 5th wall. We added beams in the kitchen and also built a coffered ceiling in the living room. The coffered ceiling truly added dimension and character to a potentially plain living room. The grid of the ceiling adds a traditional flare and a subtle reference to the front door!   We also added beams in the Cathedral ceiling of the master bedroom, this architectural detail brings attention to the pitch of the Cathedral ceiling!

The month of December brought the excitement of cabinets being installed!! What a great early Christmas present! Do you think anyone else loves getting cabinets for Christmas? Lol.. Jamie and I paid so much attention to the planning and design of the cabinets... we wanted them to be PERFECT! It was so fun to watch them being placed in their perfect spots. 

The master bathroom is huge! Jamie and I took the opportunity to design a special cabinet that could serve as a pretty display area for special toiletries, bath salts, or art. It's a wonderful storage area as well as a beautiful display piece!

8.jpg

As you can see things are quickly moving along on this 2018 Parade Home! By the way, be sure to mark your calendars for April 14th, 15th, 21st, 22nd!!! Jamie and I can't wait to meet the followers of our journey on this house.. it won't disappoint! See y'all next Monday, 7AM sharp ;)

High Point Market

In mid October I planned a trip to High Point Market.  What is High Point Market? Quite simply... it's a designer's PARADISE! It's the largest furnishing trade show in the world. It brings more than 75,000 people to the quaint little town of High Point, North Carolina twice a year. There are 11.5 million square feet of show space with over 2,000 exhibitors and tens of thousands of new product introductions.

1.jpg

It is a place to get inspired and to be introduced to the latest and greatest trends! From furniture, to lighting, to rugs and wallpaper... if you can't find it here, it doesn't exist. 

My sole purpose for going to market was to discover unknown and unique vendors and use them throughout this home. Jamie (Eagle Nest Custom Homes) and I decided early on in this process that our goal was to introduce new ideas in home building and interior design to the Lafayette community. It was super important for us to incorporate new colors, new lighting, new trends in this home. We wanted our home to stand out from others, to make a statement, to be remembered

I was able to purchase almost all of our lighting at market. The light fixtures are true "designer" lighting. Antique gold was my finish choice on these fixtures. The foyer, kitchen island pendants and dining room fixtures are all a combination of black and antique gold as seen below! 

I found the perfect black iron sconces for the stair wall. They are elongated which makes them dramatic and functional.

3.jpg

The master bedroom and bathroom continue with the antique gold theme. The bedroom is adorned with two wood bead and gold chandeliers while the master bath vanities are complimented with antique gold sconces. 

4.jpg

The powder room sconces continue the New Orleans French Quarter feel.

5.jpg

I purchased a large, oversized lantern for the living room light fixture. The scale is perfect for the tall ceiling height. It is dramatic but airy so visually it doesn't take up too much space. Big surprise... it's antique gold!! I purchased the identical lantern in black to complete the outdoor kitchen space.

12.JPG

It's always interesting to see new furnishings that will be showing up in our local furniture stores. A big color at market was emerald green. I saw lots of green velvet sofas ad chairs..

Another trending color was blush. It was everywhere!!

I also noticed another trend in tables and chests... burlwood! The details are stunning.. What a statement! 

I was able to source and purchase incredibly unique artwork! 

This gorgeous gold metal bookcase just may make an appearance in this house...

10.JPG

I have to admit that I was starstruck when I ran into celebrity style expert Eddie Ross and his partner Jaithan. Having worked at Martha Stewart Living Magazine, Eddie has established himself as a guru of all things beautiful. From antiques to food he demonstrates a vast and impressive range of talents. His recent book, "Modern Mix" is a must read for anyone interested in home design. Eddie and I have a mutual friend, Jeffery McCullough, so it was super easy chatting and catching up with him. 

11.JPG

High Point Market was an exhausting 5 days but SO worth it! It was an incredible educational tool, was a wonderful place to network with my peers, and I was able to discover so many new vendors and their products. I felt re-energized and re-invigorated upon my return to the office. I'm definitely a better decorator for having gone!!!

Keep on coming back.. I'll see you next Monday!! 

Tile and Granite

Hey again! Let's get right to business...

Countertops, flooring, backsplashes... these are all items that serve a huge function in a home. But don't think for a second that "function" can't be BEAUTIFUL! This is an opportunity to add "art" in your space. Yes, tile, stone, and wood can be called "art"!

I've determined that the color palette for this Parade Home will be light and airy but warm. I want this house to feel warm and welcoming, like a big, giant hug. I am opting to choose warm colors vs. cool colors... think beige instead of gray. Not only does this apply to paint but also to my flooring, countertops, and and tile. 

The first thing to make note of is where we are installing wood floors. Jamie (Eagle Nest Custom Homes) and I have decided to run wood floors in the majority of the house. Wood floors are classic... it's just that simple. From the front door to the back door you'll see gorgeous, high end, classic wood. We wanted the main living area (the public space) to be uninterrupted. This means that the kitchen will also be wood. This is a look that I've been seeing more of lately. The beauty of the contrast that the wood has against the light kitchen cabinets is undeniable. Some may be hesitant to install wood in a "wet" area but I will speak from experience here.. my family home built in the late 70's has gorgeous, super expensive, wide-plank antique pine flooring throughout the ENTIRE house- kitchen and all bathrooms. There has never been any problem with the wood/water combination and the warmth of the classic wood is indisputable.

The end of September marked the beginning of my search for the perfect tile and wood.

Here's a tip, it's much easier to pick your tile first then bring those samples to the granite yard. It's SO important to do these two steps together to ensure a perfect match. Every granite slab is unique; none of the colors are identical. You must hand select your slabs.  

Let's start with the kitchen. We already know that the floor is wood. The very first tile I noticed when walking into the showroom was a diamond mosaic marble tile in colors of light cream and taupe. I fell IN LOVE with it and designed the whole kitchen around this backsplash tile. The diamonds reminded me of the French Quarter and the color palette was perfect! In the picture below you can see it with the selected wood floor, the wall, and cabinet colors as well as a cream tile that I used to mimic my countertops. 

1.jpg

In this picture, I'm now at the granite yard. You can see the backsplash tile and color samples along with a slab of a "Taj Mahal" quartzite. Quartzite is a natural stone that is actually harder and more durable than granite. Quartzite is a great choice for kitchens counters- the work horse of the house.

2.jpg

Here's where we are currently... backsplash is installed (not yet grouted), cabinets are painted, and countertops are in. I'm in love!

Next up... master bathroom. Again, I'm using colors of creams and taupes to ensure warmth. I've decided to use a darker tile on the floor, a lighter tile on the shower wall, and a mosaic on the floor of the shower to tie together my color scheme. Below is a photo of the floor tile color that I've selected along with some thoughts for the shower floor.

4.jpg

I ultimately decided on this darker floor tile but in a different size and also in the matte finish. Polished floors in a bathroom scare me due to slips and falls. I used this tile in the matte finish in size 12"x24" laid in a herringbone pattern. Here's a January photo showing the floor tile, shower floor tile, and granite. 

The shower wall tile is from the same company as the floor. I specifically chose this tile for its size. It's rare to find a tile that is 24"x24". I love the clean feel that is achieved by using this larger, unexpected size. As I said earlier, I selected the polished, lighter colored version... the wall tile was recently installed and is waiting to be grouted. It's just FAB!!! Here are a few pics to prove it...

I found a new ceramic brick-look tile that Jamie and I decided to add to the powder room and laundry room. Again, this tile reminded me so much of the old, peeling bricks seen in the French Quarter! I love it!

  1. I actually broke my own rule when it came to bath two (downstairs). I selected counter tops first!! I found a spectacular, one of a kind black marble at the granite yard. It was hidden behind some slabs just waiting for me to discover it! I 'claimed' it as soon as I saw it. It has a black background with gorgeous cream and taupe veining. The countertop in bath two is unusually long so it makes perfect sense to use this beautiful marble. It is so interesting and contrasts amazingly with the wall and cabinet colors.
8a.jpg

I chose a taupe hexagon floor tile and white subways for the tub surround. I'm having the awesome tile installers use a taupe pencil molding to make a custom design on the large tub wall. They aren't very happy with me now because this will be very labor intensive. However... it's all in the details, right???!

8.jpg

Last up is the upstairs bathroom... I chose to use a wonderful hexagon mosaic because it showcased all colors that I've used throughout the house... cream, taupe, and black. I'm only using it in the niches of the tub/shower. The back wall of the tub/shower is the focal point of the bathroom so these niches are very noticeable. I selected a large, cream floor tile that was used on both the floor and tub walls. In the pics below, notice how it's laid... visually your eye follows the tile down the floor and up the wall. It looks so clean and cool! I love the pop that the small niches give. The countertops are leathered black granite. 

Whew!!! I'm exhausted just reliving all the options and selections for floor, countertops, and backsplashes that I made in these last few months. It's such a treat to now watch it being installed and see the ideas in my head become a reality. 

Next up will be an awesome recount of my visit to High Point Market. High Point, N.C. is the furniture capital of the world. Have you heard the phrase "kid in the candy store"? Well... that was ME!! You won't want to miss this one... tune in next Monday!

Electrical Walk Through, Stucco, and Cabinets

Hey there! Lots of things getting done on this Parade Home and I can't wait to share!!


9-18-17

Jamie (Eagle Nest Custom Homes) and I did our "official" electrical walk through. If I'm not mistaken, it lasted 4 hours.. this is a very lengthy process but super important. The walk through is done with the electrician while the walls are still "open" (before insulation and sheet rock) so that all wires can be run inside of the walls. 

6.jpg

We walked through each room of the house discussing placement of light switches and receptacles. We made sure that no doors blocked our light switches- it's the little things you have to pay close attention to! In the living room we assigned a light switch to work the floor outlet so that the homeowner can flip a switch and turn on the lamps in the room!

By this time we knew that sconces were being used in almost all bathrooms, so we had wires run on the side of the mirror instead of above it. We determined which switch worked our under cabinet lighting and we added a hidden outlet in the master vanity area -> Details!!

3.jpg

9-20-17

My vision of the exterior of the house begins to take shape. The stucco is going on and I can get a better feel for the front elevation. As stated previously, the stucco color is Sherwin Williams Neutral Ground. I love the contrast of the black windows with the light stucco as seen in this pic!

1.jpg

Three days later Jamie and I met again to discuss cabinets. Again, this is another lengthy, detailed, important meeting. As you remember, we've already selected the appliance package. All spec sheets with dimensions are given to the cabinet maker for the kitchen appliances. We selected a shaker style cabinet front for its clean lines and simplicity. Below are options we had to choose from!

2.jpg

We determined that the cabinets are all paint grade wood vs stained wood cabinets. We, again, go room by room determining all design details. We try to think of any obstacles or obstructions- our goal is to design this house to be as efficient as possible. 

We've come up with a beautiful built in shelving unit in the master bath to display toiletries or art- can't wait for you to see this one!! From the lockers to the laundry room- it's all been well thought out!

Our cabinet maker presents us with computerized renderings of our cabinet design for all of our records. Generally, these cabinets take 6-8 weeks to build!

4.jpg
5.jpg

How am I doing?? Are you still awake and interested?? Leave a comment and let me know what you think! Next up... TILE!! See y'all next Monday!

Surprise!

Y'all it's been so hard to keep this a secret! I mean, if you know me you know I like to talk; so for me to keep my lips zipped was almost impossible. I'm so happy that I can finally announce that the gorgeous home that I've been blogging about is going to be showcased in the AHBA (Acadian Home Builders Association) 2018 Parade of Homes!!! 

What does this mean you ask?? The AHBA is an organization of licensed builders and associates. Each year certain builders are allowed to submit their homes to be toured by the local public. The tour takes place over two weekends in April.

The exact dates are April 14-22, Saturdays and Sundays from 1-6 pm! For a small fee (ticket price) you will be able to walk through this designer decorated, custom built masterpiece. You will be able to admire the unique master bath shower tile, view the custom window treatments, touch and feel the brand new furniture... you'll want to just bring your suitcase and move right in!

This is a super opportunity for you to meet me (the designer) and Jamie Leger (Eagle Nest Custom Homes). We'll be at the home each day to answer your questions, go over your future house plans, or just to socialize! 

We can't wait to show off our first ever partnership home. We've had a blast building this baby and can't wait for you locals to see it! For those of you who can't make it down South to Lafayette, LA don't worry.. I'll continue blogging about it and will have it professionally photographed. But for you locals, mark your calendars... WE HAVE A DATE!!

cookies.jpg

Time to celebrate!

Enjoying yesterday's birthday cookies made by The Ginger Bites to celebrate this big announcement!

Slab is Poured!

Good morning! Thanks for spending your Monday morning with me.. SO much is getting done and I can't wait for all of you to see it! Looks like we have good weather ahead so let's get this going!

8-3-17

The slab is finally poured!!! Lots of preparation is done before the slab is poured. Any changes to the floor plan, floor electrical outlet placement, and tub and shower drain placements must all be determined prior to this date... that's why it feels so good to see it poured! YAY!!

1.jpg
2.jpg

After a few weeks of allowing the slab to cure the framing of the house begins...

5.jpg

Next... the ceiling joists are going on!

7.jpg
4.jpg

The second floor can now be added!

3.jpg

9-14-17

The house is now completely "wrapped"! You'll notice the windows are now installed, it's important to make sure windows are well taped with window seal tape to ensure efficiency. Now is a good time to seal off any protrusions that penetrate the sheathing. 

1.jpg

Jamie and I recently visited a door company to select and order all of the interior doors! In the photo below is what was given to us to flip through and find the style we wanted..

2.jpg

After much thought we decided on a single panel door similar to the photo below! I feel that its simplicity matches our modern influence on this home.

3.jpg

This is getting exciting!!! Stay tuned for next week's discussion on the importance of the electrical walk through as well the cabinet designs! See y'all next Monday!

Appliance and Plumbing Selections

Welcome back! It's great to see you again!

Decisions... decisions... decisions... I still have a few more decisions to make before we pour the slab- the appliance package and plumbing selections! The appliances need to be chosen very early on because the specs are needed for the cabinets to get started. Cabinets take a while to be built so it's best to start the process now. All plumbing decisions must be made before the slab is poured because 1) you'll need the location of your tub drains and 2) you'll need to know what brand of faucet you're using so that all of your fittings match up. There's so much to consider so plan on spending time making these decisions because they're SO important!

7-31-17

Jamie (Eagle Nest Custom Homes) and I met at a local shop to select our appliance package. Most builders' spec homes will include all appliances except refrigerator and washer/dryer- homeowners typically bring their own. 

Below are the appliance decisions made in this meeting..  

1. We decided to choose a slide-in range/oven combination and also a wall oven that will be placed with the microwave! This means the new homeowner will have double ovens.. details!! 

1b1ac65c1e272ea2eec65c28844f59b7.jpg
419a70095ea087755249bff50c6d0c34.jpg

2. All of our appliances are stainless steel, it's still in high demand and will absolutely correspond with our modern designed home. 


Next, I went to our plumbing supplier for the plumbing selections. Their showroom is full of options but don't be afraid to ask for items! There may be new choices that have not made it on display yet.  Below are more plumbing decisions we made... there's LOTS!

1. White or off white tubs, toilets, sinks? I decided to use classic white, it's so clean and crisp looking!

2. I chose to install a free standing tub in the master bathroom. It's such a glamorous, high-end look! Because it's free standing, my tub faucet choices were either a wall mounted faucet or a floor mounted faucet. Jamie and I designed a special shelf behind the tub that will hold the faucet and hand-held sprayer as well as act as a shelf for candles, soap, etc... 

c4d92f9fb8d025a25cc3d556a42d3176.jpg
                                               A shelf behind the tub similar to this!

                                               A shelf behind the tub similar to this!

3. I spent a lot of time thinking  about my plumbing fixture finishes. Chrome, brushed nickel, black, champagne, brass... there are so many options! In the master bath I decided on gold because I knew my design scheme was a New Orleans feel and I immediately think of antique gold when I think of the French Quarter. I was thrilled when I found out that Delta just introduced a new kitchen faucet that combines black and gold finishes... how awesome is that!! I can't wait to show you this brand new faucet! 

e5f646b6efe9a0c5569fc00a1efa45e0.jpg

4. I decided not to install a pot filler behind the stove. I have a love/hate relationship with pot fillers. I love the convenience they offer of not having to transport heavy, water-filled pots from the sink.. but I HATE how the pot filler breaks-up/ruins the beautiful tile work behind the stove. I did not put one in this house for two reasons.. 1) the fact that the homeowner will still have to transport an extremely heavy pot to pour out the water is not worth it and 2) this stove area is the center of the kitchen. Your eye will immediately be drawn to it so it needed to be FAB!

d212d67570bc4a2f98542ba80fcaf9a8.jpg

5. The faucets for the remaining bathrooms are going to be black! These bathrooms will probably be used by kids and the black finish does not show finger prints!! This is a 'newer' finish and really ties in with the 'flow' of the house. Notice... we've introduced and carried this color all throughout the home. This will give the house a cohesive feel. 

29eac47e0fedeb048b2dfc4ce307c080.jpg

6. The powder room gives us the opportunity to make a statement because it is small. Keep in mind, this is a room that most of your guests will visit and it should be super special! For this space, I purchased a vanity that looks like a piece of furniture, it's so pretty!! And of course, I opted to install a gold faucet to ensure the beauty of this space! 

2be2eba30731c38ab774d0ecdbf2c614.jpg

That's all for today.. thanks for reading! Next post... SLAB IS POURED!! Can't wait! Hope to see y'all next Monday!


Exterior Selections

Happy Monday everyone!! I am still so amazed by the feedback I'm getting with this, my clients and followers ROCK and I couldn't do it without y'all.. again, any suggestions are just an email away @paigegarydesigns@gmail.com

7-24-17- The Exterior Selections

You only get one chance to make a first impression... we've all heard this statement- but it's SO true! Keep this in mind when making the exterior selections for your home. Spend as much time on the exterior as you do on the interior. This is the first impression your guests will get of your residence. It really is very important!!

Our first order of business is to make all of this home's exterior selections. These include windows, exterior doors, bricks, stucco color, soffit and trim color, shingles, garage doors, shutter design, shutter and garage door colors. Some of these were discussed in the initial meeting but we made the final and exact selections here! 

As discussed in the last blog post, Jamie (Eagle Nest Custom Homes) and I were set on using black windows and a black steel front door. This fabulous front door is custom made to our specs and it is a show stopper! The color black is amazingly classic; although, not used frequently. It is a true neutral that compliments ANY color palette, that's why I love it so much! I've been eyeing this black steel door on Pinterest and Houzz for so long and it's so wonderful to work with a builder that trusts my vision- because sometimes I may seem crazy!

The supplier for our brick and shingles gave me a list of addresses of newly constructed homes in Lafayette along with the specific name of the brick and shingle color. I dedicated a day to this and drove around the numerous subdivisions until I found the perfect ones!

Most builders have a preferred shingle brand that they use.. warranty is probably the most important factor in their preference. I chose a shingle with shades of gray to compliment the black door and windows!

I opted to use only 2 paint colors on the exterior of this house; one color for the stucco, soffit, and trim and another color for the shutters and garage doors. I'll let you know now... the majority of the house is stucco! 

For the stucco and and trim I went with Sherwin Williams "neutral ground". You can see below that it is a warm off white color that will transition beautifully with the brick; yet it will contrast and showoff our black accents!

neutral ground.jpg
40aa5fad5af3604b6ce813a4652a45b3.jpg

There will be a few louvered shutters at the front of the house, as well as the garage doors, that will be painted Sherwin Williams "agreeable gray".. it's a gorgeous color!

5cfbaceae36f2d8759284b5c8a39d2bf.jpg

Jamie and I discussed ways that we can "spiff up" the front walk way that leads to the front door (black steel). Remember... details make the difference!! We decided that our sidewalk will be a combination of concrete with grass between the slabs. I feel this will subtly mimic the panes of glass on our front door. As you can see in the picture below, a small change can really make a big difference. Details, details, details.

cf3b2b3792e83d7d759a05a07e6c83e6.jpg

Now that the exterior selections are made time for the fun stuff to begin!!! Stay tuned for next Monday's post as we continue this exciting journey!